Category: Adventures

  • Guide to Beaches and Paddling Lakes on the Sea to Sky Highway

    Guide to Beaches and Paddling Lakes on the Sea to Sky Highway

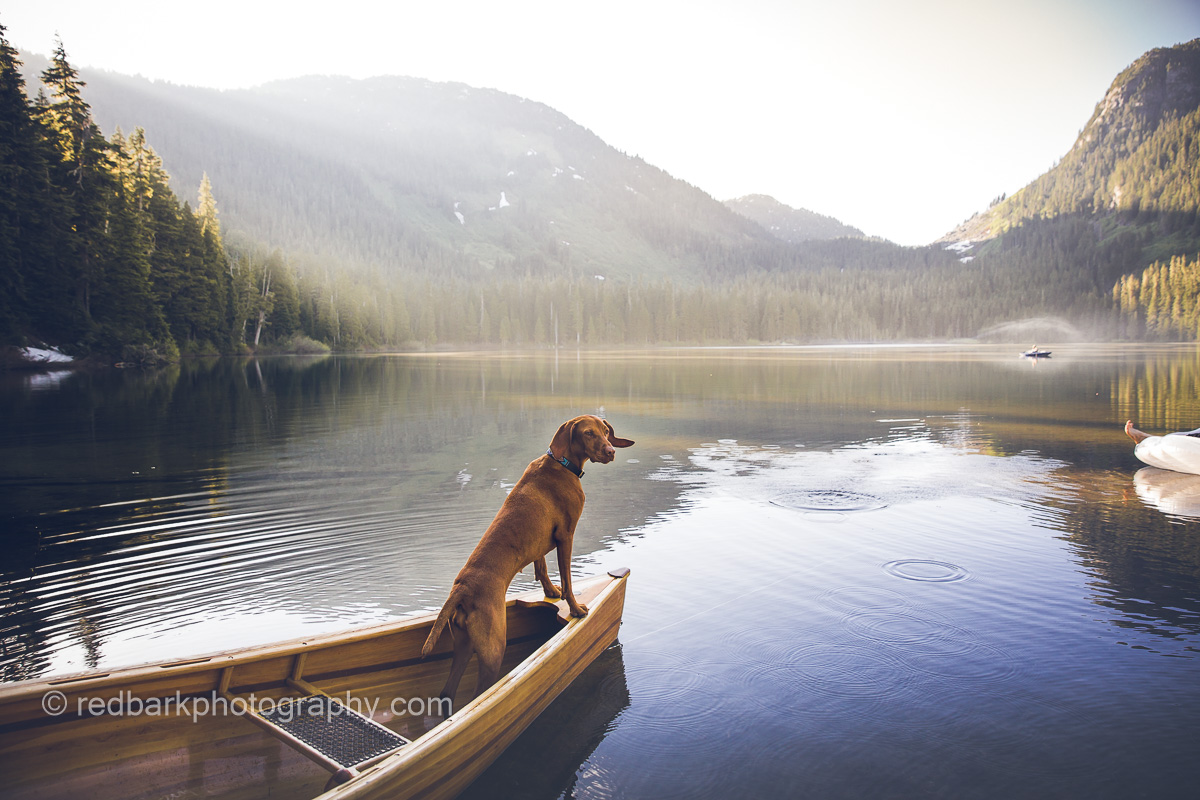
    The Sea to Sky Highway linking Vancouver to Whistler and Pemberton is one of the most beautiful drives in the world. Weekend warriors load up every Friday evening and fill up the parking lots to every easily accessible lake, trail, and park along the road. Here’s a guide to the Lakes and beaches of the Howe Sound along the highway, and places I like to take a kayak, paddleboard, or canoe with my two Vizsla dogs Whiskey and Bourbon.

    Many of these places do fill up quickly on weekends and parking is not allowed on the highway so I would suggest weekdays or very early weekends to get a parking spot! The guide moves from Vancouver to Pemberton and is location based. Check the tides for anything in Howe Sound and wear a life jacket! In case you’re a dog owner, here’s a blog on how to get started paddling with your dog.

    🚗 Car Access
    🚶‍♂️ Walk to Access
    💪Hike to Access
    🚽 Toilets
    🗑️ Garbage Bins
    🛑Difficult Parking
    🚫No Dogs

    Vancouver-Squamish

    Whytecliff Park 🚶‍♂️🚽 🗑️ – The access is down a set of stairs and a rocky beach. Check the tides before you go! There are seals, periodic whales, and an islet (island sometimes connected) to paddle around. Sunset is gorgeous. This is also a common diving spot so watch for divers! Bathrooms and a small food concession is on site as well as a small trail, green grassy space.

    Kelvin Grove Beach 🚶‍♂️🗑️- Lions Bay Beach Park may be preferable for those without dogs, but Kelvin Grove Beach is Dog Friendly. There is paid parking, and the access is down a short trail to a small set of rocks with logs. Depending on the tide you will have more or less beach to launch from with your dogs. No bathrooms.

    Porteau Cove 🚗🚽 🗑️ -A much larger beach and area to launch from. There is a campground connected to the beach as well as a large dock. Bathrooms are available and there’s lots of places to launch especially when the tide is low. Very quick and easy access from the car to beach.

    Furry Creek Beach 🚶‍♂️🚽🗑️- There is less parking and a bit more walking involved than Poteau Cove to the beach access at Furry Creek Beach, however because of this the area is a bit more quiet. There is very little beach on high tide so be aware!

    Squamish-Whistler

    Mamquam Beach 🚶‍♂️-in Squamish is currently under a series of construction so it’s hard to tell how access is lately. Right now there’s a decent walk to the beach from easy parking downtown Squamish but the beach has the best view of the Chief especially during sunset.

    Spit Road 🚶‍♂️- in Squamish has lots of options to park and launch a boat, however be warned that the river can move quickly and you’ll likely be hiking your way back up the road when you’re done. Have knowledge of river paddling, the waterflow, and tides before putting into the Squamish River (especially if you’re going to drop in further upstream).

    Alice Lake 💪🚽 🗑️ – Alice Lake Provincial park has 4 lakes. The easiest accessible lake for paddling is Alice Lake itself but it’s not dog friendly (even the trails around the lake prohibit dogs). Stump Lake is the easiest accessible lake for paddling with dogs and is quite quiet for boats and swimming even on a busy day.

    Cat Lake 🚶‍♂️🚽🗑️ – Cat Lake a small lake with loads of docks. It’s great to practice paddling as it’s so small with so many access points and lots of parking. Even so, on weekends the campground fills out and it can get extremely busy. An AWD is advised as the road can get rough and in winter it can be impassible. Boat access is a short walk down a wide trail to the main dock. There are pit toilets at parking and lots of garbage bins.

    Brohm Lake 💪🚽- Brohm lake has very limited parking, especially in the summer weekends. There can be a lineup of cars waiting to get in further up the highway. It’s a long narrow lake and water access isn’t the easiest. If you take the trail going south from the parking lot, you get to the lake quicker but you’re launching from rocks. There’s also water access if you walk up north but you’ll be hiking up and down big rocks. The area is beautiful and there are pit toilets up the North trail from the parking lot but no garbage bins currently (please take your garbage out!).

    Levette Lake 🚶‍♂️🚽🗑️- A beautiful lake up a FSR (Forest Service Road). You will need AWD on your car in order to get up the road and there’s limited parking. The water access is a short walk from the parking, which has garbage bins and pit toilets. There is very little “beach” to launch from and the area can get very busy on weekends. This may not be accessible in the winter and there are cougars and bears in the area.

    Hut Lake 💪🛑- 4.5km hike down a wider easy trail from Levette Lake. You can drive further up the road shortening this hike if you have a 4wd and if you have a monster truck you can drive the entire way to the lake HOWEVER I have seen several trucks attempt this and be stuck and it is not an easy location for someone to come pull you out! A much quieter lake because of the hiking access but with no toilets, bins, and extra cougars and bears.

    Starvation Lake 💪- Either 2.6km from the highway or 3.5km from Paradise Valley Road (AWD advisable). An easy walk down a trail to the lake provides a lovely paddle on a nice summer day. There is limited parking on the Highway and you’ll have to walk along the highway for a small stretch before the trail starts down. Paradise Valley can get busy with campers and cars as well.

    Lucille Lake 💪- Halfway to Whistler sits Lucille Lake. Again, busy on weekend especially with locals, there is a limited parking on the FSR over Chance Creek Bridge. There are two launch points that involve a short walk in. The further beach has a nice sandy beach, great to lounge or launch from. There’s also a huge questionable bike ramp on one side of the lake. With no toilets or bins, keep your dogs really close and don’t wander too far into the woods.

    Daisy Lake 💪🛑- A large lake on the way to Whistler but this one is NOT easily accessible. It’s also closed to organized recreational activity and BC Hydro has it damned so the water level changes radically.

    Callaghan Lake 🚗🚽- Callaghan Lake needs AWD access up a longer road filled with waterbars off the Sea to Sky Hwy. Launch access couldn’t be easier as you can drive right up to the lake to drop off a boat. The lake is large and surrounded by mountains. There are campsites, pit toilet but no bins.

    Madeley Lake 💪- Access by an easy walk off the FSR that leads to this lake. AWD accessible the last I checked (perhaps 4WD now) and less visited and paddled lake. Small beach access with wild camping, no toilets or bins.

    Whistler-Pemberton

    Alpha Lake 🚶‍♂️🚽🗑️- A smaller lake with a dog friendly area, Alpha lake has lots to see and like most of the other lakes can get busy on summer weekends. Being a smaller lake in an exclusive neighborhood, parking can be more difficult but there are so many lakes to choose from in this location.

    Nita Lake 🚶‍♂️🗑️ 🛑- A smaller lake that doesn’t have the easiest parking access. I Haven’t paddled this lake but there is a trail around most of the lake with access to drop a boat in.

    Alta Lake- 🚗🚽🗑️ With a dog-friendly beach, this is another beach I occasionally visit. The rainbow Park area has bathrooms, parking, and bins as well as a swimming area and dock. There are beautiful views of Whistler from the lake as well as lots of docks and big houses to check out.

    Green Lake- 🚗🚽🗑️ My favorite lake to paddle in Whistler. Green lake has easy access from many different trail and neighborhood parking along the lake. There’s also high end restaurants, chalets, and a gold course right by. Watch the seaplanes take off right in front of you (and please get out of the way!) and paddle around the gigantic mineral rich green lake.

    Whistler River– Golden Dreams Route- Paddle from Alta lake to Green Lake on this slow moving 5km route. You’ll see geese, maybe some bear, and lots of beautiful scenery. Aim for early summer as late summer the water can be low and you might need to portage a section. Check the water level before heading out as there’s a tricky section that might have you in the water. There are also tours you can take!

    Lost Lake– 🚶‍♂️🚽 🗑️ A lovely little lake with an easy beach to spend a summer day. Dogs are not permitted on the beach however but they’re welcome at “Canine Cove” 400m to the north.

    Pemberton and further

    One Mile Lake 🚗🚽 🗑️ – A lovely small lake with easy parking and beach access. The dock is easy to launch from and although the beach doesn’t allow dogs, no one has complained as we launched a boat with dogs from the dock. This is a lovely place to paddle for sunset and has lots of trails to hike when you’re done paddling.

    Lillooet Lake 🚶‍♂️🚽🗑️- The largest lake on this page by far! There are many access points along the In-shuck-ch FSR the easiest being Strawberry Point site with pit toilets, bins, and campgrounds. Access is down a dirt path to a rocky beach that stretches for a very very very long time. Because the lake is larger, pay attention to winds, however you can paddle here all day and still have loads to discover.

    Lower Joffre Lake 🚶‍♂️🚽🗑️🛑🚫- One of the most beautiful turquoise lakes, this park is now NOT dog friendly and also needs a day-pass. There is no reception at the lake so the pass must be garnered before heading up to the lakes and it is almost always packed. The lower lake is a short walk in and there is a small area to launch from. Pitt toilets and bins are available but sometimes both can be full.

    Duffey Lake- 🚗🛑 There is very little access to Duffey Lake but the area isn’t usually too busy. There are some places to pull over on the Duffey Lake Rd, or a viewpoint area on the East side with parking for several cars. The lake is huge and turquoise and surrounded by mountains. No bins or toilets, nor beach though!

    Seton Lake- 🚗🚽🗑️ Another absolutely gorgeous lake with limited parking access in the summer. If you’re feeling adventurous with a good car, you can drive around the lake and find quieter places to launch from or just to take photos.

    Birkenhead Lake 🚗🚽🗑️- Another provincial park with camping sites, toilets, and bins. The road is a bit rough but most cars can make it just fine, and I’m pretty sure there’s no reception. The area is beautiful with mountain backdrops and a beautiful lake. Perfect for swimming, there is a beach to launch from and it’s very easy to find a quiet spot to yourself on the lake

    Support my blog! Check out my little shop

  • Alaska’s Mint-Bomber Traverse with Dogs (and a Snowstorm)

    Alaska’s Mint-Bomber Traverse with Dogs (and a Snowstorm)

    Goldmint Trailhead to Mint Hut

    Deep in the Talkeetna Mountains in Alaska, a local favorite trail Hatcher Pass became world famous. Within the area, there are loads of options for hiking and exploration, but we only had a couple days, and very few days without an abundance of rain. My friend Kristina and our dogs Whiskey, Bourbon, and Cooper set out on a backcountry adventure exploring several huts and passes in the backcountry. As with most backcountry adventures in Alaska, our hike did not go according to plan.

    Bourbon’s first year with a pack

    First off was the 8 mile (13km) hike on the Gold Mint Trail to Mint Hut, where we planned to stay the first evening. The weather was beautiful and sunny (the only day it was!) and the hike in was the easiest part of the entire trip. We still did manage to get lost close to the hut, but we spent that time eating berries off the ground and taking photos so nothing very problematic. Because there had been so much rain, much of the trail was extremely muddy (re: a pond) so poles and waterproof boots were really helpful.

    Above Mint Hut, got a little lost

    When we finally found the hut, we spent the evening taking photos and enjoying the views. The clouds were coming in thicker so we were glad to have a hut to sleep in. Unfortunately the hut was also pretty damp and moldy smelling and all the pots and cups were pretty covered in black muck, so if you’re using anything stored inside, clean it well first. Also frustrating was the amount of dog poop left all around the hut. I’ve never experienced such poor management of dog feces on any trail or hut before (and that’s saying alot!) so PLEASE PLEASE pick up after your dog should you come here.

    Mint Hut exterior and views from Hatchers Pass
    Pick up after your dog here!

    Mint and Bomber huts are maintained by the MCA (Mountaineering Club of Alaska) so make sure you pay your yearly $20 fee online before you go. Because the weather had not been great, and we were at the end of the season (end of August), we were excited to try out the huts. Any of the huts along the route can be very busy so we brought an extra tent just in case, but luckily, there was only one other couple that ended up there that evening. With dogs, you must climb up a vertical ladder, or let them sleep on the ground. Our dogs are all smaller and hairless (and sleep inside our sleeping bags) so we had them up with us.

    Mint Hut interior and views from Hatchers Pass
    Mint Hut

    Mint Hut to Bomber Hut Via The Backdoor Gap (6.5km)

    This was so much fun! After Mint Hut, there are no more trails and you must be able to make your own way. You start heading up the steep scree boulder field heading towards the Backdoor Gap. The boulder field can be quite tough on dogs that are not used to climbing scree and rock. The rocks can rub paws raw, and the steep terrain can be dangerous if not navigated properly. Again, we didn’t take the most direct route, but we eventually did find the gap with extra scrambling and climbing and had quite a bit of fun doing so.

    Scree up to Backdoor gab
    Boulder field to Backdoor Gap

    The Gap itself is at the top of a glacier. You are climbing a small gap that can be snow-filled depending on the time of the year, or, in our case was currently snowing. Because it was so cold, windy, and snowing, we didn’t take too many photos and concentrated on descending. There were several questionable ropes hanging down that we used, but this section would be very steep for dogs.

    Backdoor Gap from Mint hut to Bomber Hut
    Kristina heading down the Backdoor Gap

    Next, you need to hike from the top of Penny Royal Glacier, all the way down. There were no crevasses we saw, and the glacier was pretty easy although quite slippery and was a nice break from scree climbing all morning. Eventually you drop down to the tundra and keep hiking until you find Bomber Hut. At this point it was starting to rain and we were quite tired from carrying our huge packs over the day.

    Backdoor Gab with Whiskey
    Kristina look over the Tundra heading to Bomber Hut
    Kristina look over the Tundra heading to Bomber Hut
    Bomber Hut and tundra in hatchers pass area
    Bomber hut in the background

    Bomber Hut was much nicer than Mint (although maybe not so pretty from the outside). It’s newer and with better airflow so it didn’t smell like mold. Again we were the first ones in so we made ourselves at home and started exploring outside between spells of rain.

    Bomber Pass from Bomber Hut, Alaska
    Bomber Pass

    The view from Bomber Hut were breathtaking. As the rains came and went, we were audience to moody lighting over an arena of mountain passes. Over the afternoon, more people came to join us and we had a lovely crew to chat with for the evening.

    Clouds coming in and out with Whiskey
    Bomber Hut
    Bomber Hut with snow

    Our next day, we had been hoping to hike to Snowbird Hut, however it was pouring rain and snow so we decided it would be nicer to take a day in rather than soaking everything we owned in cold rain for 5 hours without seeing any views.

    Kristina in Bomber Hut Interior
    Spending a day inside Bomber Hut

    We spent the laziest day in reading comics that had been left behind and chatting to the huge group of people that wandered through. Somehow Bomber Hut became the meeting place and over the day we had over 10 people max out the sleeping space. There were even several outside in tents in the drenching rain.

    Full House at Bomber Hut

    Bomber Hut To Reed Lakes Trailhead Via Bomber Pass (10.5km)

    Bomber Pass, Alaska
    Looking at Bomber Pass, hiking between these mountains up Bomber Glacier

    Since we changed our plans not to go to Snowbird, we ended up hiking out of Bomber Hut through Bomber Pass on our last day. We woke up to snow. So much snow! The snow turned to rain, but we could see at higher elevations it would be very very white. After a quick breakfast we started to head out and were the first group up the boulder field and onto the Bomber glacier to Bomber Pass.

    Bomber
    1950s TB-29 Bomber Wreckage and Memorial
    A plane wheel in a crevasse

    Bomber Pass is named as such because there is a TB-29 Superfortress Bomber Plane that crashed during a training mission in 1957 killing 6. Because it was snowing so hard, the other group that was heading up had decided to bypass the wreckage (it’s on the other side of the glacier). By the time we had located and explored the wreckage the other group had caught up to us and we were able to head up the pass to drop down onto Upper Reed Lake.

    A very snowy and rainy day

    The pass was quite dangerous with a new foot of snow that had fallen over the past day (making it 2 feet of fresh snow). Underneath the snow was pure ice and I hadn’t brought my ice axe so at one point I slipped and slid and slid, thankfully catching my foot on some rocks before I slid down a kilometer down the glacier. The top of the pass was totally covered in snow (snow covered rocks) so it became very very tricky to make our way up. Normally there should be a clearer path with rope but everything was so covered in snow.

    Bomber Pass in fresh snow
    Bomber Pass was treacherous with many injuries this day

    Upper and Lower Reed Lake

    Unfortunately since it was snowing so hard, we made our way through Upper Reed Lake and down through the boulder field only thinking about survival. Steep fresh snow covered boulders are a minefield and not fun on a sunny day. We were soaked to the bone with huge packs on and dogs to control. The snowy rocks are even more dangerous for dogs, especially inexperienced ones and a dog following us later that day tore a nail or toe and had to be carried the rest of the way. Someone else also injured their leg on the descent so be very methodical and careful.

    Once to Upper Reed Lake, the trails started again. I could see that normally these trails would be absolutely beautiful, but snow turned to pounding rain and we were quite tired from the pass so we just put our heads down and hiked out as fast as we could. Everything was so soaked my phone stopped working and our dogs were quite miserable. The trails had turned into muddy river that I fell in (and just laid my head down for a minute). Another area was so flooded with water that it was higher than my knee level when I sloshed through. I think my dog was swimming.

    From the parking lot we were able to hitch a ride to Mint Trailhead and were able to change our clothes and dry out finally!

    I would love to visit again!

    If you wonder why my bag was so heavy, check out here to see what I carry with me for camping. If you’d like to try out tent camping with dogs, here’s how, and if you’re looking for winter dog gear, first aid kits for dogs, or just other adventures, check out the links!

  • How to Ski with your Dog (and where)

    How to Ski with your Dog (and where)

    How to start, things to think about, and where to go!

    I love getting outdoors with my Vizslas and when it snows, we still head out. Cross country and backcountry skiing is a really fun way to keep dogs active with you during the winter months. However, there is much more to think about in the winter with dogs, so here’s what we’ve learned.

    Winter Hazards for Dogs

    While the bugs and bears are sleeping and wildlife is less of a concern in the alpine, there is the looming issue of snow, cold temperatures and avalanches. There is also less sunlight so getting lost becomes much more dangerous when the temperatures dip and there are less people on the trails.

    Snow and Cold

    You’ll need more gear in the cold (unless you have a winter mountain dog) and snow to protect both your dog and yourself. I find myself bringing lots of layers for everyone, and also sometimes a dog sleeping bag for longer days. Here’s more on clothing and footwear for dogs in the winter. Expect to carry a larger heavier pack than the summer, and keep your dog moving to the car if you start seeing signs of shivering. It’s always a good idea to check on your dog’s paws and body throughout hikes but it’s especially important in the winter.

    With deep snowpack, running through especially thick deep snow can be exhausting for dogs and hard on their joints and hips. My dogs know to run on the skin tracks or follow behind in deep snow but some dogs may run beyond what they can sustain because they’re having so much fun. Thick crusty snow that gets punched through can also cut dogs paws and legs. Legs can get very bloody if you end up in these conditions, so ask your dog to stay behind your tracks or turn back if you see their legs raw or bloody.

    Tree wells

    Even in mild terrain, if there’s enough snow, there are tree wells. A space of loose snow can form around tree trunks and hidden cavities can easily trap and suffocate dogs (as well as people) that fall in. I’ve heard of several dogs lost overnight when they’ve fallen into tree wells and could not get out. This isn’t just for backcountry skiing, but right off the side of cross country trails. Be aware and keep your dogs in sight at all times.

    Avalanches

    If you’re going into avalanche terrain, make sure you have the training! There are classes available throughout the season and it’s very dangerous to go into terrain without knowledge, gear, and a skilled group of friends. Do not put an avalanche beacon on a dog. In an event a group may be swept away, humans must be first priority and precious time spent digging out a dog instead may mean the life or death of a human. You can put a different beacon on your dog that you can track instead.

    When you travel through avalanche terrain, keep your dogs in control, and in line with the pack. A dog running above may trigger an avalanche above a group of humans or may also be caught in an avalanche even if the humans have been able to avoid one. There was recently a dog rescued after 20 minutes buried in an avalanche in Colorado. Please take precautions!

    Basic Commands for Skiing with a Dog

    There’s a couple things I have taught my Vizslas to do when I ski with them. The first is to get out of my path when I’m going to ski right into them. GO GO GO is the command that I’m right behind and they need to move out of the way. The safest way is to practice this is during running or with cross country skis (something without sharp edges). I just speed up randomly and yell GO GO GO and run them by without hurting them. They learn really quickly to move out when they hear that!

    Another important command is to “STAY BACK” and hang out behind your tracks. That can be taught on leash at first, while walking or running. I use STAY BACK often while hiking on leash and need dogs not to pull in technical terrain.

    PASS BY” is something I picked up when I was mushing in the Yukon. When two dog teams pass by each other, they need to ignore each other and keep running. “Pass by” means no greeting, no sniffing, you are passing by dogs and you are working. Again, this is best trained while running.

    STAY CLOSE” and of course full RECALL (“full” meaning the dog comes all the way back and stands by you to be leashed without you stepping forwards) is extremely important when off leash skiing. These should already be in your repertoire but make sure you have these tools before heading out! Lastly, you should be able to leash your dog while on skis at any point (wildlife, dog fight, injury, emergencies, etc) so keep a leash within easy reach.

    Dog etiquette

    It goes without saying (but I’ll say it anyway) pick up after your dog, especially on groomed ski tracks where someone may ski over. The poop also messes up the grooming machines and if this happens too often, dog-friendly becomes no dogs allowed quite quickly!

    Keep your dogs away from leashed dogs or dogs in muzzles, and keep your dogs in the car until you’re all set to go. Off leash dogs in parking lots are super dangerous for both parties. Normally the first 5 minutes dogs are out are when they tend to poop and dog-poop filled parking lots are not fun for anyone.

    Whistler Olympic Center

    If you’re moving quickly, keep your dogs to the side so they don’t run into anyone else skiing in the opposite direction. Keep your dogs from just standing in the middle of a run, especially on a blind turn, and let dogs play off to the side.

    Skijoring, kick sleds

    I’ve never tried! I’ve trained my dogs not to pull but I know lots of people that skijor and love this sport. There’s competitions with teams, as well as bikejoring and canicross (running with dogs pulling you). Make sure you have the correct gear (not just a regular harness and leash) and see if there are classes and competitions in your area (some listed below). For even more fun, try kick sleds on tracks! The faster you go, the bigger wipeouts you’ll have, so first start running and teaching commands before you really go for it.

    Dog Friendly Cross Country Skiing Trails in Canada

    It’s uncommon for dogs to be allowed off leash in cross country ski areas but there are some that do! Some are of these are on-leash, some allow skijoring, and some off leash. Please do your research before going! BC and Alberta have more off leash trails and Ontario and Quebec have more skijoring trails.

    Dog Friendly Cross Country Skiing Trails in USA

    Backcountry Skiing

    There’s lots of places to go backcountry skiing with your dog. The terrain opens everything up, and basically you can go anywhere that’s not dog-prohibited. Just make sure that you have all the essentials for yourself as well as a dog.

    It gets really expensive and dangerous for winter rescues so make sure you’re self sufficient. At minimum carry a satellite communication device, first aid, and have the training to be out. I really like the Whyld River down dog bags as an emergency bivy/dog bag. The XL sizes can fit both you and your dog inside should you get caught out and it packs in extra small.

    as a reward for reading all this, here’s a pug in a backpack going backcountry skiing
  • Ultimate List of Dog-Friendly Hikes in Squamish/Sea to Sky

    Ultimate List of Dog-Friendly Hikes in Squamish/Sea to Sky

    warnings:

    Most of Squamish is officially dogs-on-leash however you’ll find most people skirt these rules outside of the downtown areas. Squamish, including downtown has loads of wildlife you must be aware and prepared for. DO NOT let your dogs off leash if you cannot recall them from wildlife. You will find Black Bears, Coyotes, Eagles everywhere throughout Squamish including residential areas. There are also Cougar sightings almost constantly in one trail or another, and less common are wolves, Grizzly bears, bobcat, and elk. Check trail reports before you go to avoid cougar and bear sightings.

    Here’s a list of beaches and lakes to take your dog paddling along the Sea to Sky from Vancouver to Pemberton and beyond!

    Wonderland Trail is super green in the winter

    Parking is very limited in the summer in certain places, especially weekends. Avoid busy areas with dogs as a curtesy of other trail users. Trails may close due to Grizzlies and Black bear issues so check before leaving. Roads can close due to flooding/washouts. Roads and parking are also different in the winter as many FSRs are snowed in and never ploughed. Chains are usually necessary in the winters. Check avalanche forecasts and have knowledge before you head out. Many areas have no reception so download or print maps, and have a point of contact if your car breaks down.

    Alexander Falls Frozen in the Winter

    Easy- 1 hourish

    Ray Peters
    Very flat, official dog-off leash area, can be close to the highway so be aware, bears, coyotes, lots of options to make your own, also good for biking

    Alexander Falls
    Winter hike, entrance fee to Callaghan, microspikes advised

    Whistler Trainwreck
    Several entry points, watch for trains and broken bottles, metal on the ground

    Wonderland
    Close to highway, so be aware! Great for running on-leash or biking

    Cat Lake
    Extremely busy in summer, AWD, not ploughed in winter

    Starvation Lake/ Cheakamus Canyon
    AWD advised to park in the canyon, must leash up to start by highway

    Crumpit Woods is close to town but beautiful views

    Moderate- under 3 hours, uneven ground

    Crumpit Woods
    Easy to get lost, bears and cougars sometimes present, lots of trail options

    Murrin Lake/Jurassic Ridge
    Must leash around lake, no dogs around lake, busy in the summer, easy to get lost

    Murrin Lake views overlooking the Howe Sound

    4 Lakes Loop
    Very busy in the summer, No dogs at Alice lake (walk on road do not follow the map), lots of offshoot bike trails to add-on, limited parking

    Smoke Bluffs
    Easy to get lost on the trails, Lots of viewpoints

    Brohm Lake
    Very busy in the summer, lots of trail options, awesome views from viewpoint, places to dip in the lake, leash near highway, very limited parking

    Crooked Falls
    Road can flood, AWD, Leash around waterfall, No reception

    Tunnel Bluffs

    Moderate/Hard- under 4 hours, uneven ground, steep sections, trailfinding

    Watersprite
    Very busy in the summer, Bears almost constant in the summer, cougar area, no reception, winter route is different, cars will need chains in the winter

    Debeck’s Hill
    Short but steep and easy to be lost, several options, views aren’t great

    Chief
    Very busy in the summer, may need daypass, leash around steep areas, 3 peaks for options

    Sea to Sky Gondola/Sea to Summit Trail
    Buy dog ticket at the bottom to go down by gondola, steep sections, rope areas, microspikes on icy days needed

    High Falls
    Easy to get lost, Grizzly and black bears, AWD, no reception, leash near falls

    Tunnel Bluffs
    Very busy in summer, log crossings, Black Bears, paid parking, limited parking

    Triconi is a real scramble

    Experienced only

    Brandywine
    Black bears, busy in summer, closed during snowmobile season, awd to lower parking, 4wd to higher parking, No reception, no trail past meadows

    Triconi Peak
    Scrambling and boulder fields, 4wd with clearance, wasps, black and grizzly bears,

    Lake Lovely Water
    Fast water crossing (need boat), wasps, bears, busy in the summer, no reception, no water, no dogs allowed in hut

    Seed peak
    AWD, routefinding, steep sections with rope, no reception

    Brandywine is beautiful, but it’s true wilderness

    Last warnings!

    Be aware of human feces that might be laced with drugs on trails. This is a common problem especially around where people camp, on bike trails, and busy trails. If you notice excessive panting, dilated eyes, excessive drooling, disorientation, turn back immediately and seek help. Another common issue are dogs chasing (or being chased) by bears. In both cases you should be in control of your dogs as there is very little help out of reception. Wasps can sting out of seemingly nowhere (when you pass through a ground nest) and dogs may bolt or be allergic so it’s good to have anti allergy drugs. Lastly, water loving dogs need to be leashed near fast moving water especially Lake Lovely Water, Crooked Falls, High Falls, and Sea to Sky Gondola hike. Dogs have died on these rivers that turn into waterfalls.

    Crooked Falls, slippery and a deadly fall

    Not Dog Friendly

    These places dogs are absolutely not allowed!

    Garibaldi Park (Garibaldi Lake, Wedgemount Lake, Elfin Lakes, Black Tusk), both sides of Whistler due to watershed/park rules (Blackcomb, Whistler peak, Rainbow Lake, Cheakamus Lake, Iceberg Lake, Mount Sproatt) as well as Joffre Lakes and Tenquille Lakes further north.


    Check out more on a list of beaches and lakes to take your dog paddling! And here’s a post on how to each your dog to recall off leash as well as a recall challenge to try before heading out into bear country! Support my page by checking out my shop redbarkshop.com

  • How to: the Unbelievable Moraine Lake with Dogs

    How to: the Unbelievable Moraine Lake with Dogs

    Moraine Lake

    One of the most famous and busy lakes in the world, Moraine lake is iconic and was featured on our older $20 bill. I’ve taken my Vizsla Whiskey loads of times for day trips and hikes and when I got Bourbon, my new Vizsla puppy, I took her on the 11 hour drive as soon as I got her.

    10 week old Bourbon could hike up the 350m to the Rockpile for photos

    Banff National Park

    Moraine Lake with dogs? Yes! Dogs are allowed in Banff National Park! Unlike the American National Parks, dogs are allowed on most trails and in the backcountry however there are expectations including times of the year for specific areas and trails.

    We love all seasons at Moraine Lake!

    Dogs must be on leash for many reasons including your safety, their own safety, and wildlife safety. There are loads of Grizzlies, Black Bears, Moose, Elk, and Porcupine to name a few. I’ve seen all of these animals within the park and I’m not a local! It goes without saying, please pick up after your pet, and keep your dog on a tight leash, under control around other dogs and all the chipmunks that beg for treats everywhere (I’ve never seen fatter chipmunks around).

    Elk, Moose, Bear, and Porcupine can all be dangerous

    There are lots of garbage cans and toilets at the parking and the National Park is pristine so please help keep it dog friendly for all of us!

    Getting there

    Moraine Lake is located in Banff National Park right on the edge between Alberta and British Columbia (on the Alberta side). You can see mountains in British Columbia right at the lake. The road to Moraine Lake branches off the road to Lake Louise, the closest gas station and town.

    A long drive with the dogs but worth it!

    It’s about 2 hours 20 minutes from Calgary and 9 hours 30 mins from Vancouver (I’m 10 hours 30 mins away in Squamish, BC). Banff National Park and Moraine Lake is one of the most accessible locations for Canadian beauty. So many of the most famous lake are less than 400m walking distance from parking lots and the roads around the area top the most scenic of the world.

    Moraine Lake Road and Parking

    Getting to Moraine Lake with a dog is most of the battle. The easiest way to guarantee getting there without a dog, is using the shuttle or booking a tour. However, the buses don’t allow dogs so the only way to get to Moraine lake with a dog is driving or hiking. Assuming you aren’t hiking in (13km or so, one way, from Lake Louise), you’re going to want to drive in.

    Coming towards the end of the season is less busy

    Moraine Lake Road opens seasonally so first see if the roads are open for the year. You can ski or bike up the road off-season but it may be too long to go with your dog back and forth.

    Dogs must be on leash

    When it is open, Moraine Lake parking lot tends to fill up in the mornings around 530am on weekdays and 5am on weekends although people do leave and the attendants will slowly let people in throughout the day. The parking lot is very small for the demand so if you’re set on making it, get there early! During high season such a Canadian long weekends or larch season, the parking can fill before 430 am! Please also note that you must enter Moraine Lake Rd from Lake Louise (no left turn from Lake Louise Drive).

    We usually only stay an hour for photos if we are not hiking here

    Normally you cannot “line up” with your car on the road to get in, so it’s luck while you drive by the road entrance if they’re allowing cars in or not. Somehow we’ve always had luck getting in with some persistence. If the road is closed, you can loop back through the village and through Lake Louise Lake but the loop can take up to 30mins and the road may still be closed so be prepared or just come early. You cannot sleep overnight in the parking lot, and you do need a Parks Pass in order to park. I’ve also had luck coming at the end of the day around sunset after the hikers and families have left.

    Bourbon and Thierry at the beach

    Photo Ops at Moraine Lake Rockpile Trail

    Most of the photos you’ll see of Moraine Lake are all taken from the Rockpile Trail. It’s about 300m from parking and one of the best views you’ll see with so little effort. Even so, the trail is not wheelchair friendly and has stone and log steps. There are lots of chipmunks and pikas teasing the dogs and begging for crumbs so watch your dogs on leash!

    Lots of places to take photos at the Rockpile
    Tourists lining up to take photos with Whiskey (2018)

    We took Bourbon here at 10 weeks old and she found someone’s leftover chicken wing in the bushes. The scream she let out when we took it away frightened a couple tourists! Whiskey normally has a line up of Asian tourists waiting to take photos with her here. I usually place her on the wall and we’ll get at least 10 people taking photos with her. She absolutely loves the attention while Bourbon’s trying to track chipmunks.

    Bourbon’s first adventure

    Paddling Moraine Lake with Dogs

    The Canoe Rentals at Moraine Lake are run by the Moraine Lake Lodge. The lodge and the canoes are not dog friendly so you must bring your own boat to paddle with. For reference the canoes are only rented from around mid-June to mid-September and are around $130 Cad an hour (!!).

    Finally a calm day for a paddle!

    The lake is actually quite windy I’ve found and we’ve had to come repeatedly in order to find a day to paddle with low winds. We launched some Oru Kayaks from the beach and paddled down the lake at sunrise with both girls on my lap. It was one of the best and most peaceful memories I’ve had at the Rockies. This was in October when no one else was out on the water.

    Sunrise with two pups on an Oru kayak

    There’s also been another trip in October where we bundled up and launched a packraft when I just had Whiskey. It’s more stable with winds but also a bit colder to sit in. I really suggest coming out with a paddleboard or kayak if you have the chance!

    Alpacka Rafts are amazing and pack down light

    Day hikes

    Moraine Lake is known for the Larch Season in September when the larches turn golden and crowds from all over come to see the autumn colors. Larch Valley on the way to Sentinel Pass is one of the easiest Larch hikes, around 535 m gain and 4.3 kms one way on a non-technical trail.

    Larch Valley in the autumn
    Sentinel Pass

    There are also several other hikes that I haven’t yet had time to try. I’m pretty sure my girls would be able to do the Tower of Babel scramble, as well as Panorama Ridge passing by Consolation Lakes. I’m not sure if Eiffel Peak or Mount Temple or Wastach Mountain is dog-doable but one day we might see!

    Lake Annette from Paradise Valley

    Another hike that starts on the Moraine Lake Road, but not the lake is Lake Annette and the Giant Steps. If you hike far enough into Paradise Valley, you come out the other side of Sentinel pass and end up in Moraine Lake but I think most people take that as a multi-day trip. You would need to hike down the road or catch a lift with someone if you wanted to do that road-trip but it might be worth it! We’ve done up to Giant Steps but because of a heat-wave and Covid, did not want to chance the road mid-day.

    Where to stay

    Since the Moraine Lake Lodge is not dog-friendly you’ll have to stay off the lake for your visit! The nearby famous Fairmount Chateau Lake Louise is dog-friendly but extremely luxurious and expensive. I tend to camp at the Lake Louise campgrounds or stay at a hotel in nearby Canmore. The campgrounds are utilitarian but a great location, clean, and dog-friendly.

    Lake Louise campground
  • Amazing Adventure Camping at Floe Lake (Rockwall Trail) with Dogs

    Amazing Adventure Camping at Floe Lake (Rockwall Trail) with Dogs

    The Draw

    Just google Floe Lake and Rockwall trail and you’ll know why it’s one of the most popular trails and locations. In fact, that’s probably how you got to this blogpost. It’s accessible, and possible as a day hike or run. The entire 55km Rockwall trail can be done in 3-5 days but the highlight is definitely Floe Lake and Numa Pass. Usually most people hike from Paint Pots to Floe Lake and we wanted to do the same, but booking the trail because our biggest issue.

    The view from camp

    Dogs are allowed on Rockwall trail but must be on leash, and there is wildlife (more about that later) that you must be prepared for (even on leash!).

    Floe Lake in the morning with overhead clouds

    Booking

    The Rockwall trail is a classic of the Canadian Rockies and difficult to book campsites in! I waited in line online when the booking opened and was 7000s on cue. By the time I got to book, most everything was taken. Floe Lake campsites is one of the most popular backcountry sites in the Rockies so of course it was taken. I booked some random days in Tumbling creek campground and Numa creek campground and hoped for cancellations. You can hike into each campground from the road and I just really wanted to see Floe lake with the dogs.

    The weather was mixed, some rain and some sun!

    Eventually, we checked daily and were able to secure cancellations at Floe Lake during our vacation time. We booked every cancellation we could and joined up the dates (and cancelled the ones we were not going to use). Unfortunately the way the booking system works is that your reservation fee is separate than a booking fee and you do not get the booking fee back. In the end there’s no benefit to cancelling an unused reservation (you will not get your money back) other than to let someone else use the campsite. I strongly encourage everyone to cancel unused campsites though, because it’s so limited and for all the evenings we were at Floe, there were usually unused tent pads.

    One of our day treks took us to a quiet pass

    Our Plan

    Because we were not able to book campgrounds in order for the Rockwall trail, we just aimed to book whatever we could at Floe Lake and do day hikes from the campground. Since Numa Pass and Floe were the highlights of Rockwall, we figured we would explore Numa Pass and check out other areas we could hike to within a day. Everything would be limited to what the dogs could do (Bodhi gets heat stroke and isn’t the most agile of dogs) and what we felt like!

    Above Floe Lake looking onto Numa Pass

    The Hike In: Floe Lake Trailhead to Floe Lake

    The hike in is not technically difficult, and about 10.5km from the Floe lake Trailhead. Most of the trail is narrow with a slight incline across a forest that is bare from a recent forest fire. When we hiked in, the trail was very overgrown to the point your couldn’t see your own feet and made for difficult footing with a dog on leash in front and a huge pack with awkward balancing. The trail is mostly exposed so if you’re heading out in the summer with dogs that are sensitive to heat, head out as early as possible.

    Hiking into Floe from Floe Lake Trailhead

    At some point near the end of the trail (at 8km) the trail climbs up dramatically and then you’re at the lake. There is a couple water sources that may or may not be running in the summer but we had access to water before the climb. This was my first hike with a pack in the year so I really struggled in the heat! Erica was kind enough to wait for me in the bug-infested breaks I had to take. I also lost a water filter I had not secured well enough to the front of the pack. All and all, not my best hike, but we did get there eventually!

    A rest log on the way into Floe Lake

    Wildlife

    Normally most people are worried about the Grizzlies and Black bears but we found porcupines and squirrels to be the most dangerous. Squirrels and chipmunks are awful because they run across your path without warning and then your dog instantaneously jumps at them pulling you and your 40lb bag down. Porcupines were a bit of a surprise! We encountered one on the hike up to Floe (halfway up the incline, so about kilometer 9 going in). It was right off the trail hidden, so Bodhi almost got quilled, on leash, on the trail before Erica saw what it was.

    Numa Pass, the porcupine was between this spot and the lake

    The second porcupine was between Floe Lake heading up Numa Pass, about 1km in. We never actually saw it, but Bourbon somehow got quilled by stepping on a quill on the ground after the dogs seemed VERY interested in sniffing around the area. Needless to say, keep an eye out for the creatures!

    Camping at Floe Lake

    Camping with a view

    The tent pads at Floe are all over a wide area, and not organized in any way we could understand. The best site with a view over the lake is the first ones you see as you hike in from the Floe trailhead. We chose one further away from others with dogs and settled in just as it started raining.

    There were 4 tables at the food area and a couple beaches

    There is a wonderful eating area with bear lockers right by the lake that has the best views. We loved starting and ending our day there, watching the light move across the mountains and lake and were always able to find a place to sit at a table or on the beach. The first couple days there were still ice floes moving across the lake but eventually they melted by the time we left.

    We fit 2 humans and 3 dogs into a decade old 3 person tent

    We met a couple dogs each day we were at the campsite but were able to steer clear of them without issues. Every evening we moved our tent closer and closer to the “best” spot and the last evening we snagged a photo-worthy tentpad!

    Day treks and scrambles from Floe Lake

    Looking down on Numa Pass

    In the end we stayed at Floe for 4 days, 3 evenings leaving us 2 days to explore. The first day took us to Numa Pass, up to a couple viewpoints, and a look at Numa Mountain. From the viewpoint, we then spotted some lakes in the far distance so we aimed for those (no trails, just wandering). We scrambled over a boulder field and scree and as the weather changed we decided to stop, take some photos and head back.

    Going for a walk!

    I had seen some treks to Numa Peak before we hiked out but there was very limited information on if the peak was doable with dogs or not. The next day we decided to aim for Numa and head back if it ended up being too difficult. It’s always hard to know how tough something is until you actually try the scree and test the angle. We made it to just below the notch of the peak before we stopped for lunch and called it. It would have been sketchy to get Bodhi past the point with exposure and the views would not have been better. We were just meters from the peak and were further along than we had been expecting!

    Looking at Numa Peak
    Numa Peak, we made it just before the notch

    Numa Peak was such a highlight, but I would not recommend it for people and dogs that are not comfortable hiking and scrambling. You can walk right up to the scree and see for yourself but there is no rescue or rangers here so you must be self sufficient and be extra careful if your dog is not full capable and under control. I also recommend a harness made for lifting, and paw care if your dog’s paws are not weathered for scree.

    The best views

    Would I hike the Rockwall trail again?

    Oh yes!! This was such a lovely location, very peaceful for how popular it is. Definitely be aware that you are in the backcountry and take extra precautions but Floe Lake was such a highlight of my year. I’m so thankful I have a friend to do this with, one that understands my dog limitations and is willing to camp, hike, explore and scramble with me!

  • What you need in a Hiking Dog’s First Aid Kit

    What you need in a Hiking Dog’s First Aid Kit

    Already have a human first aid kit for hiking and camping? Wondering what ELSE you might need for your dog? There’s no need to double up commercial first-aid kits for you and your pup as most elements can be shared but there are some extras to bring and take into consideration. The dog-specific pieces can also be shared with humans and you might find them quite useful!

    Listed in detail below, some items that are good to have at home, in the car, on the trail

    Whiskey and I have been hiking since she was a puppy and with the addition of Bourbon, we’ve had to deal with lots of minor issues while in the backcountry and on roadtrips without reception or vets nearby. Even at home, we’re able to deal with minor emergencies without having to pay for a vet visit.

    When I’m hiking I always have a small first-aid kit and I add extra pieces depending on the length of the hike and the risk factors as well as the size of the pack I’ll be taking. I’ve never seen most of these products listed in ready-made canine first-aid kits that you can purchase so I thought this list might be good for people that are active and in the wilderness with their dogs.

    Consider where you are going, the environment and temperature, as well as any medical issues your own dog might have. Always bring extra clothing for warmth, and shade. And let me know in comments on anything I may have missed!

    Trail Dog First Aid Checklist

    Items in your Human First-Aid Kit should have that can be shared with your Pet

    • Gauze
    • Adhesive tape
    • Swabs
    • Ice Pack
    • Scissors/ knife
    • Gloves
    • Bandages
    • Alcohol wipes
    • Saline
    • Tweezers
    • Headlamp/flashlight
    • Splint
    • Eye wash- non medicated eyewash can be used on dogs
    • Polysporin/ antibiotic ointment
    • All-purpose skin soother -Skincare for sunburns, rashes, chapped lips, bug bites, and healing cuts and scrapes
    • water-proof bag
    • towel
    This is minimum what I carry in my daypack
    This all fits into a small bag in previous photo called “first aid kit”

    Trail Specific First Aid Kit Items

    • Blister Packs
    • Zip Ties
    • Lighter
    • Water Purification Tablets
    • Emergency Blanket
    • Electrolyes
    • Multi-use tool/ Swiss Army Knife

    Trail Dog First Aid Kit additions

    • Benedryl (Diphenhydramine), Reactine (Cetirizine)– Pills are the most used item in my first-aid (human or dog). These I use for any allergic reaction including bug bites
    • Tick remover– if you have a chance of ticks in the area, clearly also for humans
    • Tweezers– very useful with the tick remover but also splinters, cactus spines, shards of things that get imbeded
    • Pup Wax -nose and paw wax balm for dogs, I use this nightly when hiking on boulder fields and the paws are about to be cracked (or are already cracked) to keep them moisturized as well as dry noses
    • Dr Dobias Skin Spray– Wonderful for skin scrapes and closed wounds as well as insect bites. Also great on humans
    • EMT Gel– Fantastic for paw cracks and tears in the skin. I was able to stave off Bourbon’s paw fully cracking with this gel, pupwax, wrapping and a bootie while hiking for 8 days in a row.
    • Duct Tape– as much as the adhesive tape in a regular first-aid kit might help humans, I’ve found Duct Tape is very helpful for dog patients. It’s also wonderful for fixing gear that breaks and holding boots in place for crazy running Vizslas.
    • Superglue– or stapler but superglue is much smaller to carry on treks out (many of my friends will carry a stapler to staple wounds)
    • Dog-friendly bug/tick spray– I’m still working on finding the magical dog-friendly bug spray but I’ve used Cedarwood-based, citronella based, and I would like to try PERMETHRIN next. Regardless, throw a pet-friendly spray in
    • Emergency Bootie– slightly larger size than usual, universal boot (not left/right) to accommodate bandages underneath if needed. I use muttlucks and duct tape this one when needed.
    • Hydrogen Peroxide– to in duce vomiting immediately after ingesting a non-corrosive poison (do not induce vomiting if you think it might be corrosive), commonly while hiking, if your dog eats mushrooms, or human feces that may be laced with drugs, anything that may have drugs (including edibles), poisoned meat, etc
    • Activated Charcoal+ powdered milk– if your dog has eaten something and is reacting (you did not induce vomiting in time) already reacting to the effects. I add the milk to make it more palatable and it also coats the stomach to prevent absorption while the charcoal works to bind the poison. Mix with water into a paste with a syringe pump or bowl if your dog will eat it.
    • Vet Wrap– Extremely useful for paw injuries, holding bandages in place, or sprains. I use it for myself when I consistently sprain my ankle. Sticks to itself and is non-adhesive to anything else. Also useful for boots and harnesses that rub.
    • Gravol/Famotidine– Whiskey has a sensitive stomach so this is more Whiskey-specific. When her stomach is very gurgling and she’s not wanting to eat, I give her Famotidine and it settles. Whatever drugs your dog may need, of course, bring some in your first aid kit
    • Emergency leash/ Rope + carabiner– leashes and collars break or get lost, an extra rope can really help, be made into a quick harness, or help muzzle a dog in pain.
    • Dog sling/bag/ability to carry out an injured pet– depending on the size of your dog, whom with, and where you are going, make sure you have the ability to carry your dog out
    • Bandana or cloth– you may need to drench a piece of cloth in water to cool a dog down, and emergency it can be very helpful to cover your dog’s eyes, or muzzle your dog while working on an injury, especially if you are alone

    DO NOT SHARE

    Be cautious of these items and research ahead of time if the ones in your kit are dog-friendly or not

    medications– some medications can be shared with your dog, and some not. Make sure you have an understanding of the dosage and which are poisonous, this includes medicated eyedrops
    creams/oils– some ingredients that can be used for humans like certain essential oils can be dangerous for dogs
    bug spray– DEET is poisonous to dogs, even while spraying, make sure your dog is upwind
    sun screen– Many types of sunscreen are potentially toxic if if a dog licks it off

    Keep your puppies safe!

    [wps_products product_id=”7342189740231″]

  • the Best Tents and Considerations for Camping with Dogs

    the Best Tents and Considerations for Camping with Dogs

    Camping with dogs can mean freedom and an escape from the city, but it can also have it’s own complications, especially if it’s your first time or you camp solo. A good tent can really ease the transition and prevent accidents that might happen. There is a large variety of tents prices to go with those and since this your “home” while outdoors, it really is worth choosing wisely.

    Prepare

    So you want to go camping but your dog’s never been in a tent? After you purchase one, it’s a good idea to set it up at home, or in the backyard and take a nap together inside. Work on going in and out with treats and teach your pup it’s a good place. Check out this other post I wrote about first time camping with a dog and things to think about, as well as how to introduce the tent. Just please do not zip your dog inside the tent alone unless your dog is very chill, trained, and calm.

    Whiskey with my 1ppl Big Agnes UL fishhook- there are no zippers

    A Large Doorway

    When choosing a tent, look for a larger doorway. Doorways that are small and narrow will be difficult to get in and out when you are stepping over a sleeping pup, and can be frustrating at night. You want a good zipper that doesn’t snag, and ideally several options to open it quickly from inside and out. It’s great to have space to put a towel on the ground to clean paws before they jump onto your sleeping bag, and also space to put shoes, a bag, easy access to leashes. Finally you want to have a wide sightline outside for your dog, approaching animals, and anything else. The more animals you have, the more you will appreciate a wide entryway.

    I’ve now upgraded to a larger 2ppl Nemo Dragonfly tent with 2 dogs

    Mesh

    I cannot stress to you how much a good quality mesh is important with dog nails. UL or Ultra lightweight tents sacrifice tough materials including mesh for weight so it’s easier to carry but this lightweight mesh is very easy to puncture. Whiskey likes to “paw” at the doorway to enter and my heavier tents have withstood this. There are many snags in the mesh, but no holes but I’ve heard so many dogs ruining the popular UL Hubba Hubba mesh trying to jump out at the wrong moment.

    This Marmot Ajax 3ppl tent is well over a decade old and still going

    Freestanding

    Some tents, especially lightweight tents can be non-freestanding where you need to stake lines in order to create the tent shape. They prioritize weight over convivence and can also use trekking poles as tent poles. I don’t recommend these for dogs for several reasons. The more lines you have running from the tent, the more entanglement you’ll get with legs and leashes. Bourbon seems to have fun pulling out pegs on my last trip and the inside of my tent tends to wander with two dogs so a strong, freestanding tent is my goal. If your tent structure goes down every time a stake gets pulled, it could get frustrating! These tents also take longer to set up and especially with multiple dogs, rain, and wildlife, you just might want to have less complications in life! Lastly, I camp in rocky locations and places where pegging isn’t really an option, so a freestanding tent is a must.

    Group 8 day backpacking trip

    Pockets

    I LOVE pockets! Pockets in tents are amazing. There’s always collars, leashes, sprays, towels, and a multitude of things that need to be packed away in it’s own place. I always put my headlamp, dog collars, and first aid things right next to my head. Pockets are also great for drying out whatever the dogs get muddy, and keeping the tent floor from becoming a huge mess when they start digging into your sleeping bag.

    My cheaper, heavier tent withstood the snow and wind better than the UL tents my friends had

    Footprint/Flooring

    Buy it, use it! Spend the extra cash for a footprint and use it, or a tarp is just as good. A thicker tent may not need a footprint (I don’t always use one myself when it’s dry) but lighter tents will need one and it will keep your tent lasting longer and dryer and prevent abrasions from rocks and dog paws digging.

    I suggest a footprint with snow or wet ground

    Single/Double wall

    Some lighter tents or cheaper tents may be single-walled. They tend to be solid so water does not go through but if pressed, water will condense through. These will not be as ventilated as double walled tents that will have mesh as an inner layer with a waterproof fly. I highly suggest double walled tents. Many dogs will like to lay in a corner of the tent pushing against the tent walls and if it’s a single layer, can bring water in. The single layer laminated wall is also the only layer between you and the elements so if it rips, you will need to pray you have enough duct tape! When the weather gets too warm or stuffy, it’s also nice to be able to take off the rainfly and let the tent air out or even enjoy the stars! But if your dog isn’t feeling safe open to the elements (many dogs feel uneasy) you can put the fly back on and create a closed off den.

    This is a cheaper Coleman 6ppl tent we car-camped out of for a month and half

    Car Camping

    With weight not a problem, I would suggest a large tent you can stand inside (check the height) and a second-hand or affordable one. You don’t need lightweight, and most tents these days are made well enough to withstand wind, rain, and typical use. The ability to stand-in and change or wrangle dogs without kneeling is SO helpful. Unless you’re camping more than 30 days a year, most cheaper tents will work just fine. We forgot our tent on our trip to Alaska and bought a cheap Coleman tent at Canadian Tire that lasted the entire trip fine under all weather and even crazy winds. With cheap tents, expect to replace pegs and take a little bit extra time to put together. The poles may have cheaper elastic but that’s also easily fixed with duct tape. Our North Face tent was much better made and still survives to this day, but it’s heavier (better fabric), packs easier, and has better zippers. If this is your first time out camping, put your money elsewhere (like a good mat!).

    This is my 4ppl Northface tent for car-camping that you can stand up in

    Backcountry Camping

    This is where weight and packability matters. For most brands, there are UL tents of various sorts and a cheaper line of tents. Even though the UL tents tend to be more expensive, I do not suggest them because the material is easier to break and do not stand up to dog use well. Unless you have one well trained dog and weight is of utmost importance, I would suggest a heavier, cheaper tent and take on the extra 2lbs it may weigh. Either way, bring some duct tape on your trip in case something rips open and a big scoop of good humor! Camping with dogs is always interesting!

    A double walled tent allows you to take off the fly and enjoy the stars and breeze

    We’ve used the Marmot Ajax 3ppl tent for 2 of us and Whiskey for well over a decade. I’ve got a UL 1ppl tent for solo camping that’s only 2 lbs (it’s the Fishook tent with no zipper) but that would be too tight with 2 dogs, camera gear, and clothing. I still carry the 3ppl 6lb tent when just solo camping with Whiskey sometimes because it’s just so much more comfortable if the conditions are rainy. Being stuck in a 1ppl tent for a rainy evening or afternoon is SO uncomfortable and I would rather carry weight than be stuck in an awkward tight position. Researching further I just ordered the Nemo 2ppl tent as my new solo tent and I’ve been considering the Copper Spur 3ppl tent as a new 3ppl option but am holding back due to the flimsy material and huge cost. I think if I’m sharing a tent, then sharing the load would be acceptable.

    My heavier Marmot swallow 3ppl tent for winter camping

    Winter Camping

    I haven’t done too much backcountry snow camping but I did buy a heavier vintage tent for the purpose. It’s very warm, with loads of venting options, space, and can seal up tight if needed. Winter tents that are light are very expensive, so vintage was the way to go! Even though it’s not the latest tech, the huge zippers, heavy mesh make me so comfortable with dogs running in and out. The last time I used the tent it was actually too warm in the morning, and I haven’t found too many friends that want to winter camp so I just haven’t had the opportunity to use this one too often.

    FAQ

    What’s the best backcountry tent for 1 person and a dog?

    I would suggest a stand-alone, double walled, cross-bar 1 or 2 person tent to share with a dog. Crossbar tents are quick and easy to set up with a large door and slightly thicker mesh (not super UL). Make sure the zipper is well made and does not snag.

    What’s the best car camping tent for dogs?

    If you are starting out, get something that is easy for one person to set up (unless you always camp with multiple people)

    How do I teach dogs to camp in a tent?

    Check out this blog about first time camping with dogs!

    What other gear is good for camping with dogs?

    Here’s a blogpost on Our Best and Tested Gear for Camping with Dogs

  • How to: First time Camping in a Tent with Dogs

    How to: First time Camping in a Tent with Dogs

    Never been camping with your dog? Here’s the basics to get you thinking!

    Planning/Before

    -set up a tent in your home, or your backyard, go inside with your dog, bring lots of treats, and hang out to get them comfortable
    -zip up and down the tent while you are inside together
    -take your dog inside the tent after they are exercised and take a nap together
    -Open a door halfway and show them how to get in and out even if the doorway isn’t open all the way
    -Teach your dog to wait until you open the door to jump in
    -Teach your dog what the mesh is, that they cannot go through the mesh when it is closed
    -do not zip your dog inside the tent, with you outside (or vice versa) until you are confident they are calm
    -start with car camping, you always have a place to escape to, and you can easily bring more gear
    -make sure you camp with someone experienced or are comfortable camping alone, there’s nothing worse than having to take care of both your dog and a human!
    -choose a place to camp where you can easily walk your dog during the day, we always research trails around the campsite as well as trails while driving to and from the location. Do this before you are out of reception!
    -I advise to get tents that are not ultralight. Ultralight tents are have very thin mesh and materials and tend to rip quickly when a dog taps the material in order to get out. Duct tape is always a good idea!
    -here’s a post I wrote specifically about tents and dogs
    -Babywipes are always useful! Camping was never a clean activity!

    When you get to the site

    -go somewhere that isn’t packed with as much space as possible between campsites, book or choose a campsite away from bathrooms, perhaps in the corner of the campground where you will have the least amount of people wandering by
    – bring a long line to tie up your dog if they wander, a Tuflex check cord works the best as it doesn’t knot, is easy to clean, and is still flexible in cold weather
    -if there are bugs, see if you can bring natural bug repellent like citronella candles, read all the directions of bug repellents. Remember your dog is (most likely) smaller than you and are more effected by poisons. There are some bug sprays and electric repellents that state you cannot use when you are eating or around small ponds with fish (it poisons the water) or with babies or kids. I would not use these with pets!
    -a dog mat is always a good idea, even if you dog doesn’t need it, just to keep everything clean, and to have a “place” for your dog to return to on command.

    During

    -say hi to your neighbours if they’re friendly and introduce your dog, mention that it’s their first time camping and bring treats if it helps. Be really nice especially if they have kids or another dog.
    -walk your dog around the campground if he’s friendly
    -respect your neighbours and make sure you clean up after your dog
    -if your dog wakes up early or stays up late due to the unfamiliar territory, take him for a walk to tire him out
    -try and keep to any routines you might have at home (time you eat, sleep, bedtime routines)
    -close the fly so your dog cannot see outside if they are guarding, or barking at noises or people
    -keep an eye out for people passing by and work on rewarding your pup for not barking, and for being friendly, the site will probably be “his” territory so you’ll have to make sure your dog knows who’s in charge and that you have your eye on things
    -If you must leave your dog (to go to the bathroom or clean dishes for example), leave them in the car to avoid wildlife, strangers coming by, or whatever else may happen, do not leave your dog in the tent alone. I’ve had my tent “walk” after me on occasion. You can also leash your dog outside the bathroom or ask someone to keep them while you go.
    -keep a jar of treat (or kibble) around and use this as a training opportunity, although respect rules about food and wildlife, especially bears.

    Afterwards

    -Pick up after yourself and your pup when you leave the campground
    -Inspect your tent for any holes or damage and repair it before the next trip
    -If you hit any issues with camping, work on training at home before going out again. If there are issues guarding, or anxieties, you can practice at home or in a backyard before heading out
    -Make a list of equipment or situations that could be improved. Depending on where and how you camp, there are loads of gear and solutions that may be available. For instance my dogs prefer to sleep on my mat, in my sleeping bag no matter how many dog beds I bring, so I now have an extra long, extra wide mat and sleeping bag to house them. However while I’m not actively sleeping, I bring their own beds that can be dirtied and used in and out of the tent so they can go in and out of a bed while not making a mess out of mine.

  • How to hike the Stawamus Chief with Dogs

    How to hike the Stawamus Chief with Dogs

    One of the best dog-friendly hikes in the area, the “Chief” overlooks the Howe Sound with incredible views of Squamish and peaks around. It’s one of my favorite sunset hikes and an iconic location for locals and tourists alike. There’s loads of blogs and descriptions of this hike so I’m going to keep this very dog-oriented.

    As this is a hike up a mountain, it involves lots of elevation gain over a short distance. There are never-ending stairs, lots of big steps, and can be difficult to those not used to this sort of hike. Please go slow if you’re tired and take the breaks you need to. The only bathrooms are the ones at parking, so make sure you go before starting!

    Check out this blogpost on more hikes along the Sea to Sky highway as well as beaches and lakes to paddle.

    The Chief has 3 peaks (creatively called 1st, 2nd, and 3rd) and it’s possible to do one or all of them in one go. The first peak is the lowest at 630m , and 2nd at 680 and finally 3rd at 702m. For dogs, the 2nd peak is the hardest to climb as there’s the longest metal ladder with an awkward section between rock that can be hard to get through without holding your dog. Each peak is possible but I would suggest 1st peak if you’re looking for something quicker and 3rd peak if you want the most dog-friendly, least busy route (but also the longest).

    Warnings for dogs

    These trails are busy and well trafficked and like most busy trails here, people leave food and there are chipmunks and crows on the peaks. If your dogs might go after chipmunks and run off the cliffs PLEASE keep them far from edges and have a leash system that will not break or slip off your hands. Harnesses are usually more secure than a collar from an unexpected run. There are also climbers coming up from unexpected places so be aware in case your dog might get scared of people popping out of nowhere.

    This hike is NOT puppy-friendly. The steepness paired with the hard rock is too long and strenuous for growing joints unless you will carry your older puppy down yourself (I put Bourbon in a 65L backpack).

    The trail is so busy that it can be common for dogs to find human feces along the route. Just a warning, it happens frequently and sometimes people don’t go more than 1 foot off the trail. Be careful as I’m always scared it could be laced with THC.

    When I hike in the dark, I always have lights on the dogs just in case anyone might get scared and they have lots of warning. Like any off-leash dog hike, clean up after your pup (garbage bins are at the bottom), and keep them off the trail for any leashed dogs, people that might be scared, and children. The bottom section has a fast running dangerous river so make sure water loving dogs are kept away from the current. There is no water source outside from this so I would advise bringing all the water your dogs may need.

    Parking and trail start

    starts off with so many stairs

    The most common trail (the only one I would suggest for dogs) starts at the chief parking lot and goes through the campground. There are pit toilets and garbage here and keep your dog on leash until you reach the trailhead with the stairs. There are no more toilets or garbage bins beyond the trailhead. Once you start up the stairs, you will hike up up up.

    The trail is mostly lots of big rock steps

    The first split is for the Sea to Sky Gondola (also dog friendly, with a small chain section most dogs can go up without help). Dogs are allowed to ride the Sea to Sky gondola down (but not up) if you’re looking for something different. The second split is for 3rd peak, and the 3rd split is for 1st peak. If you continue straight without turning off you will end up on 2nd peak.

    1st Peak 630m

    First short ladder up 1st

    There are two ladders to 1st peak, both somewhat short and dogs can avoid them. The first ladder is halfway between the peak and the split to 2nd. It’s pretty short and dogs can veer off to the left side and gain the same incline without a ladder. You can also lift them up the ladder easily, or, if they like agility, they can use the branches around the ladder to climb up (this is Whiskey’s preference, I don’t know a single other dog that would do this).

    At some point you’ll see permanent chains attached to rock that you don’t really need to hike up, but they do lead to a narrow section with some bigger steps that a dog might need help getting around (Whiskey and Bourbon can work out a route around them without help). There are 3 options for dogs getting up this section.

    The first way is to head up on the right hand side around or before the chains. Both human and dog can take this together to avoid the entire section I write about below.

    the thin second ladder up 1st

    This narrow section leads to a thin ladder on an angle. Before the ladder, dogs can make their way up the left side of the rock without help. The 3rd option is for dogs to climb the ladder (Whiskey loves climbing up and down this to show off to onlookers). Because the ladder is on an angle and placed on the rock, if a dog’s paws slip through, it just touches rock. I suggest climbing right underneath your dog so you can support them up if they need help. Bourbon can also climb up this way but less gracefully.

    view of Garibaldi

    Coming down, Bourbon prefers to take the route to the left, (the right when you are coming down) and Whiskey prefers the ladder. It’s harder for dogs to walk down a ladder than up and I always suggest being underneath your dog so you can help them if they want to do this.

    Steep down, slippery when icy. Keep puppies on leash (like B)

    The peak is beautiful and quick to gain. You have the best views of Garibaldi from here and great views of the city. The peak here can be very icy in some conditions so bring spikes if you suspect it might be so!

    2nd Peak 680m

    There are two ways up 2nd peak. The first is the direct route from the split of 1st peak. It’s the hardest section for dogs. There’s a way around the entire ladder section but it’s quite steep (you must turn off before the narrow part that leads to the ladder. This ladder is vertical and long so you’ll have to fireman carry your dog up the ladder. I never go up this route with the dogs, I normally go the other direction as getting down a ladder with 50lbs on your neck is easier and safer than going up.

    The longest ladder on 2nd

    The second way up 2nd peak is coming from 3rd peak. There’s a trail between the peaks that doesn’t involve ladders or extremely steep sections. I typically come up the 3rd peak, and down the second, if I’m doing second at all (I don’t tend to hike 2nd). Between the peaks is a huge drop-off so please be aware and keep your dogs on leash if you’re not 100% sure they will not run off after a chipmunk.

    between 2nd and 3rd there’s a huge drop

    3rd Peak 702m

    the most dog friendly

    3rd peak is the only one without ladders or ropes and I frequently have the entire peak to myself on weekdays. This is the one I hike the most with my girls, as its the longest option, the best views (in my opinion) and the least busy. It’s also the most rugged trail out of all 3 options and you may be looking for the trail markers on a number of occasions. I absolutely love this one on a less busy day and I’ve spent at least one birthday here eating cake with my friends.

    If you’re confident hiking back down in the dark, it’s fantastic for sunsets and you’ll most likely be the only one up there. If you have the time and don’t mind a bit of trail-finding, this is the one I would recommend to do with your dogs if you’re only doing one peak!


    Hikes along the Sea to Sky Highway

    Beaches and Lakes from Vancouver to Pemberton