Category: Camping

  • Alaska’s Mint-Bomber Traverse with Dogs (and a Snowstorm)

    Alaska’s Mint-Bomber Traverse with Dogs (and a Snowstorm)

    Goldmint Trailhead to Mint Hut

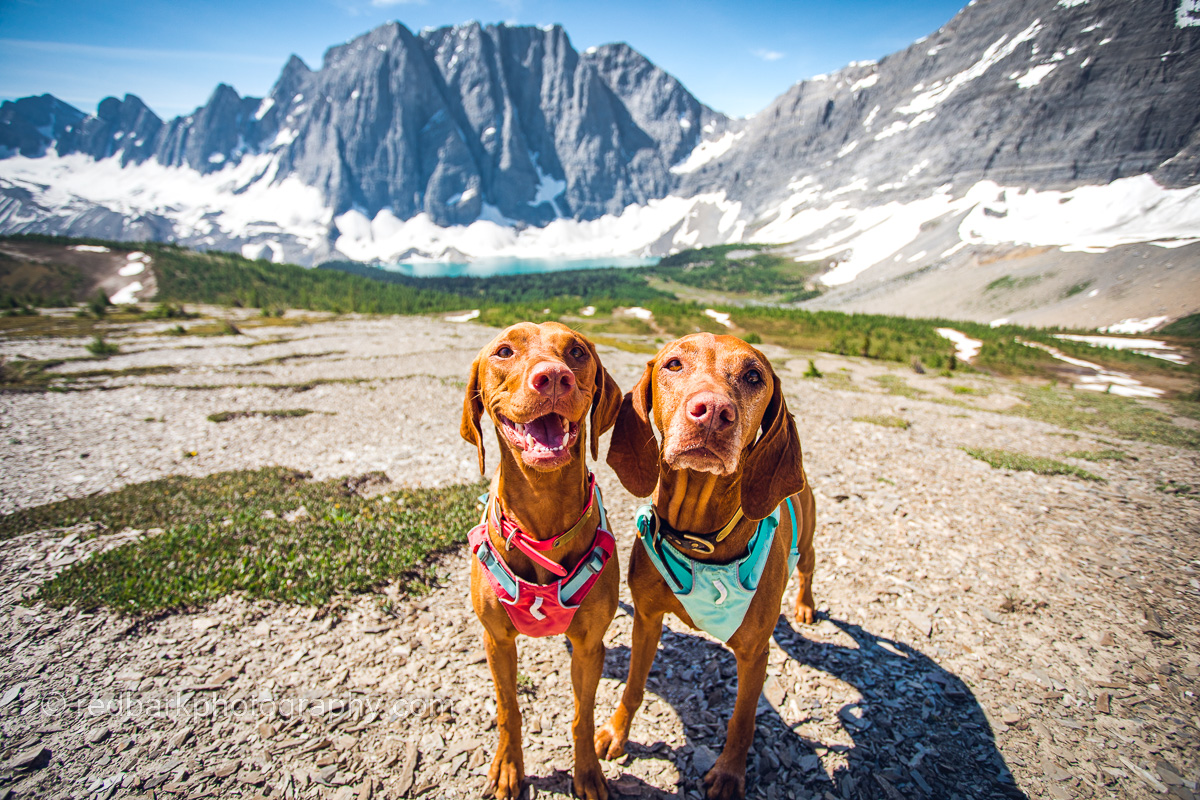
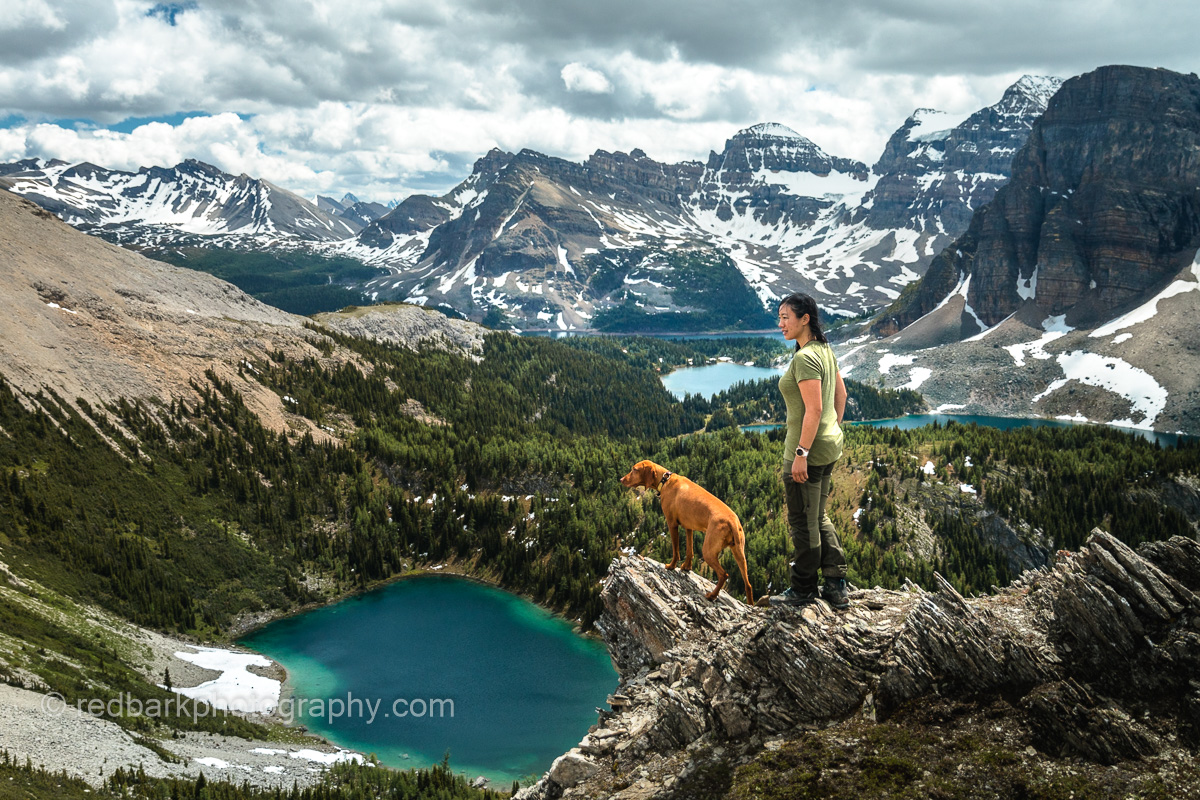
    Deep in the Talkeetna Mountains in Alaska, a local favorite trail Hatcher Pass became world famous. Within the area, there are loads of options for hiking and exploration, but we only had a couple days, and very few days without an abundance of rain. My friend Kristina and our dogs Whiskey, Bourbon, and Cooper set out on a backcountry adventure exploring several huts and passes in the backcountry. As with most backcountry adventures in Alaska, our hike did not go according to plan.

    Bourbon’s first year with a pack

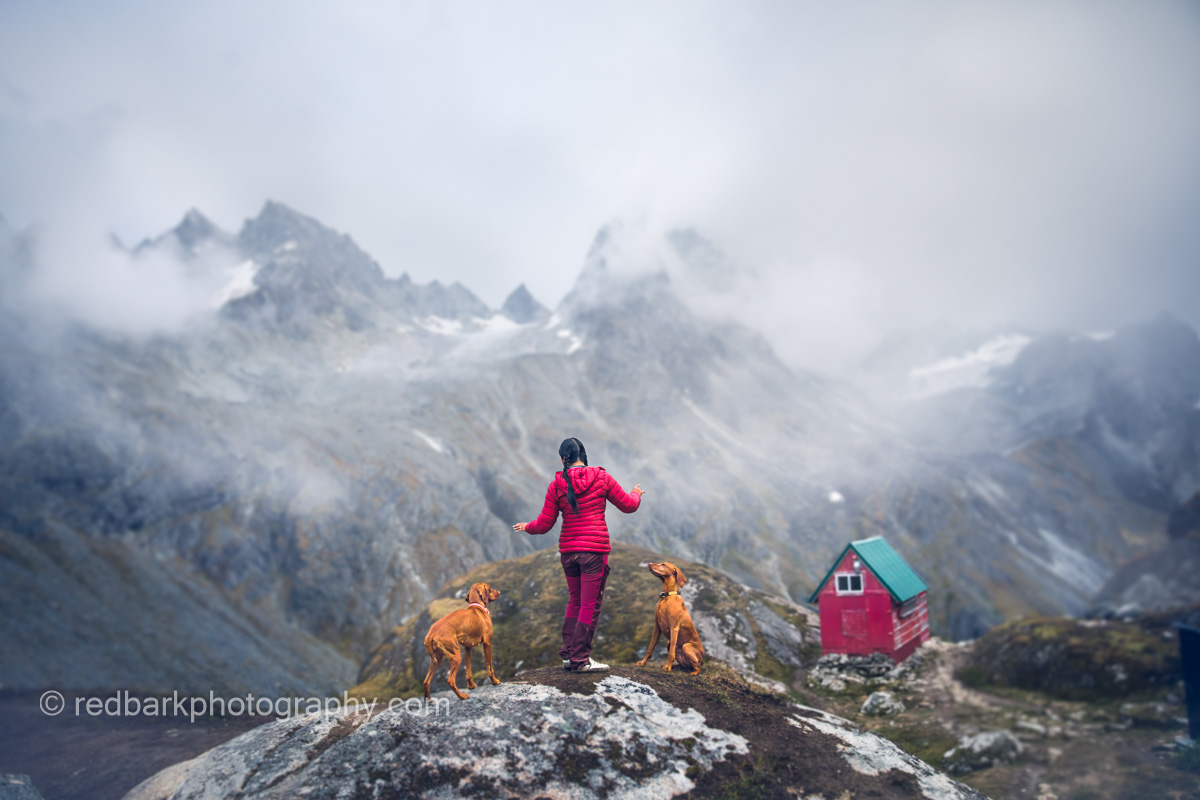
    First off was the 8 mile (13km) hike on the Gold Mint Trail to Mint Hut, where we planned to stay the first evening. The weather was beautiful and sunny (the only day it was!) and the hike in was the easiest part of the entire trip. We still did manage to get lost close to the hut, but we spent that time eating berries off the ground and taking photos so nothing very problematic. Because there had been so much rain, much of the trail was extremely muddy (re: a pond) so poles and waterproof boots were really helpful.

    Above Mint Hut, got a little lost

    When we finally found the hut, we spent the evening taking photos and enjoying the views. The clouds were coming in thicker so we were glad to have a hut to sleep in. Unfortunately the hut was also pretty damp and moldy smelling and all the pots and cups were pretty covered in black muck, so if you’re using anything stored inside, clean it well first. Also frustrating was the amount of dog poop left all around the hut. I’ve never experienced such poor management of dog feces on any trail or hut before (and that’s saying alot!) so PLEASE PLEASE pick up after your dog should you come here.

    Mint Hut exterior and views from Hatchers Pass
    Pick up after your dog here!

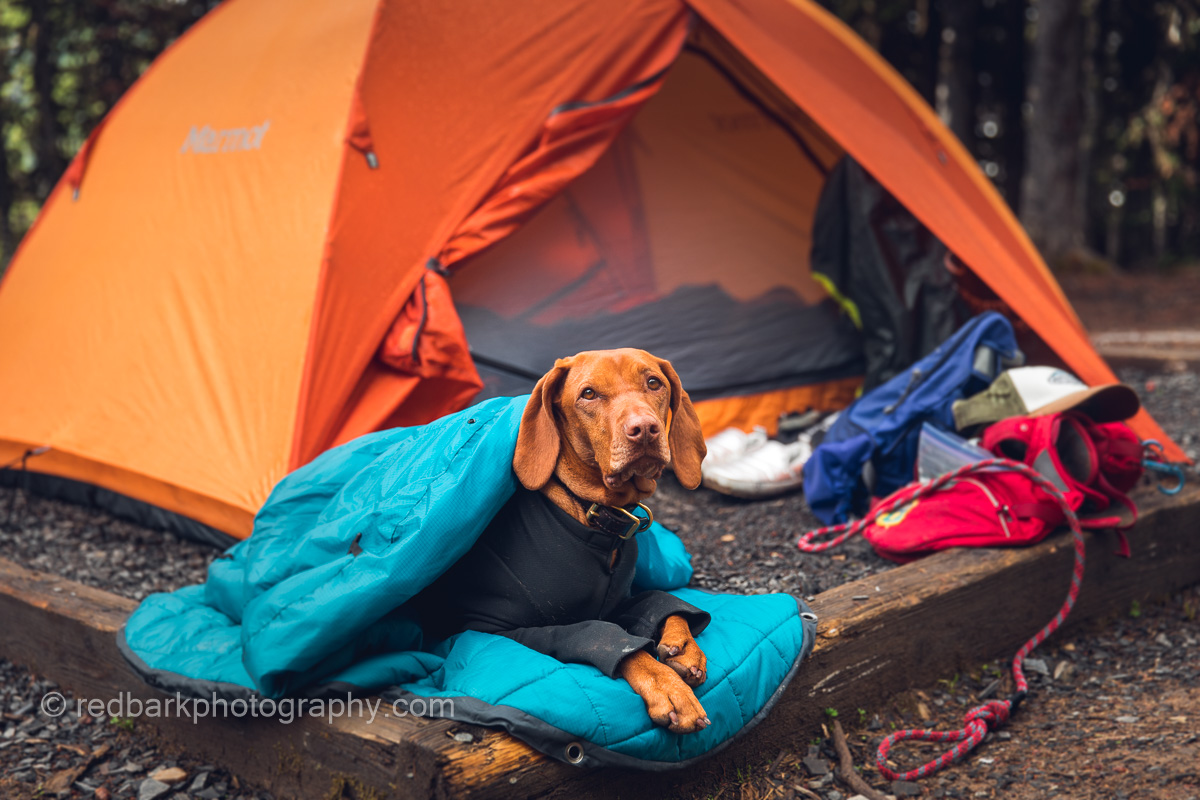
    Mint and Bomber huts are maintained by the MCA (Mountaineering Club of Alaska) so make sure you pay your yearly $20 fee online before you go. Because the weather had not been great, and we were at the end of the season (end of August), we were excited to try out the huts. Any of the huts along the route can be very busy so we brought an extra tent just in case, but luckily, there was only one other couple that ended up there that evening. With dogs, you must climb up a vertical ladder, or let them sleep on the ground. Our dogs are all smaller and hairless (and sleep inside our sleeping bags) so we had them up with us.

    Mint Hut interior and views from Hatchers Pass
    Mint Hut

    Mint Hut to Bomber Hut Via The Backdoor Gap (6.5km)

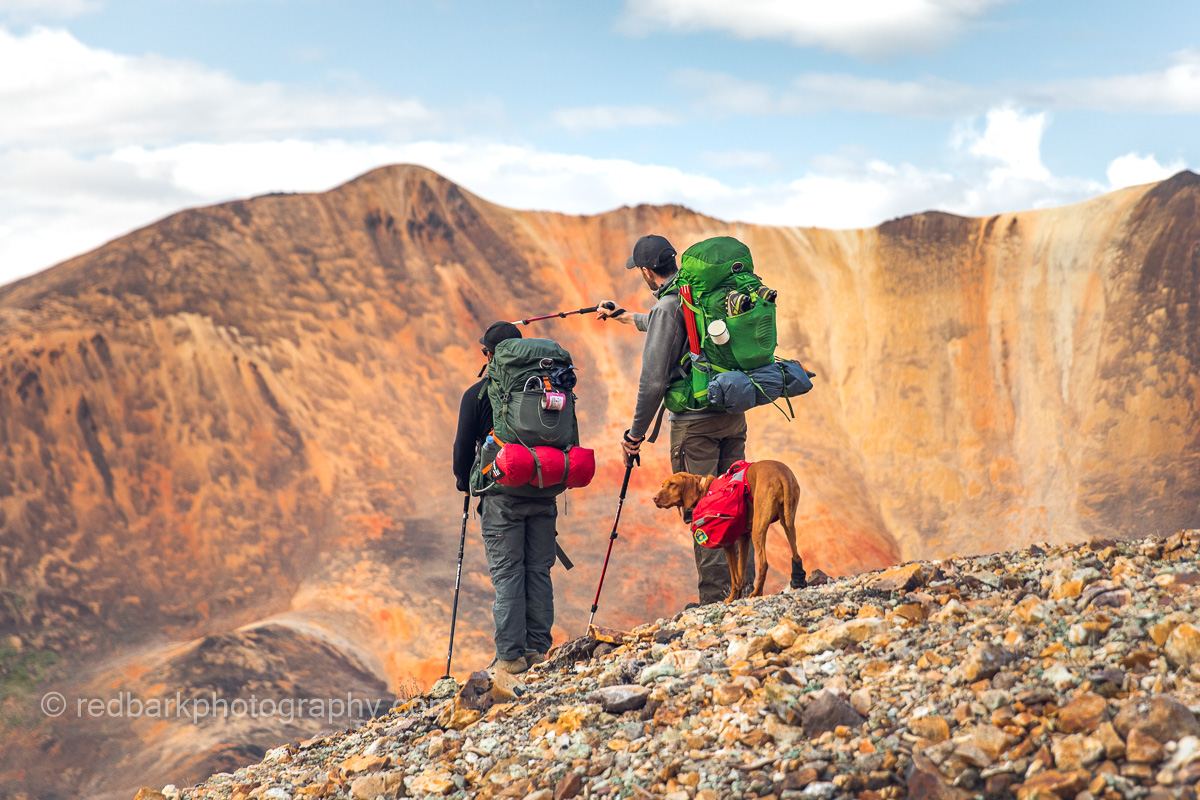
    This was so much fun! After Mint Hut, there are no more trails and you must be able to make your own way. You start heading up the steep scree boulder field heading towards the Backdoor Gap. The boulder field can be quite tough on dogs that are not used to climbing scree and rock. The rocks can rub paws raw, and the steep terrain can be dangerous if not navigated properly. Again, we didn’t take the most direct route, but we eventually did find the gap with extra scrambling and climbing and had quite a bit of fun doing so.

    Scree up to Backdoor gab
    Boulder field to Backdoor Gap

    The Gap itself is at the top of a glacier. You are climbing a small gap that can be snow-filled depending on the time of the year, or, in our case was currently snowing. Because it was so cold, windy, and snowing, we didn’t take too many photos and concentrated on descending. There were several questionable ropes hanging down that we used, but this section would be very steep for dogs.

    Backdoor Gap from Mint hut to Bomber Hut
    Kristina heading down the Backdoor Gap

    Next, you need to hike from the top of Penny Royal Glacier, all the way down. There were no crevasses we saw, and the glacier was pretty easy although quite slippery and was a nice break from scree climbing all morning. Eventually you drop down to the tundra and keep hiking until you find Bomber Hut. At this point it was starting to rain and we were quite tired from carrying our huge packs over the day.

    Backdoor Gab with Whiskey
    Kristina look over the Tundra heading to Bomber Hut
    Kristina look over the Tundra heading to Bomber Hut
    Bomber Hut and tundra in hatchers pass area
    Bomber hut in the background

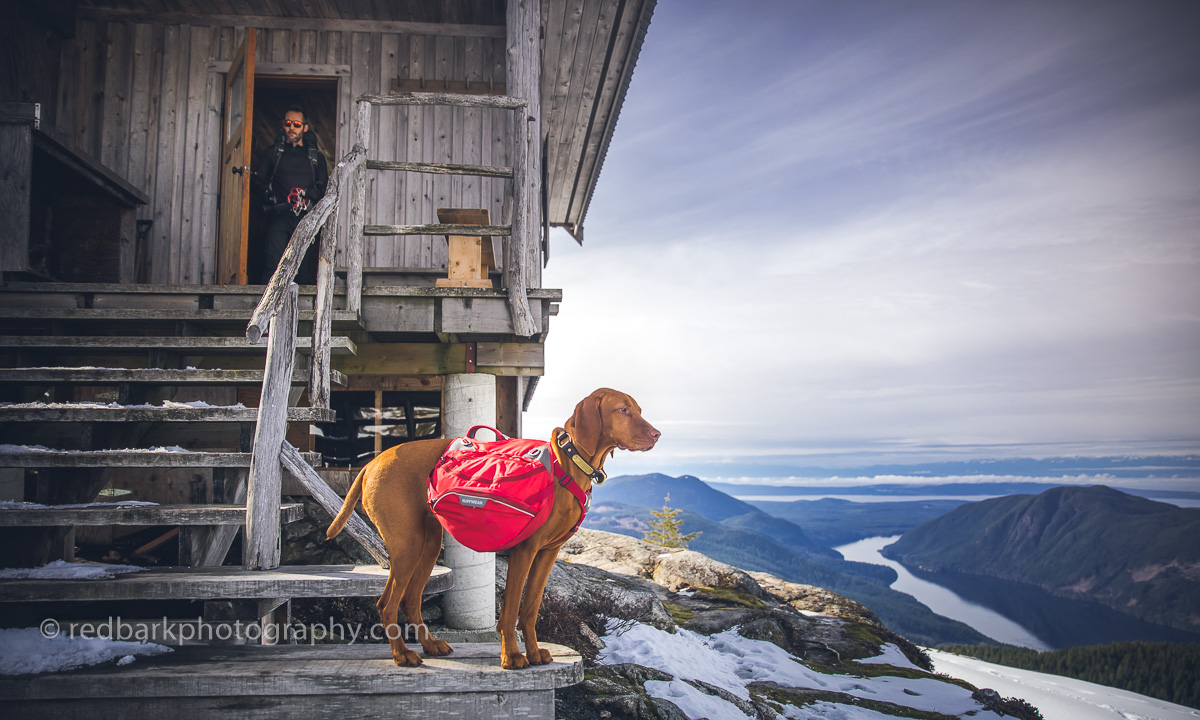
    Bomber Hut was much nicer than Mint (although maybe not so pretty from the outside). It’s newer and with better airflow so it didn’t smell like mold. Again we were the first ones in so we made ourselves at home and started exploring outside between spells of rain.

    Bomber Pass from Bomber Hut, Alaska
    Bomber Pass

    The view from Bomber Hut were breathtaking. As the rains came and went, we were audience to moody lighting over an arena of mountain passes. Over the afternoon, more people came to join us and we had a lovely crew to chat with for the evening.

    Clouds coming in and out with Whiskey
    Bomber Hut
    Bomber Hut with snow

    Our next day, we had been hoping to hike to Snowbird Hut, however it was pouring rain and snow so we decided it would be nicer to take a day in rather than soaking everything we owned in cold rain for 5 hours without seeing any views.

    Kristina in Bomber Hut Interior
    Spending a day inside Bomber Hut

    We spent the laziest day in reading comics that had been left behind and chatting to the huge group of people that wandered through. Somehow Bomber Hut became the meeting place and over the day we had over 10 people max out the sleeping space. There were even several outside in tents in the drenching rain.

    Full House at Bomber Hut

    Bomber Hut To Reed Lakes Trailhead Via Bomber Pass (10.5km)

    Bomber Pass, Alaska
    Looking at Bomber Pass, hiking between these mountains up Bomber Glacier

    Since we changed our plans not to go to Snowbird, we ended up hiking out of Bomber Hut through Bomber Pass on our last day. We woke up to snow. So much snow! The snow turned to rain, but we could see at higher elevations it would be very very white. After a quick breakfast we started to head out and were the first group up the boulder field and onto the Bomber glacier to Bomber Pass.

    Bomber
    1950s TB-29 Bomber Wreckage and Memorial
    A plane wheel in a crevasse

    Bomber Pass is named as such because there is a TB-29 Superfortress Bomber Plane that crashed during a training mission in 1957 killing 6. Because it was snowing so hard, the other group that was heading up had decided to bypass the wreckage (it’s on the other side of the glacier). By the time we had located and explored the wreckage the other group had caught up to us and we were able to head up the pass to drop down onto Upper Reed Lake.

    A very snowy and rainy day

    The pass was quite dangerous with a new foot of snow that had fallen over the past day (making it 2 feet of fresh snow). Underneath the snow was pure ice and I hadn’t brought my ice axe so at one point I slipped and slid and slid, thankfully catching my foot on some rocks before I slid down a kilometer down the glacier. The top of the pass was totally covered in snow (snow covered rocks) so it became very very tricky to make our way up. Normally there should be a clearer path with rope but everything was so covered in snow.

    Bomber Pass in fresh snow
    Bomber Pass was treacherous with many injuries this day

    Upper and Lower Reed Lake

    Unfortunately since it was snowing so hard, we made our way through Upper Reed Lake and down through the boulder field only thinking about survival. Steep fresh snow covered boulders are a minefield and not fun on a sunny day. We were soaked to the bone with huge packs on and dogs to control. The snowy rocks are even more dangerous for dogs, especially inexperienced ones and a dog following us later that day tore a nail or toe and had to be carried the rest of the way. Someone else also injured their leg on the descent so be very methodical and careful.

    Once to Upper Reed Lake, the trails started again. I could see that normally these trails would be absolutely beautiful, but snow turned to pounding rain and we were quite tired from the pass so we just put our heads down and hiked out as fast as we could. Everything was so soaked my phone stopped working and our dogs were quite miserable. The trails had turned into muddy river that I fell in (and just laid my head down for a minute). Another area was so flooded with water that it was higher than my knee level when I sloshed through. I think my dog was swimming.

    From the parking lot we were able to hitch a ride to Mint Trailhead and were able to change our clothes and dry out finally!

    I would love to visit again!

    If you wonder why my bag was so heavy, check out here to see what I carry with me for camping. If you’d like to try out tent camping with dogs, here’s how, and if you’re looking for winter dog gear, first aid kits for dogs, or just other adventures, check out the links!

  • Amazing Adventure Camping at Floe Lake (Rockwall Trail) with Dogs

    Amazing Adventure Camping at Floe Lake (Rockwall Trail) with Dogs

    The Draw

    Just google Floe Lake and Rockwall trail and you’ll know why it’s one of the most popular trails and locations. In fact, that’s probably how you got to this blogpost. It’s accessible, and possible as a day hike or run. The entire 55km Rockwall trail can be done in 3-5 days but the highlight is definitely Floe Lake and Numa Pass. Usually most people hike from Paint Pots to Floe Lake and we wanted to do the same, but booking the trail because our biggest issue.

    The view from camp

    Dogs are allowed on Rockwall trail but must be on leash, and there is wildlife (more about that later) that you must be prepared for (even on leash!).

    Floe Lake in the morning with overhead clouds

    Booking

    The Rockwall trail is a classic of the Canadian Rockies and difficult to book campsites in! I waited in line online when the booking opened and was 7000s on cue. By the time I got to book, most everything was taken. Floe Lake campsites is one of the most popular backcountry sites in the Rockies so of course it was taken. I booked some random days in Tumbling creek campground and Numa creek campground and hoped for cancellations. You can hike into each campground from the road and I just really wanted to see Floe lake with the dogs.

    The weather was mixed, some rain and some sun!

    Eventually, we checked daily and were able to secure cancellations at Floe Lake during our vacation time. We booked every cancellation we could and joined up the dates (and cancelled the ones we were not going to use). Unfortunately the way the booking system works is that your reservation fee is separate than a booking fee and you do not get the booking fee back. In the end there’s no benefit to cancelling an unused reservation (you will not get your money back) other than to let someone else use the campsite. I strongly encourage everyone to cancel unused campsites though, because it’s so limited and for all the evenings we were at Floe, there were usually unused tent pads.

    One of our day treks took us to a quiet pass

    Our Plan

    Because we were not able to book campgrounds in order for the Rockwall trail, we just aimed to book whatever we could at Floe Lake and do day hikes from the campground. Since Numa Pass and Floe were the highlights of Rockwall, we figured we would explore Numa Pass and check out other areas we could hike to within a day. Everything would be limited to what the dogs could do (Bodhi gets heat stroke and isn’t the most agile of dogs) and what we felt like!

    Above Floe Lake looking onto Numa Pass

    The Hike In: Floe Lake Trailhead to Floe Lake

    The hike in is not technically difficult, and about 10.5km from the Floe lake Trailhead. Most of the trail is narrow with a slight incline across a forest that is bare from a recent forest fire. When we hiked in, the trail was very overgrown to the point your couldn’t see your own feet and made for difficult footing with a dog on leash in front and a huge pack with awkward balancing. The trail is mostly exposed so if you’re heading out in the summer with dogs that are sensitive to heat, head out as early as possible.

    Hiking into Floe from Floe Lake Trailhead

    At some point near the end of the trail (at 8km) the trail climbs up dramatically and then you’re at the lake. There is a couple water sources that may or may not be running in the summer but we had access to water before the climb. This was my first hike with a pack in the year so I really struggled in the heat! Erica was kind enough to wait for me in the bug-infested breaks I had to take. I also lost a water filter I had not secured well enough to the front of the pack. All and all, not my best hike, but we did get there eventually!

    A rest log on the way into Floe Lake

    Wildlife

    Normally most people are worried about the Grizzlies and Black bears but we found porcupines and squirrels to be the most dangerous. Squirrels and chipmunks are awful because they run across your path without warning and then your dog instantaneously jumps at them pulling you and your 40lb bag down. Porcupines were a bit of a surprise! We encountered one on the hike up to Floe (halfway up the incline, so about kilometer 9 going in). It was right off the trail hidden, so Bodhi almost got quilled, on leash, on the trail before Erica saw what it was.

    Numa Pass, the porcupine was between this spot and the lake

    The second porcupine was between Floe Lake heading up Numa Pass, about 1km in. We never actually saw it, but Bourbon somehow got quilled by stepping on a quill on the ground after the dogs seemed VERY interested in sniffing around the area. Needless to say, keep an eye out for the creatures!

    Camping at Floe Lake

    Camping with a view

    The tent pads at Floe are all over a wide area, and not organized in any way we could understand. The best site with a view over the lake is the first ones you see as you hike in from the Floe trailhead. We chose one further away from others with dogs and settled in just as it started raining.

    There were 4 tables at the food area and a couple beaches

    There is a wonderful eating area with bear lockers right by the lake that has the best views. We loved starting and ending our day there, watching the light move across the mountains and lake and were always able to find a place to sit at a table or on the beach. The first couple days there were still ice floes moving across the lake but eventually they melted by the time we left.

    We fit 2 humans and 3 dogs into a decade old 3 person tent

    We met a couple dogs each day we were at the campsite but were able to steer clear of them without issues. Every evening we moved our tent closer and closer to the “best” spot and the last evening we snagged a photo-worthy tentpad!

    Day treks and scrambles from Floe Lake

    Looking down on Numa Pass

    In the end we stayed at Floe for 4 days, 3 evenings leaving us 2 days to explore. The first day took us to Numa Pass, up to a couple viewpoints, and a look at Numa Mountain. From the viewpoint, we then spotted some lakes in the far distance so we aimed for those (no trails, just wandering). We scrambled over a boulder field and scree and as the weather changed we decided to stop, take some photos and head back.

    Going for a walk!

    I had seen some treks to Numa Peak before we hiked out but there was very limited information on if the peak was doable with dogs or not. The next day we decided to aim for Numa and head back if it ended up being too difficult. It’s always hard to know how tough something is until you actually try the scree and test the angle. We made it to just below the notch of the peak before we stopped for lunch and called it. It would have been sketchy to get Bodhi past the point with exposure and the views would not have been better. We were just meters from the peak and were further along than we had been expecting!

    Looking at Numa Peak
    Numa Peak, we made it just before the notch

    Numa Peak was such a highlight, but I would not recommend it for people and dogs that are not comfortable hiking and scrambling. You can walk right up to the scree and see for yourself but there is no rescue or rangers here so you must be self sufficient and be extra careful if your dog is not full capable and under control. I also recommend a harness made for lifting, and paw care if your dog’s paws are not weathered for scree.

    The best views

    Would I hike the Rockwall trail again?

    Oh yes!! This was such a lovely location, very peaceful for how popular it is. Definitely be aware that you are in the backcountry and take extra precautions but Floe Lake was such a highlight of my year. I’m so thankful I have a friend to do this with, one that understands my dog limitations and is willing to camp, hike, explore and scramble with me!

  • the Best Tents and Considerations for Camping with Dogs

    the Best Tents and Considerations for Camping with Dogs

    Camping with dogs can mean freedom and an escape from the city, but it can also have it’s own complications, especially if it’s your first time or you camp solo. A good tent can really ease the transition and prevent accidents that might happen. There is a large variety of tents prices to go with those and since this your “home” while outdoors, it really is worth choosing wisely.

    Prepare

    So you want to go camping but your dog’s never been in a tent? After you purchase one, it’s a good idea to set it up at home, or in the backyard and take a nap together inside. Work on going in and out with treats and teach your pup it’s a good place. Check out this other post I wrote about first time camping with a dog and things to think about, as well as how to introduce the tent. Just please do not zip your dog inside the tent alone unless your dog is very chill, trained, and calm.

    Whiskey with my 1ppl Big Agnes UL fishhook- there are no zippers

    A Large Doorway

    When choosing a tent, look for a larger doorway. Doorways that are small and narrow will be difficult to get in and out when you are stepping over a sleeping pup, and can be frustrating at night. You want a good zipper that doesn’t snag, and ideally several options to open it quickly from inside and out. It’s great to have space to put a towel on the ground to clean paws before they jump onto your sleeping bag, and also space to put shoes, a bag, easy access to leashes. Finally you want to have a wide sightline outside for your dog, approaching animals, and anything else. The more animals you have, the more you will appreciate a wide entryway.

    I’ve now upgraded to a larger 2ppl Nemo Dragonfly tent with 2 dogs

    Mesh

    I cannot stress to you how much a good quality mesh is important with dog nails. UL or Ultra lightweight tents sacrifice tough materials including mesh for weight so it’s easier to carry but this lightweight mesh is very easy to puncture. Whiskey likes to “paw” at the doorway to enter and my heavier tents have withstood this. There are many snags in the mesh, but no holes but I’ve heard so many dogs ruining the popular UL Hubba Hubba mesh trying to jump out at the wrong moment.

    This Marmot Ajax 3ppl tent is well over a decade old and still going

    Freestanding

    Some tents, especially lightweight tents can be non-freestanding where you need to stake lines in order to create the tent shape. They prioritize weight over convivence and can also use trekking poles as tent poles. I don’t recommend these for dogs for several reasons. The more lines you have running from the tent, the more entanglement you’ll get with legs and leashes. Bourbon seems to have fun pulling out pegs on my last trip and the inside of my tent tends to wander with two dogs so a strong, freestanding tent is my goal. If your tent structure goes down every time a stake gets pulled, it could get frustrating! These tents also take longer to set up and especially with multiple dogs, rain, and wildlife, you just might want to have less complications in life! Lastly, I camp in rocky locations and places where pegging isn’t really an option, so a freestanding tent is a must.

    Group 8 day backpacking trip

    Pockets

    I LOVE pockets! Pockets in tents are amazing. There’s always collars, leashes, sprays, towels, and a multitude of things that need to be packed away in it’s own place. I always put my headlamp, dog collars, and first aid things right next to my head. Pockets are also great for drying out whatever the dogs get muddy, and keeping the tent floor from becoming a huge mess when they start digging into your sleeping bag.

    My cheaper, heavier tent withstood the snow and wind better than the UL tents my friends had

    Footprint/Flooring

    Buy it, use it! Spend the extra cash for a footprint and use it, or a tarp is just as good. A thicker tent may not need a footprint (I don’t always use one myself when it’s dry) but lighter tents will need one and it will keep your tent lasting longer and dryer and prevent abrasions from rocks and dog paws digging.

    I suggest a footprint with snow or wet ground

    Single/Double wall

    Some lighter tents or cheaper tents may be single-walled. They tend to be solid so water does not go through but if pressed, water will condense through. These will not be as ventilated as double walled tents that will have mesh as an inner layer with a waterproof fly. I highly suggest double walled tents. Many dogs will like to lay in a corner of the tent pushing against the tent walls and if it’s a single layer, can bring water in. The single layer laminated wall is also the only layer between you and the elements so if it rips, you will need to pray you have enough duct tape! When the weather gets too warm or stuffy, it’s also nice to be able to take off the rainfly and let the tent air out or even enjoy the stars! But if your dog isn’t feeling safe open to the elements (many dogs feel uneasy) you can put the fly back on and create a closed off den.

    This is a cheaper Coleman 6ppl tent we car-camped out of for a month and half

    Car Camping

    With weight not a problem, I would suggest a large tent you can stand inside (check the height) and a second-hand or affordable one. You don’t need lightweight, and most tents these days are made well enough to withstand wind, rain, and typical use. The ability to stand-in and change or wrangle dogs without kneeling is SO helpful. Unless you’re camping more than 30 days a year, most cheaper tents will work just fine. We forgot our tent on our trip to Alaska and bought a cheap Coleman tent at Canadian Tire that lasted the entire trip fine under all weather and even crazy winds. With cheap tents, expect to replace pegs and take a little bit extra time to put together. The poles may have cheaper elastic but that’s also easily fixed with duct tape. Our North Face tent was much better made and still survives to this day, but it’s heavier (better fabric), packs easier, and has better zippers. If this is your first time out camping, put your money elsewhere (like a good mat!).

    This is my 4ppl Northface tent for car-camping that you can stand up in

    Backcountry Camping

    This is where weight and packability matters. For most brands, there are UL tents of various sorts and a cheaper line of tents. Even though the UL tents tend to be more expensive, I do not suggest them because the material is easier to break and do not stand up to dog use well. Unless you have one well trained dog and weight is of utmost importance, I would suggest a heavier, cheaper tent and take on the extra 2lbs it may weigh. Either way, bring some duct tape on your trip in case something rips open and a big scoop of good humor! Camping with dogs is always interesting!

    A double walled tent allows you to take off the fly and enjoy the stars and breeze

    We’ve used the Marmot Ajax 3ppl tent for 2 of us and Whiskey for well over a decade. I’ve got a UL 1ppl tent for solo camping that’s only 2 lbs (it’s the Fishook tent with no zipper) but that would be too tight with 2 dogs, camera gear, and clothing. I still carry the 3ppl 6lb tent when just solo camping with Whiskey sometimes because it’s just so much more comfortable if the conditions are rainy. Being stuck in a 1ppl tent for a rainy evening or afternoon is SO uncomfortable and I would rather carry weight than be stuck in an awkward tight position. Researching further I just ordered the Nemo 2ppl tent as my new solo tent and I’ve been considering the Copper Spur 3ppl tent as a new 3ppl option but am holding back due to the flimsy material and huge cost. I think if I’m sharing a tent, then sharing the load would be acceptable.

    My heavier Marmot swallow 3ppl tent for winter camping

    Winter Camping

    I haven’t done too much backcountry snow camping but I did buy a heavier vintage tent for the purpose. It’s very warm, with loads of venting options, space, and can seal up tight if needed. Winter tents that are light are very expensive, so vintage was the way to go! Even though it’s not the latest tech, the huge zippers, heavy mesh make me so comfortable with dogs running in and out. The last time I used the tent it was actually too warm in the morning, and I haven’t found too many friends that want to winter camp so I just haven’t had the opportunity to use this one too often.

    FAQ

    What’s the best backcountry tent for 1 person and a dog?

    I would suggest a stand-alone, double walled, cross-bar 1 or 2 person tent to share with a dog. Crossbar tents are quick and easy to set up with a large door and slightly thicker mesh (not super UL). Make sure the zipper is well made and does not snag.

    What’s the best car camping tent for dogs?

    If you are starting out, get something that is easy for one person to set up (unless you always camp with multiple people)

    How do I teach dogs to camp in a tent?

    Check out this blog about first time camping with dogs!

    What other gear is good for camping with dogs?

    Here’s a blogpost on Our Best and Tested Gear for Camping with Dogs

  • How to: First time Camping in a Tent with Dogs

    How to: First time Camping in a Tent with Dogs

    Never been camping with your dog? Here’s the basics to get you thinking!

    Planning/Before

    -set up a tent in your home, or your backyard, go inside with your dog, bring lots of treats, and hang out to get them comfortable
    -zip up and down the tent while you are inside together
    -take your dog inside the tent after they are exercised and take a nap together
    -Open a door halfway and show them how to get in and out even if the doorway isn’t open all the way
    -Teach your dog to wait until you open the door to jump in
    -Teach your dog what the mesh is, that they cannot go through the mesh when it is closed
    -do not zip your dog inside the tent, with you outside (or vice versa) until you are confident they are calm
    -start with car camping, you always have a place to escape to, and you can easily bring more gear
    -make sure you camp with someone experienced or are comfortable camping alone, there’s nothing worse than having to take care of both your dog and a human!
    -choose a place to camp where you can easily walk your dog during the day, we always research trails around the campsite as well as trails while driving to and from the location. Do this before you are out of reception!
    -I advise to get tents that are not ultralight. Ultralight tents are have very thin mesh and materials and tend to rip quickly when a dog taps the material in order to get out. Duct tape is always a good idea!
    -here’s a post I wrote specifically about tents and dogs
    -Babywipes are always useful! Camping was never a clean activity!

    When you get to the site

    -go somewhere that isn’t packed with as much space as possible between campsites, book or choose a campsite away from bathrooms, perhaps in the corner of the campground where you will have the least amount of people wandering by
    – bring a long line to tie up your dog if they wander, a Tuflex check cord works the best as it doesn’t knot, is easy to clean, and is still flexible in cold weather
    -if there are bugs, see if you can bring natural bug repellent like citronella candles, read all the directions of bug repellents. Remember your dog is (most likely) smaller than you and are more effected by poisons. There are some bug sprays and electric repellents that state you cannot use when you are eating or around small ponds with fish (it poisons the water) or with babies or kids. I would not use these with pets!
    -a dog mat is always a good idea, even if you dog doesn’t need it, just to keep everything clean, and to have a “place” for your dog to return to on command.

    During

    -say hi to your neighbours if they’re friendly and introduce your dog, mention that it’s their first time camping and bring treats if it helps. Be really nice especially if they have kids or another dog.
    -walk your dog around the campground if he’s friendly
    -respect your neighbours and make sure you clean up after your dog
    -if your dog wakes up early or stays up late due to the unfamiliar territory, take him for a walk to tire him out
    -try and keep to any routines you might have at home (time you eat, sleep, bedtime routines)
    -close the fly so your dog cannot see outside if they are guarding, or barking at noises or people
    -keep an eye out for people passing by and work on rewarding your pup for not barking, and for being friendly, the site will probably be “his” territory so you’ll have to make sure your dog knows who’s in charge and that you have your eye on things
    -If you must leave your dog (to go to the bathroom or clean dishes for example), leave them in the car to avoid wildlife, strangers coming by, or whatever else may happen, do not leave your dog in the tent alone. I’ve had my tent “walk” after me on occasion. You can also leash your dog outside the bathroom or ask someone to keep them while you go.
    -keep a jar of treat (or kibble) around and use this as a training opportunity, although respect rules about food and wildlife, especially bears.

    Afterwards

    -Pick up after yourself and your pup when you leave the campground
    -Inspect your tent for any holes or damage and repair it before the next trip
    -If you hit any issues with camping, work on training at home before going out again. If there are issues guarding, or anxieties, you can practice at home or in a backyard before heading out
    -Make a list of equipment or situations that could be improved. Depending on where and how you camp, there are loads of gear and solutions that may be available. For instance my dogs prefer to sleep on my mat, in my sleeping bag no matter how many dog beds I bring, so I now have an extra long, extra wide mat and sleeping bag to house them. However while I’m not actively sleeping, I bring their own beds that can be dirtied and used in and out of the tent so they can go in and out of a bed while not making a mess out of mine.

  • Guide to Hiking and Camping at Assiniboine with Dogs

    Guide to Hiking and Camping at Assiniboine with Dogs

    Reaching Assiniboine’s epic views involves some logistics, and planning but it isn’t very difficult. Getting there with dogs is a whole different experience! For all the right reasons, dogs are not encouraged in the park and there are loads of limitations that can take quite a bit of researching to find out. I’m all for limiting the backcountry to dogs that are trained and have experience (imagine if anyone at your local dog park could fly their dog in for the weekend) as this place is so special and is chalk full of wildlife and there are a list of things to consider before attempting to come.

    Nub Peak with an oncoming winter storm to the left. We had to abandon camp early
    An easy day hike around Magog Lake

    Dogs are not allowed in any shelter, building, on the helicopter, on the bus to Sunshine valley, nor the gondola. They must be under control and on leash. There is abundant wildlife everywhere!

    At Lake Magog with Mount Assiniboine looking over
    With Erica coming in through the Assiniboine pass and meadows full of ground squirrels
    Views from Nublet are hard to beat

    Sunshine Village Route from top of Gondola

    There are 3 main ways of arriving into the main campground at Lake Magog (there’s others that are less well travelled, I’ll stick to the 3 main ones). The first and easiest is a quick helicopter ride from Mt Shark Trailhead but dogs are not allowed. The second is hiking in from Sunshine Village, however dogs are not allowed on the bus to Sunshine village, nor are they allowed up the gondola (so you can still do this, however it would likely involve at least one night camping along the way and more distance and incline than the next option). Lastly you can hike from Mount Shark trailhead taking either the Wonder Pass or Assiniboine Pass (the trail splits at about 15km mark).

    Wonder Pass is harder but well worth the effort on a sunny day during larch season

    Details/Tips/Tricks/Lessons Learnt

    Our tent can (and has) taken 1 foot of snow. We bring layers for dogs as well as humans, extra food, daypacks, rain gear and have seen deer, grouse, rabbit, grizzly, and marmot at camp.

    The trail from Mt Shark is about 30km to the campsite give or take 2kms and dogs are not allowed in the shelters along the way. The camping along the route isn’t very special (also buggy!) so I’ve always hiked straight in. There is also a special trick to make the whole thing easier- although dogs are not allowed on helicopters, you can pay to fly in your bag, or gear. However, there are a couple things to note with this “trick”. The first is that you pick up your gear at Assiniboine lodge which is 2kms away from the campgrounds so you must be able to walk your bag over and back easily (I do not suggest a 50lb duffle bag at the end of a 30km hike!). In order to fly your gear in, you must check in your gear in Canmore prior to driving to the trailhead so make sure you time it right or you might not get your gear in time! The second time I did this hike, there was no such option available during Covid, so we had to carrying everything in.

    Last note is that it makes much more financial sense to fly in a person with 40lbs allotted gear if you have that possibility (instead of paying per lb for gear) but I’ve never been in a group large enough that we could fly someone in. Also if you have a problem, they will not fly your dog out, so make sure you have everything you need to hike yourself and your dog out!

    Hiking in through Assiniboine Pass with a full 5 day load pack

    I’ve done this trip twice, and each time it’s not gone to plan. Mother Nature likes to remind us that she’s boss and we need to roll with whatever she throws. The first time I did this hike in September we got snowed in the second night waking up with more than 1 foot of snow on our tent. The weather report said there was more coming and everyone started clearing the campgrounds, however we couldn’t join the exodus into the cabins because of Whiskey (no dogs allowed), so we ended up hiking out early several days early during an early winter storm. It was a mentally tough hike in snow that turned into relentless rain for a really really long day and at the point our minds had become really numb we almost walked right into a bull moose in the middle of the trail. Thankfully the moose didn’t charge us and went into the forest and we continued on until we got back to our car and into warm dry clothes.

    The second trip I came with Erica and her hiking pole broke early on and she experienced some really bad leg pains with an already injured knee. Since we had to carry all our gear in (45lbs+packs), our hike slowed to a crawl and we adjusted our trip to have many more rest days and cancelled a side camp trip to Og Lake. On both trips the weather was very difficult to predict and far from perfect (I have this luck that it’s always freezing on my trips). However the bad weather seemed to coincide with rest days and just makes me want to go again so I can finally experience the elusive Assiniboine experience that doesn’t need all my winter and rain gear.

    Winter storm hitting us while we are on Nublet

    What I’ve learned from these adventures to Assiniboine is

    • Book extra nights at the campgrounds so you can adjust your trip accordingly. Let the rangers know if you are leaving early though, so someone else can take your tent spot.
    • Fly some of your gear in, but pay attention to drop off and pick up times (non-covid times)
    • Use an Inreach Garmin to get an accurate weather report of the day (pay for the detailed report) and for a safety communication device. The ability to predict weather is worth so much if you’re heading out on a 6 hour hike alone in spotty weather.
    • Train for this hike if you are doing it in one day, train your dog, and train carrying the weight!
    • This location is PACKED full of wildlife including meadows full of ground squirrels, marmots under the outhouses, grouse, rabbit, deer, grizzly bear, and moose (I’ve seen every one of those on this trail!). You MUST have control of your dog (and I’m not just talking about hooking up a leash!) because if your dog pulls you towards every single squirrel you are going to be damaging your dog’s neck and you’re going to be dragged around like a puppet. You’ll have a much better time if you can hike and watch the wildlife with a dog calmly at your side.
    • Use hiking poles, your knees will thank you
    • If you are camping with dogs, study the campground map and find a quiet corner to camp at. I like site 16, although furthest from bathrooms and the shelters/bear caches, I will bother the least amount of people. Whiskey will have less chances to feel like she needs to warn me of people approaching (less anxiety for everyone) and I’ll be able to relax more.
    We are so grateful to be able to experience this place with our pups

    The Hike in From Mt Shark

    Hike from Mt Shark to Lake Magog with two passes

    Mt Shark trailhead starts from a long dirt road from Canmore with loads of potholes and corrugation that might have your teeth rattling. The road is exceptionally beautiful at sunrise and sunset if you can time it well! The trail head has great facilities including bathrooms, picnic tables and a large garbage. The trail actually take you across province lines (from Alberta to BC) and across park lines (although NOT timezones funny enough).

    There are several side trails so make sure you have a good GPS map when you start (every wrong turn will cost you extra this day). The beginning of the trail is nice, wide and flat and is the quickest part of the hike. Once you pass the bridge over spray river/lake you start into the forest where the trail narrows but is till really easy to follow and hike. You’ll pass by BR9 campsite and keep going towards Bryant Creek Shelter. There is water at the Spray Lakes bridge, at the campsites, and at Bryant Creek Shelter (with Br 13 and 14 close by). Remember dogs are not allowed in the shelter but perhaps during a storm it could be life saving.

    Wonder Pass with Larches in full glory
    Erica with Bodhi halfway up Sunburst for sunset
    Weather is always changing (at least with my luck). Check the weather as much as possible

    Here you need to decide if you are continuing onto Wonder Pass or Assiniboine pass. This is where the incline starts and you need to start working! Assiniboine pass is easier if you are carrying a ton of weight- it’s slightly longer but feels easier overall. Erica and I chose this way as she was in pain and it was the least impact. I also chose the for the way down during the storm I was hiking in on the first trip. Assiniboine pass has two options- hikers trail or horse trail. The hikers trail is higher with better views but is technically harder with more bridge crossings. The horse trail is lower in the valley and can be muddy with lots of shallow water crossings. Earlier in season I wouldn’t suggest the horse trail unless you don’t mind your feet being soaked but later in season the hiker’s pass may be closed and that may be the only option (as we experienced during the storm).

    Wonder Pass with Larches
    Trail from the lodge to camp is 2km of amazing

    Wonderpass takes you to Marvel lake, around the side of the lake, and up some switchbacks into the pass between Wonder Peak and The Towers. If you miss this pass on the walk in, it’s definitely worth a day hike from the campground! In the right season the larches are just amazing and the pass is a very easy hike from the lodge. During the height of summer, watch carefully your water sources if it’s warm and know that not all the creeks on the maps may be flowing.

    Hiking back in a storm, we went from snowstorm to rainstorm and then to a bull moose
    Looking at Sunburst Peak from the lakes
    Looking at Sunburst and Assiniboine from Nublet

    Once you have set up camp, you have loads of day hike options. The money shot is from the Nublet/Nub, a quick 7km+ (to Nublet) hike return from the campground. There’s loads of places to scramble and climb depending on your comfort level, as well as your dogs. Remember this is very remote and wild country with no rescue or fly-outs for your dog so please know your level and stay well within it. Even the Nub hike can have grizzlies so always bring bear spray and call out for bears.

    We’ve scrambled halfway up Sunburst Peak (no trail), all the way up Chucks ridge (no trail), Nub Peak via Elizabeth Lake (no trail), Windy Ridge (14km trail) and there’s still so much I want to do! For rest days you can walk around Lake Magog, Sunburst Lake, Cerulean Lake and Elizabeth Lake. In all, remember that the goal for your 30km hike isn’t to just get to Lake Magog, it’s to get there to start hiking so make sure you’re up for it!

    Scrambling up Nub from Elizabeth Lake (no trail)
    Windy Ridge, not a single person on the trail, not a technical trail
    Erica and Bodhi at Windy Ridge looking into Banff with a rainbow
    Chuck’s ridge was an adventure, totally not most-dogs friendly
    Only take mountain goats up scrambles!

    There are very few wild places like this that still allow dogs so please represent us dog owners well! Clean up after your pup, keep clear of other campers, keep on leash, and respect the wildlife. There are loads of birds and chipmunks at every eating station, a marmot lives under one of the outhouses, and we saw deer and grouse right at our tent (and a grizzly mom and cubs had been through our campsite while we were out). Scrambles are not easy so please hike well within your dog’s limits and please do not use earphones so you can hear and see wildlife! Lastly, don’t let your dogs lick the frogs on the trail, Bodhi had a bit of a reaction when he (on leash) had a taste of one!

    Girls and their dogs! It’s a ton of effort but so worthwhile
    Whiskey’s second time around and we still didn’t clear skies…next time!

    Here’s a list of dog camping gear that I can’t live without

    and a list of human hiking gear that I’ve grown to depend on over the years

  • Our Best and Tested Gear for Camping with Dogs

    Our Best and Tested Gear for Camping with Dogs

    I’ve been backcountry camping with Whiskey since I’ve had her and we’ve tried so many different forms and types of gear. While I’ve gotten used to carrying a significant amount of weight, every piece that I bring needs to be purposeful, tough, and lightweight (in that order). For reference we hike and camp in bear country, usually with the threat of variable weather, rain, snow, river crossings, and in wild country. We avoid crowds and sometimes hike without trails. Normally I go with girlfriends but once a year tend to go alone. Over the year I tend to camp close to the snowline, in the alpine, and summit peaks close to camp. Ticks are not an issue for us being so cold, but other wildlife is, so keeping scent-free is very important. I hope our gear guide is helpful, please let me know if you have any specific questions! A few links may be affiliate but are meant as a guide as to where you can buy the product. I do not promote one brand above others and have purchased most of the gear myself.

    Whiskey rocking her Palisades Ruffwear bags and K9topcoat base layer

    The BASICS

    Dog leash- Wilderdog– I love gear that’s multi-purpose especially if I’m needing to carry it in on my back up a mountin! Wilderdog uses climbing rope and real locking carabiners. I’ve used the leash for everything from hanging a bear bag, lifting up my pup up some steep sections (from the harness, not neck), to even installing my tire chains. We’ve used the leashes for several years and they’re in top condition.

    Hiking Pack- Ruffwear Palisades Pack– My love of this bag matches the love of my own Osprey. I love LOVE how the packs can come off and on so easily so we can take it off during food breaks. I ask Whiskey to carry a hefty load on multidays and every break she can get really helps. The harness underneath is perfect for summiting trips so I don’t need to bring another piece of gear. It’s good to note that we did break one of the tiny buckles that secures the bag onto the side of the dog (it’s not a major problem), and I’ve been too lazy to ask for a replacement buckle. The material of the bag also does rub and wear overtime on bushes and trees but overall I’m just so impressed by the ease of this product.

    So much gear needed for backcountry camping, but so worth it

    Harness- Ruffwear Flagline Dog Harness– Whiskey doesn’t tend to pull but if you’re hiking all day long on-leash it’s much more comfortable for everyone if your pup is on a harness, especially around mountain tops and technical scrambles. Bourbon is new to technical scrambles so I would always recommend a handle on the harness to help your dog up sections and have the easiest way to grip them should they slip (also easiest for a friend to help as well). If you’re even thinking you may need a harness, I would always recommend one with a handle.

    Tent– Depending on the size of your dog, you may need to go up one person size of your tent (ie if you’re two people with one large dog you may need a 3ppl tent). I also highly recommend NOT getting an UL tent as the mesh on those are so easily torn with dog paws. Whiskey loves to “knock” on the mesh to ask to be let in and out and also to say hi to friends in the morning. UL tents also have snaggier zippers which aren’t good if you need to unzip in a pinch for a pee break/barf emergency.

    I use vintage Marmot tents that are really heavy compared to what’s available these days but I just find the doors are huge, zippers are great, and the material lasts so well. Our 3 person Ajax tent has been under a foot of snow, in all conditions and we’ve had it for a decade now. I also highly recommend that you leave the bottom of the tent unzippered and teach your dog how to go in and out without having to ask you to unzip and zip each time. I’m totally resigned to the fact my tent’s going to be messy with dogs so I just keep my clothes in the corners. Lastly even if the evening calls for blue skies, consider bringing the fly unless you’re sure your dog won’t be bothered by watching the outdoors. I find most dogs sleep better when they cannot see outside.

    The Klymit Moon Dog Mat

    Klymit Moon Dog Mat– A really tough blow up mat that makes all the difference when the ground is cold, or you just want a comfortable spot to put your pup. Like humans, dogs lose so much heat from the ground so having an elevated surface really helps. I don’t bring the outer cloth layer anymore as it just adds bulk and weight and I’ll almost always bring a doggy sleeping bag instead. The mat is also great in canoes or anywhere else you want a mat that’s waterproof. I love the inflation system and I’m not even nervous about dog nails on these tough mats.

    The Whlyd River Sleeping Bag that I carry on colder hikes

    Whlyd River sleeping bag– Discount code: WHISKEY10
    the best and warmest doggy sleeping bag out there. There’s so many options to adjust the bag to your needs and dog’s comfort, and a strap at the bottom to keep the bag on a mat. Available in 3 sizes we use Medium, Whiskey loves her bag and crawls right on as soon as I pull it out. There should be a down UL bag coming soon (the original uses synthetic insulation which is better for damp/wet conditions) that I would also totally recommend if you need to go light and don’t need the ultimate warmth the original provides. I use the UL bag during the day and slip the bag over the footbed of my own sleeping bag to keep me warm Whiskey Whiskey crawls in to join me. Another sidenote is that I normally take off most of Whiskey’s jackets if she’s going under the sleeping bag so she can warm up and so any dampness (it’s always damp where we are) doesn’t keep her cold.

    Gundogsupply collar– We have lots of fancy collars but tend to go to these basic collars with nameplates. I’ve lost too many collar tags to trust them and if for some reason I lose a dog, I want to know my contact information is going to be on her collar. The collars are super tough and reasonably priced.

    Our Ajax Marmot tent has lasted over a decade

    the Human

    Klymit extra wide sleeping bag– Whiskey sleeps in my sleeping bag with me at night (the dog mat and sleeping bag are for the rest of the time we are at camp because I don’t’ want her crawling in and out of my sleeping bag during the day). I haven’t found many options for extra wide bags and this one is amazing. It fits Whiskey and I with room to spare (I’ll report back if I can fit Bourbon as well) and comes in two warmth options. Please do note that when Whiskey’s in my bag I cannot keep the face section tightened so although Whiskey does add extra heat, the open bag does make it colder at the same time. Also, I take of Whiskey’s collar and clothing before she shares my bag so we don’t get tangled!

    Nemo Sleeping mat– Not a dog thing, but I find if I’m sleeping with a dog my mat needs to be higher, wider, and more comfortable since we’ll both be moving around. I love this mat and it’s been much warmer than other mats of the same warmth rating.

    for more Human hiking gear, here’s a more detailed post

    the Kitchen

    Dog bowl- I’ve tried the soft collapsible bowls but they break much easier (of two I’ve had both had holes from the dogs pawing at them). The fabric ones last but they’re a pain to clean when you feed something messy and leave food smells for the animals. I’m still looking for the perfect dog bowl!

    DogFood- I highly recommend Open Farm Freeze Dried Raw (code WHISKEY10). It’s super lightweight, comes with a suitable package (so you don’t need to repack), I use half of her daily allowance for recall treats, and Whiskey’s poops are always so good.

    Trying out my vintage 4 season tent, Whiskey chowing down on dinner with her dog mats

    Earth Rated Poop Bags- Use the compositable bags and dispose of dog poop when you also need to go (in a proper waste management method like a cat hole). Bring a freezer zip lock bag to place the poop until you can dispose of them so you don’t have an “accidents”. I normally ask Whiskey to carry her own.

    Bear Bag- Ursack- If you are camping in bear or critter country without suitable bear boxes, animals can easily get into your food at night. I really suggest these bear and critter proof bags to keep your food and seal it in a scent-proof bag (drybag) if you can. They’re heavy and an nuisance to carry but it also means you’re not attracting and feeding wildlife, putting yourself in danger, making sure your campsite stays open, and of course that your food isn’t eaten.

    My Ursack poking through the bottom of my frost covered tent

    the Extras

    night light dog collar– There are clip on lights for dogs in the evenings but I’ve preferred these light up collars as others can see it’s a dog easier (it’s so scary if your dog walks by someone else’s campsite at night but much less threatening if they look like they’re ready to party). It’s also less likely that your dog may turn around and the light is obscured.

    Bug Protection- I’ve tried everything and nothing “natural” works for more than 5 mins. If it’s bad I’ll keep Whiskey in the tent, cover her with a jacket/blanket, or put a jacket on her that I’ve sprayed with DEET. Otherwise you just have to keep moving. I believe Hurtta makes a bug suit but I’ve never tried it as Whiskey’s not allergic.

    Winter camping involves more gear, but cabin winter camping is at least tent-less

    Dog jackets- We’ve done loads of reviews on dog jackets but I didn’t want to ignore the need of protection in the evening when the temperature drops. Like humans it’s good to have layers, fleece, waterproof options, and maybe even a base layer depending on where you are going. The doggy bag is super warm but if you’re going to be out for long periods of time, having options is always great!

    H2O4K9 Stainless Steel K9 Water Bottle– the “insulated” leaks- I normally carry a water bladder and hike in locations with loads of water so I don’t normally ever need to carry water for Whiskey. However if you do need a dog water bottle, this is the best one I’ve found. You can pour the unused water right back in so nothing is wasted and the lid doesn’t add much weight and works really well for Whiskey.

    Sometimes I bring too much! This hike I have my boat and paddles attached to my bag

    First Aid

    Paw Wax- Pup Wax– I keep a tiny tin and apply on my pups paws at night while giving the paws a close inspection especially on rocky and long multi-days. It’s so important to check their paws as much as possible because if you can catch a cut early and boot it, you can save yourself the trip, a rescue call, or carrying your dog the rest of the way. Try and make it a nightly ritual! You can also apply to sunburnt noses and your own hands and feet if they’ve been overworked.

    Allergy Pills- I keep Benedryl and Reactine with me on most hikes. Allergy reactions are one of the most common issues (wasps, bugs, plants, etc). It’s good to know your dog’s dose of the drugs and write them down.

    Activated Charcoal– Eating human feces with THC is highly poisonous and getting more common. Write your dog’s dose of charcoal and keep on hand if you are on a busier campground/trail/bike trail. I’m the crazy dog owner that goes out of my way to inform anyone I see smoking that my dog can die if they don’t dig a deep enough cat hole.

    Duct Tape/Zip lock baggy/bandages- These are part of my normal human first aid kit that I find the most useful crossover to dogs. Duct tape can help wounds, make booties, mend broken gear. Zip lock bags (go for the freezer ones) are useful in so many ways but can help keep something waterproof. Bandages are self explanatory!

    Whiskey wearing her emergency bootie (she had a small cut) on a lunch break (packs off)

    Booties– I normally bring an emergency bootie on long or serious camp trips. Boots that fit every single paw is best if you don’t want to bring the entire set so we go with Muttlucks (I can strap on really tightly and kept one on for 5 days of backcountry last year). If there’s any reason you may suspect your dog may need boots outside of an emergency (bad cut on glass for example) then bring an entire set and stay on the safer side.

    Garmin InReach Device– should anything happen on your hike where you would need help (or come across someone else that may need help), you can communicate out of reception with any cell phone number or email (as well as SOS emergency systems). You can also track your location with GPS and check weather systems coming in.

    Emergency Harness- I mention this as it’s something my friends have been pondering, some buying. You need to have some way to carry out your own dog should they become injured or sick. Whiskey’s just over 50lbs and I can carry her slowly over short distances on my shoulders and I do prefer that over a harness situation. Regardless, make sure you have a way to carry your dog and that you practice it before you need to. If you don’t regularly bring an emergency harness, practice carrying your dog over your shoulders (behind your neck) with their legs on either side so your dog feels comfortable and so you can get in and out of the position.

  • Adventure in Edziza- Hiking the Spectacular Spectrum Range

    Adventure in Edziza- Hiking the Spectacular Spectrum Range

    When I passed by this section of Northern BC a couple years ago, I looked at the parks nearby and made a mental note to research more for a multiday hike in the future. Just the photos of the Spectrum range alone makes one spend a couple hours looking into the possibility of checking out this region.

    The bright colored mountains drew us in

    Previously called the Rainbow Mountains, the range is so colorful from the heavy mineralization from the Mount Edziza volcanic complex. As well, this location is the main source of obsidian in Northern BC and First Nations travelled from as far away as Alaska and northern Alberta for the sharp stone.

    The wild Spectrum range

    There are very few trails in the region, mostly not marked, often overgrown and always difficult to hike. There’s two main areas in the Mount Edziza Park, the Spectrum range (South of the Raspberry Pass) and the Edziza area, neither of which has vehicle access, all very remote, and home to Grizzlies, moose, mountain goats and sheep, and wolves.

    The little plane that took us in, and all our gear

    With little information and no trails, we made our own trail plan, traversing from Little Ball Lake to Mowdade Lake in a U-shape heading over the range. Everyday we passed by one or two mountain ranges, and normally crossed at least one river/stream. Our maps were old (glaciers having receeded a large amount) but with barely any trees, we were able to find our route relatively easy. Scrambling passes were more difficult, as sometimes you would climb most of the way up a mountain only to pop over the other side and realize you couldn’t get down safely. Another time we scrambled up a pass with loose scree that just kept getting steeper to the point we ended up climbing up a waterfall as it had the largest stable rocks to cling to.

    The crew, 3 humans, one pup

    River crossings were another challenge and there was a day we reached a river towards the end of our day. We could have camped and then attempted the crossing in the morning, but we chose to attempt the crossing in the evening in case someone fell in and needed to spend the day warming up. The river was ranging, and we scouted until we found a narrows (which made the river even faster). There was a 1 meter jump that could not be missed. Packs were thrown over separately and Whiskey made it on her own (with alot ALOT of encouragement and a rope tied to her harness).

    Vistas were at every turn

    Water was everywhere, and filtered it was clean and easy to cook and drink with. We never needed to carry much with us, as everyday we would pass countless sources of water or snow.

    Limited food supplies but still yums

    Finding suitable camp spots was also easy, the main question being, “should we keep going, would it be better further on”. We buried our bear bags (Ursacks), with all our food overnight far from our camp spots and never had any issues. We carried dehydrated food packs, and with very limited spaces in our ursacks (the determining factor in what we could bring), packed dried fruits, bars, and shared double

    Whiskey and the humans were exhausted every night

    Communication became key, as our last day ended up being longer than any of us expected (with no trail, we didn’t know how long anything would take). With my InReach mini device I was able to speak to our plane for a pickup as late as possible. We were racing the sun as we finally got to Mowdade Lake (with a couple wrong turns) and boy the elation when we saw our plane picking us up!

    The most loyal, strongest, sweetest trail dog ever
    Hanging out above glaciers
    What a wild country

  • Sunshine Coast Trail

    Sunshine Coast Trail

    Tinhat Hut-> Elk Hut-> Walt Hill Hut// Fiddlehead Landing -> Dixon Road

    The Sunshine Coast trail has been on my “must do” list for a couple of years now, and it was only recently I finally put aside all excuses and found a crew who were keen to try. We were all photographers who had weekdays free, and since I don’t go without Whiskey, I wanted to ensure that it would be the least busy on the trail. Scroll to the end of the article for map links and other resources!

    The Sunshine Coast Trail

    The Sunshine Coast trail is located on the northern Sunshine Coast which involves 2 ferries from mainland Vancouver. With the timing of the ferries and the drive across the Southern Sunshine Coast, parking at the end of the trail, and shuttling to the beginning being so time-consuming, we decided to sleep over at Egmont, near Earls Cove. This way we could pick up an early ferry and have a fresh start at the trail the next day, freshly showered and with a good nights rest. There is also so much to do on the drive to Egmont, so we checked out one of my favorite spots, Smuggler Cove, and reached our cabin at the BackEddy well before sunset.

    Smugglers Cove Sunshine Coast

    In the morning, we took off early and headed to meet Jesse of the Sunshine Coast Shuttle Services so he could help drop us off at the beginning of the hike (this way we could do a one-way hike to reach our car). We parked around the 137 km mark of the trail and he shuttled us to Fiddlehead Landing with his truck (dog friendly, yey!). We hit the trail in the rain, knowing that our first day was over 1100m incline with full packs.

    Ask Jessie to shuttle you to the start of your hike!

    Pretty soon we were seeing views between trees and with a couple sketchy log crossings and some very muddy patches. Eventually we made our way to a huge junction at km 88 where the trail meets a rugged forest road. Going straight would keep us on the SCT and turning right would take us a couple kilometers to the Tin Hat hut and some pretty epic views. The snow started around this point and we kept climbing until we finally broke through the trees when Brice, who was (usually) in the lead saw the first glimpses of the cabin. I was sooo happy to drop my pack at the hut and magically the sun came out and lit up the best views on the entire trail. We had slammed this section, of around 9km in only 3 hours 45mins (including breaks) so we had tons of daylight left. A benefit of off-season camping is that the snow meant we didn’t need to go off in search of water (there is no water source at the cabin normally). Also, sharing a tight space with a dog (even a short haired, well behaved and non-smelling one) can understandably be difficult for non-dog lovers, and so I also go out of my way to go to huts off-season.

    The cabin is small, but well built and would be cramped with about 8 people in the loft. It sits on the best views of the trail and has a compositing outhouse in really good condition. There is a wood pellet stove to keep warm and even in the spring, there was more than enough pellets for a couple months more. We even had reception! After a really well deserved dinner we grabbed our cameras and headed out to the view point for sunset. Crampons really helped as we were making fresh tracks and we were rewarded with one of the best sunsets yet this year!

    Sunset at Tinhat peak

    After a really warm night’s sleep in the winterized cabin loft, we took our time eating breakfast, making lunch, and headed out. The weather was calling for rain in the evening so we tried to keep moving. There are two options to head to the next part of the trail, the quicker South trail, or the longer trail that loops around Lewis Lake. The Lewis lake trail was unbroken snow and is a scramble in sections, and also adds about 5kms but is more scenic and avoids some of the logging roads. We chose the south route because of the snow and the weather. About the halfway point, we had a quick lunch break at Coyote lake where the sun popped through he clouds for a couple minutes, and then kept going, arriving at Elk Hut just before the downpour started in earnest.

    The crew

    Elk hut is an open hut, with 3 sides walled in, and one open. The loft is also open to air, so it was going to be a chilly night. On a dry summer day, I can imagine this would be a lovely place with a firepit outside (that was totally soaked), places to hang out, and a log dock. We even saw a canoe underneath the cabin but as it was pouring rain our whole time there, we didn’t get to enjoy it much! To warm up, we quickly changed into dry(ish) clothing, boiled up some water for tea, cooked up some dinner and crawled into our sleeping bags really early hoping for an early head start the next day.

    Not happy it was raining

    13 hours later, we crawled out of our bags back into rain. I suppose we had been pretty tired from a cold day’s trek so we all slept really well. After breakfast and packing up again, we started to our last hut of the trip- Walt Hill. It looked like this would be our easiest day so far, and most of the hike was lovely but as soon as we hit the snowline, everything changed. Although this section is lower in elevation than Tinhat, the snow was deeper and softer so we spent what seemed like an eternity taking turns breaking trail and post-holing up a path that no one had visited recently. The views are really nice on this section, and I can imagine without snow this would be one of the best parts of the trail to hike. When we finally saw glimpses of the hut, we were absolutely elated to have 4 walls and a fire to warm up and dry out for the evening. We had about an hour after reaching the Walt Hill hut before the rain really came down again. We still had lots of snow so we didn’t have to worry about a water source once again and huddled inside drying out the shoes, socks, and clothes for the evening.

    All the snow
    all the shoes and socks drying

    Our last day on the trail was calling for the a downpour, so I threw on all the rain gear, packed up my camera deep into my bag, and raced down the mountain thinking only of that dry car! Thankfully it was a quick section on a very well marked trail with only a couple water crossings (which probably aren’t anything on a dry day). We cheered at every kilometer marking (or at least I did!) until we reached the road where I parked and all scrambled into the car making really good time (2 hours 50 mins 12 kilometers).

    View from Tinhat

    Overall I would love to do this trail again! I really recommend it for those that aren’t as comfortable tenting in bear country, or would prefer to shed the weight of a tent and have a roof and space to sprawl out in the evenings. I can imagine the huts would be pretty busy in the summer and could be quite tight in space if there were too many people (it has been full on weekends in the summer). There isn’t a way to book the hut, so plan accordingly by bringing a backup tent or aim for a weekday (or day when the weather isn’t great). Definitely take advantage of Jesse’s shuttle service and ask him questions when you are in the car about the conditions and trail reports he’s heard about. Also please consider donating to PR PAWS who maintain the trail and huts if you are using the trail.

    Until next time

    Resources:

  • Grizzly Lake- Tombstone overnighter

    Grizzly Lake- Tombstone overnighter

    Camping at Yukon’s Grizzly Lake

    With the speed of our road trip, we didn’t have much time for backcountry adventures but we did want to do at least one overnight trip in a beautiful location (especially since we had brought our backpacks and gear). Tombstone Territorial Park is one of the most accessible northern parks, and not only are the mountains and tundra jaw-droppingly beautiful, it’s also home to moose, caribou, bear, Dall sheep, marmots, ground squirrels, and loads of falcons and birds. Since it is located at the base of the Dempster road, we would be passing through the park twice and were a bit more flexible on camping dates.  This was necessary because the Tombstone’s Grizzly lake site was almost booked out for a week (max 10 sites), and we were able to secure a spot a week later after on the return from the Dempster.


    a really cute marmot
    Amazing scenery on the way to the site
    The mountains surrounding the campground behind us
    some rocky bits to travel through
    Carrying her share!
    Just really beautiful!

    When you overnight at Grizzly lake, you must pick up a pass from the Interpretive Center and also a bear container. Why they don’t just keep the containers in the camp site’s bear lock-ups (as they do in BC) is a bit beyond me as they are large and hard to pack and heavy. We had a little intro to the hike with a very friendly ranger, loaded with lots of warnings and were given estimated hiking times that were really quite extreme (8-12 hours one way). Just as a reference, we asked lots of hikers along the way and campers at the campsite, and got an average one-way time of about 5-7 hours (but we didn’t meet too many older hikers). Without a backpack I would estimate one could do a return trip in about 9-12 hours with lots of breaks and rests. We finished in about 7 hours one way with about 1.5 hours of total rest and photography time.


    Starting in the subalpine
    the first section is a climb and you get views quickly
    up up and up!
    saying hi to some rangers at the top of the first incline
    having no issues with the “tough” terrain
    lots of resting and photos
    The highest point of the trail
    The terrain is varied and beautiful with lots of changes but is not technical and the path is very easy to find and follow. A hiker from Vancouver wouldn’t have a problem at all, but I can see that anyone not used to mountainous inclines might find the hike difficult with a full pack. We kept Whiskey on a leash most of the time as we passed by lots of marmot territory but did have to let her off where being attached to a leashed dog is actually quite dangerous (jumping over large boulders and areas with exposed sides). In these cases, for us it’s safer to let her find her own path since one wrong pull from a larger dog could bring you tumbling (and also we are used to off leash hiking so Whiskey is also safer as well).

    You can see the campground coming up! more than half done
    Whiskey pulling her daddy along
    You can see the lake clearly now
    A tiny bit of snow left in July, with the most amazing views
    At this point everyone is tired of me taking pictures
    rocky sections separate a couple marmot meadows

    The campsite was really muddy and had roped off trails to and from the eating shelters which was really the worst part about this entire trip, but at least the camp spots were raised off the ground (great for squirrels not to eat through your tent). Ground squirrels are famous for eating through everything since they are so salt-deprived and will even eat your shoelaces if left outside of the tent. It was not advised to use the lake water, rather the running water from the streams on the way to the campsite but we saw people using the lake water with filters. For Whiskey’s food we packed her dehydrated dog food which she of course, carried herself.


    Walking through some meadows
    ground squirrels are really chirpy!
    marmots shrill as we walk by (keep dogs on leash!)
    They blend in so well here!
    Living in paradise 
    a pointer doing her thing
    lots of breaks to look at the scenery
    mom! enough pictures!
    watching us set up camp
    at the food shelter
    waking dad up
    the hardest part is getting up when it’s cold and rainy
    Overall we were extremely lucky with the weather as we only had a sprinkling of rain on the trail, but once we set up the tent for the night and started cooking under the shelters, the rain started coming down in earnest. It rained the entire night, but in the morning it stopped just long enough for us to hike back (and started again when we got back to the car).

    a mini waterfall for collecting water
    massage stops along the way, of course
    Heading back was much faster
    I still couldn’t get enough of the scenery
    looking back down at the rest of tombstone
    We are tiny in a beautiful Earth
    Just missing the proper rain, but we had a few sprinkles
    the entire trail has views except for the first km
    The trail was easy to follow with no chance of getting lost
    Racing to the car before those pregnant clouds let loose!

    There were many options for a 3rd and 4th night, unfortunately, we didn’t have time and headed back . Quick doggy cheat: Thierry attached Whiskey’s leash to his pack, and then to his belt so she would power him up the inclines. It’s a bit trickier heading down though! On the return trip we were an hour faster (and took fewer photos) and just arrived in time to drive back to the Interpretive Center to return the bear can before they closed. I’d love to come back again!


    Until next time!


  • Fountain Lake Camping

    Fountain Lake Camping

    Fountain Lake

    This is our 3rd yearly trip to camp at Fountain Lake as well as the first time I’m doing it without my better half sharing the driving and the tent. Fountain Lake is beyond Lillooet which is a long drive with our many stops (for food and pictures). We left at 3pm and arrived after 7pm just in time to set up our tents, start a fire and watch the light dying down in front of us. There was a little bit of drizzle as we drove in but the weather the rest of the weekend was just fantastic with passing clouds and a really warm days.

    Cloudy coming in, stopping for a break at Duffey Lake
    Stopping at Lillooet for a view

    We’ve recently bought a car-camping kit with a gigantic tent you can stand in, foam sleeping pads that take up half the car space and the much-needed ice box and water jugs to go with our bbq. With a group of 10, we took over our normal camp-site next to the lake and spent the days floating on the lake, eating really really well and sitting in front of the campfire singing, laughing and just having the best of times.

    gathering firewood
    setting up the camp chairs
    Around the campfire, taking my seat
    Relaxing in the tent
    Elly popped in for the second day!
    Marshmellows and fire

    On Saturday we even fit in a new hike- the Fountain Ridge Hike. As there was only a tiny description, we chanced it and once we found our way, the views were fantastic. We did get our friends’ van stuck and had a bit of an adventure but found our way back to camp for a quick swim before dinner.

    summer days!
    the view from our ridgewalk
    lunchspot…may I have your sandwich?
    views of the Fraser
    heading back!
    relaxing on the water
    toast them up!
    come play with me!
    warming up at the fire

    The next day we took it easy walking around the lake and floating a bit before heading back to town.

    Happy days!
    Walking around the lake
    sharing the paddleboard and Ginger’s first try out!
    floaties are for sharing right?
    just hanging!
    Ginger exploring the weeds
    stopping at viewpoints on the way back again!