Category: Adventures

  • Ultimate list of Dog-Friendly hikes in the North Shore

    Ultimate list of Dog-Friendly hikes in the North Shore

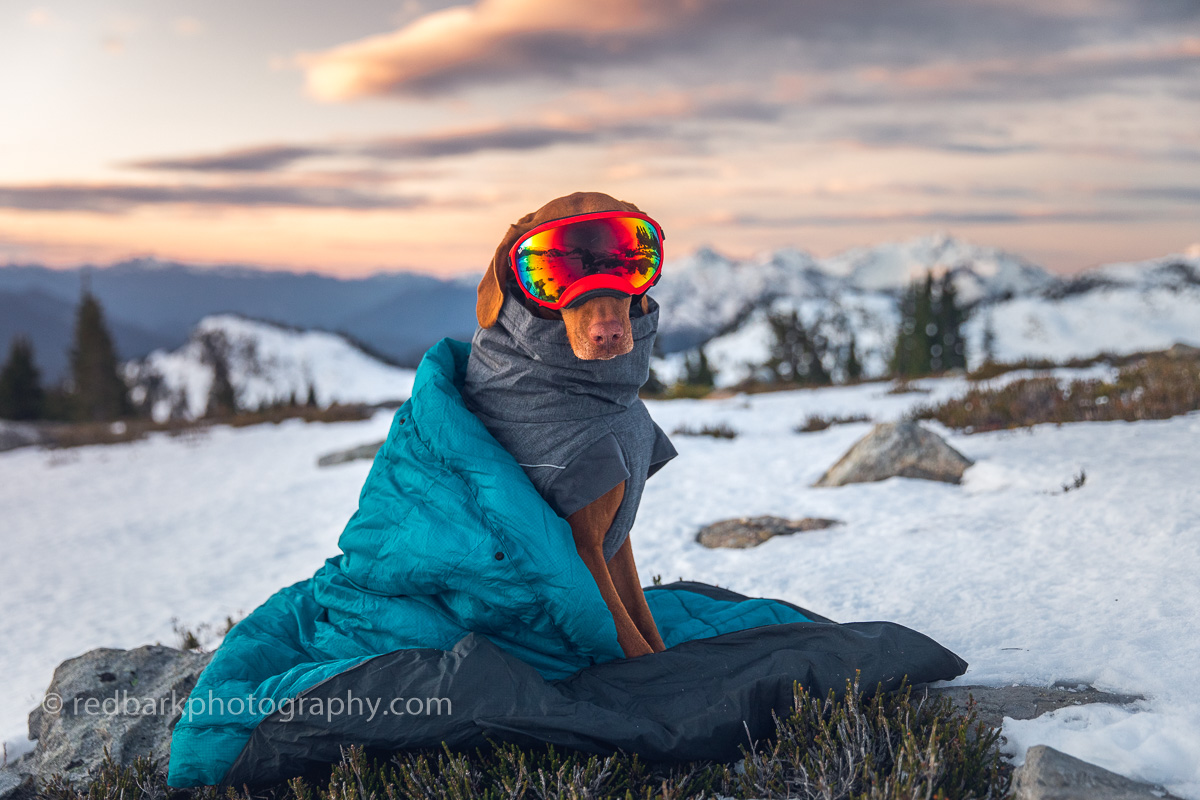
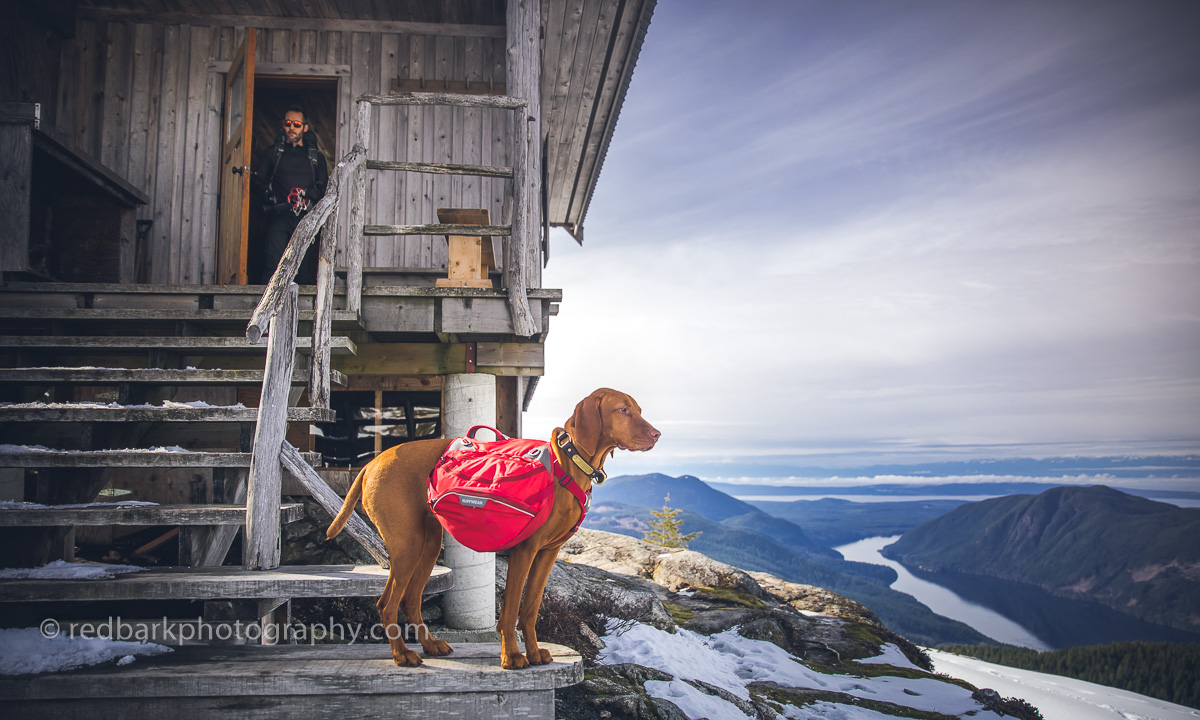
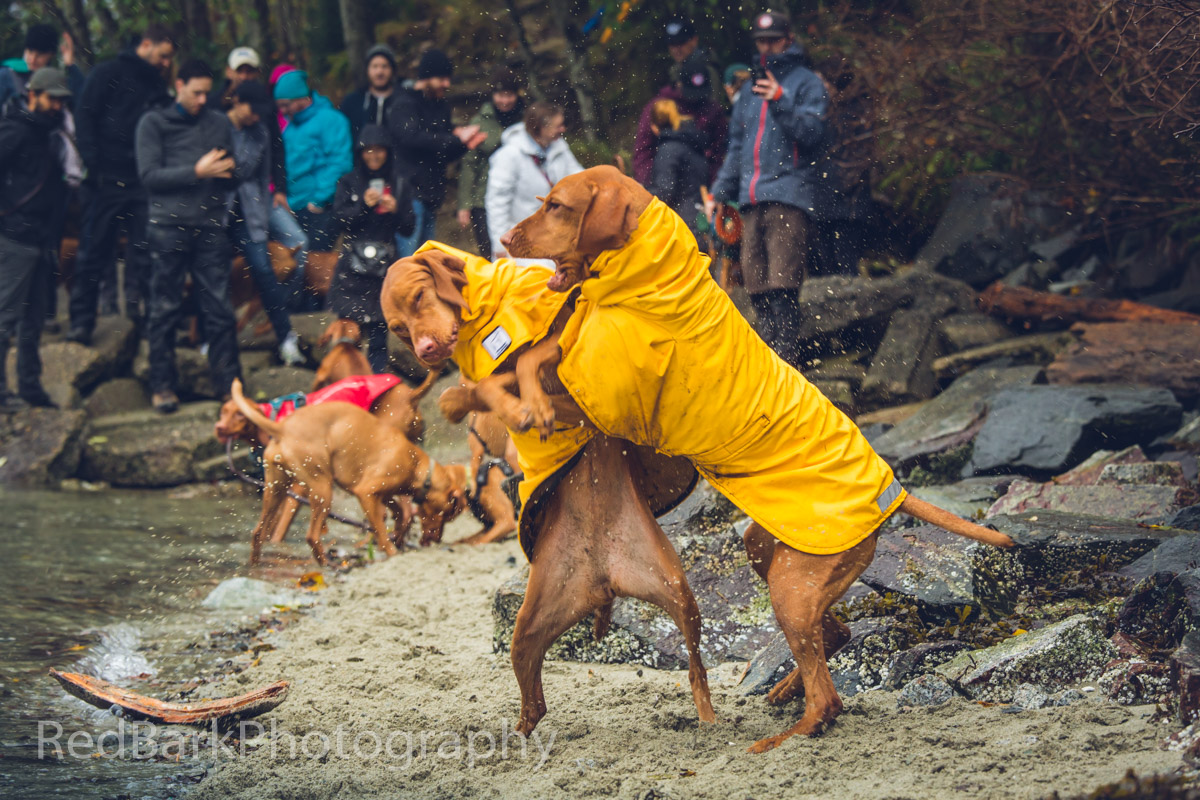
    Vancouver’s North Shore has been our go-to for short and long walks ever since we got Whiskey. As the years have gone by, it’s gotten busier and sharing the trail with other hikers, runners, dogs, bikers, and bears becomes a little more difficult.

    Here’s a mix of Instagrammable dog friendly hikes mixed with peaceful ones typically only visited by locals. If you have dogs, I would suggest to go very early, go late, go on weekdays, and rainy days, especially for busy trails. Generally, I would avoid busy trails on sunny weekends with dogs to respect other trail users. Bike trails tend to be less busy but are shared with bikers so keep an ear open for wheels coming down! Know how to deal with bears, and keep a wide berth and respect for all wildlife, as it’s their home we are entering and don’t forget the cougars and coyotes too!

    Norvan Falls in North Vancouver
    Although the 14km Norvan Falls is relatively flat, lots of people do get lost and need rescue on this trail. It leads to many tougher backcountry hikes and some people are still missing.

    Finally, trails do close over the winters and always remember the 10 essentials. If you get lost, call 911 for help as soon as you can, and if you are out of reception, take a satellite device such as an Inreach Mini. I’m linking to a variety of sources, so please check them online before you go out!

    *** busy ** well used * less busy
    🌊waterfall 🌲 forest 👀views 💦lake/river/ocean

    Ngaio at Lighthouse Park
    Lighthouse Park has wide easy access trails and wilder ones to explore

    Flat/Easy

    Lighthouse Park ***🌲💦👀- One of my favorite places to go with friends with kids, or someone that’s not able to hike anything strenuous. There’s lots of variety in terrain and views, as well as bathrooms and is very dog friendly.

    Whytecliff Park ***👀💦- Go when low tide, read the tide charts and don’t get stuck on the island! More of a fun walk then a hike with beautiful views of Vancouver, to Vancouver island. We’ve even seen a gray whale here!

    Inter River Park ***🌲💦- Connects to the Lynn Valley system and up to Lynn Headwaters, great for trail running, and has a couple beautiful watering holes to swim in. Continue up all the way to Lynn Headwaters for a very long hike or jog.

    Deep Cove Park and Wickenden Park ***🌲👀💦- A lovely flat and easy place to walk your dog. The Deep Cove community is also lovely to discover but very busy for parking on the weekends.

    Spirit Trail * -City Trail that runs 6.5km on the North Shore’s waterfront. Do a portion and see the city in a different way. I especially like the less busy West portion that becomes more green.

    Mosquito Creek Park **🌲💦- 4.2km of a meandering path along a salmon habitat.

    Whiskey in winter wonderland
    Dog Mountain in the snow is a wonderland
    Ngaio overlooking Cypress Falls with her pug Wonton in matching yellow rainjackets
    Cypress Falls is very dog friendly
    Whiskey the Vizsla looking through a fence in Vancouver
    Whyte Lake is a fairytale trail with lots of moss

    Moderate/Easy

    Whyte Lake **🌲💦- One of my favorite trails on a rainy day. There’s something special about this one, with really nice sections and big cedars and firs. There’s a walkway around a small section of the lake that’s very beautiful too.

    Old Buck Trail/Seymour Bike trails *🌲- There’s a load of bike trails on lower Seymour that are great to wander around with your pup, just keep your ears open for bikes

    Fromme Bike Trails *🌲- Similar to the Seymour trails there’s loads of bike trails to walk or run when it’s rainy or you just want a change of scenery. Keep your dogs off the bike trail, or close to you so you can quickly jump out of the path if you hear bikes coming down. There’s lots of amazing sections through the forest. Watch out for bears!

    Bowen Lookout **👀- short hike with a wonderful sunset view, keep going to St Marks but only if safe in winter

    Dog Mountain ***🌲👀- Amazing for sunrise, I only go on weekdays or it’s too busy. During the winter the road is closed so check opening times. Great views of the city and a lovely walk.

    Quarry Rock ***🌲👀💦- There are many ways to get to this famous rock, look at maps, the main path goes through the end of the Baden Powell trail in Deep Cove with a lovely walk through a beautiful forest. Can be so busy on weekends they are trying to limit the amount of people. Don’t forest to pick up a doughnut at Honey’s afterwards!

    Cypress Falls Park **🌲🌊- A friendly neighborhood park that leads to some nice falls. The falls are viewed from above and at a distance but it’s still lovely. Don’t go too close to the cliffs as it’s unstable. The trails around are also beautiful.

    St Mary’s Trail *🌲- Connects to Baden Powell and other bike trails, I normally start on St. Mary’s Ave and connect to the Grouse Mountain Highway on one trail or another and make a loop back.

    Goldie Lake Loop *🌲💦 -ski hill in winter, quiet in summer. Sometimes I just bring some lunch to eat on the slopes and do a little walk.

    Mackay Creek *🌲💦 – Another loop that ties into the Baden Powell. There’s loads of these you can make up and do depending on the time and workout you want. Great for a quieter option. This one has the F-86 Jet Crash Memorial

    Hollyburn is a quick hike with views of the Lions
    Brothers Creek goes through a beautiful forest
    Eagle Bluffs in West Vancouver
    The view up at Eagle Bluffs in the winter

    Moderate

    Seymour Peak***🌲👀 my favorite! With 3 pumps or peaks, each with amazing views, there’s so much to love about this varied hike. I would stick to first pump while there’s snow on the trail and avoid the full peak until summer as there’s avalanche risk and exposure between 2nd and 3rd. Very busy and I run into black bears frequently here.

    Eagle Bluffs ***🌲👀 – The popular route starts you at Cypress Mountain through Black Mountain, the less popular starts you at Horseshoe Bay. Either route has incline (the Baden Powell more so) but I would avoid the BP route in the winter due to avalanche issues.

    Norvan Falls **🌲🌊- A lovely 14km trail run to a beautiful waterfall. Take care on this route and make sure you’re very familiar or you have lots of daylight left as many people need rescue getting lost here. Trails starting off Norvan Falls are for advanced hikers only so please don’t attempt unless you’re fully prepared.

    Baden Powell *🌲💦- 45.5kms of trail connecting Horseshoe bay to Deep Cove. Choose a section or do it all! If you’re attempting it all, please push this trail to the “Difficult” section! For most sections, I would say it’s moderate.

    Brother’s Creek **🌲🌊💦- nice loop options in a beautiful forest with some gigantic trees, bridge was taken out but still possible to cross creek if adventurous. Try sidetrips to other lakes like Blue Gentian and Lost Lake if you want to extend.

    Hollyburn Mountain **🌲👀-busier in winter, less in summer, steep inclines with an amazing view.

    Big cedar and Kennedy falls *🌲🌊- People get lost here, I’m not really sure why but make sure you have a map you can read and are comfortable in the wilderness because it can get wild fast. The parking is mainly for bikers and can get busy in the summer.

    Mt Fromme *🌲👀- An easy to access peak and relatively rarely hiked mountain. The base starts at the bike parking and you can have lots of bikers heading up on the wide FSR. Criss-crossed by loads of bike trails, just keep an eye on your map to not get lost!

    Twin Falls-Lynn Valley-Suspension Bridge ***🌲🌊💦- busy but lovely trail that goes through two bridges along a river and some super gorgeous forest. Avoid the crowds on weekdays and the rainy season. The cliffs can be very dangerous and the river can sweep an unsuspecting pup quickly down so keep away from any edges or fast moving water.

    Elsay Lake trail is a long downhill climb to a wild lake
    Crown Mountain is a huge hike through Hanes

    Difficult

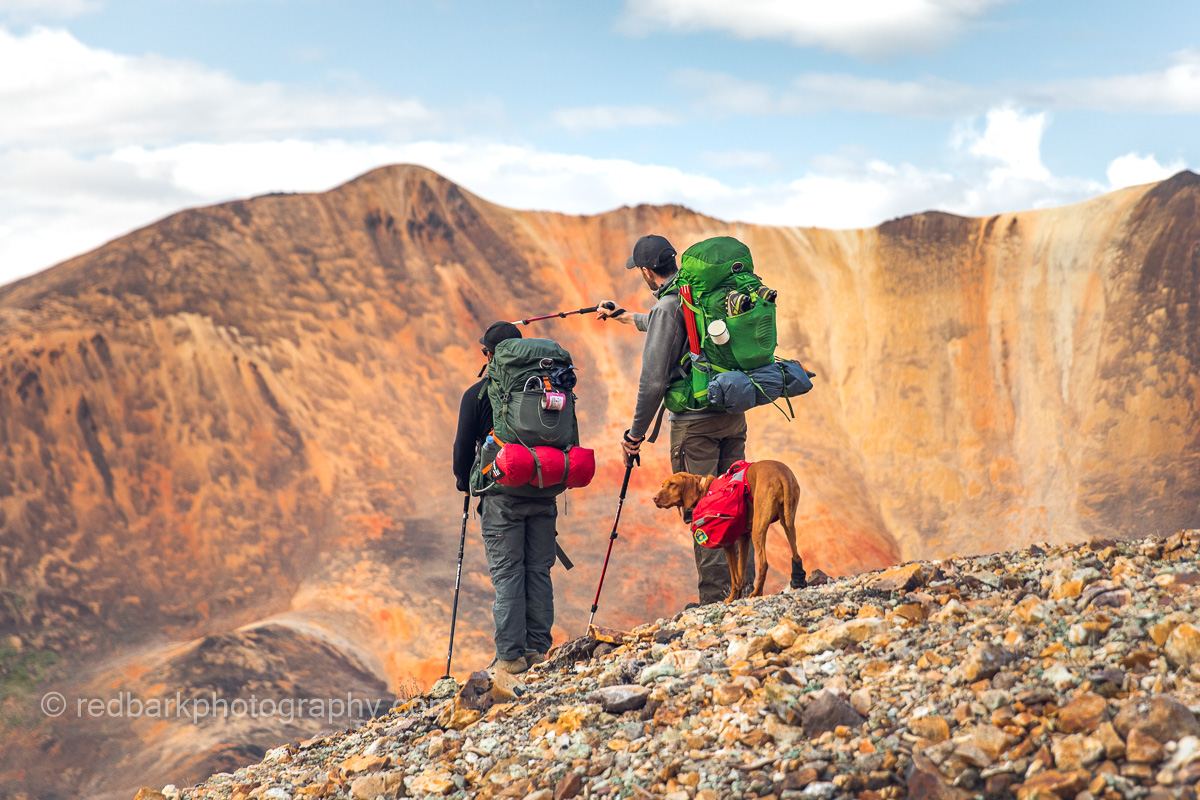
    Most of these trails are VERY technical and NOT ok for most dogs. Leashing while scrambling can be extremely dangerous and I do not recommend you bring any dogs that are not fully in control. Please do not attempt these trails alone and without your 10 essentials and letting someone know your eta. Start early and bring water for your dog!

    Elsay Lake *🌲👀💦- A rare hike that goes down, not up! The trail is easy to lose if the visibility isn’t far and goes by many rock falls that can be avalanche zones in snow. It’s harder than it looks on the map. Very few tenting spots, please do not use the Emergency shelter unless it’s an emergency.

    Coliseum *🌲🌊👀- Start this one earlier than you think, especially if you’re parking at the Lynn Headwaters that locks for the evening. Very muddy for most of the year, and possible to continue further if you’re a crazy trail runner to Mount Burwell.

    Crown via Hanes **🌲🌊👀- Only accessible through Lynn Valley, heading up through Hanes Valley and back down. This makes for a VERY full day. Dogs are no longer welcome on the BCMC but other trails like Fromme can make this a loop. High elevation gain, long distance, and a route notorious for needing rescues. The last section is technical and a scramble. If you’re parking at Lynn Headwaters, be aware of closing times or you may initiate a rescue if you’re not back at your car by the time they close the gates. Hanes is very dangerous if there’s low visibility and many people get lost here. There’s very little sources of water along the route past Norvan, and this is a no-go zone during avalanche season. Those without dogs can do a much shorter hike from Grouse Gondola (dogs not allowed on Grouse, BCMC)

    South Needle *🌲👀- The trail can be busy until Lynn Peak, then empties out and gets more strenuous. A less visited peak that’s easy to access for lovely views. Please note that you cannot access with dogs on the Seymour side (that I know of).

    Howe Sound Crest Trail ***🌲👀- One of the best hikes (or multiday hikes) you can do in the region. This hike is normally done over several days and is a hike-through so you need to have a plan to get back to your car. It’s on rugged terrain and is much harder than you might expect if you just look at the distance and gain. The trail does go through some watershed areas so please note where you’re allowed to camp. The rocks and terrain can be really rough for dogs (I’ve seen a dog tear through all 4 pads attempting this one) so ensure you’ve got all your safety gear. There are spots that are very exposed and steep, making this a no-go for most during wet or snow conditions. You can always do a section of the trail as a day-hike. There are loads of side peaks that you can do to add on but keep an eye on your water. There are not too many watering holes especially during the top of summer.

    From Mt Unnecessary looking at the Lions on the Howe Sound Crest Trail

    [wps_products product_id=”7342189740231″]

  • Guide to Hiking and Camping at Assiniboine with Dogs

    Guide to Hiking and Camping at Assiniboine with Dogs

    Reaching Assiniboine’s epic views involves some logistics, and planning but it isn’t very difficult. Getting there with dogs is a whole different experience! For all the right reasons, dogs are not encouraged in the park and there are loads of limitations that can take quite a bit of researching to find out. I’m all for limiting the backcountry to dogs that are trained and have experience (imagine if anyone at your local dog park could fly their dog in for the weekend) as this place is so special and is chalk full of wildlife and there are a list of things to consider before attempting to come.

    Nub Peak with an oncoming winter storm to the left. We had to abandon camp early
    An easy day hike around Magog Lake

    Dogs are not allowed in any shelter, building, on the helicopter, on the bus to Sunshine valley, nor the gondola. They must be under control and on leash. There is abundant wildlife everywhere!

    At Lake Magog with Mount Assiniboine looking over
    With Erica coming in through the Assiniboine pass and meadows full of ground squirrels
    Views from Nublet are hard to beat

    Sunshine Village Route from top of Gondola

    There are 3 main ways of arriving into the main campground at Lake Magog (there’s others that are less well travelled, I’ll stick to the 3 main ones). The first and easiest is a quick helicopter ride from Mt Shark Trailhead but dogs are not allowed. The second is hiking in from Sunshine Village, however dogs are not allowed on the bus to Sunshine village, nor are they allowed up the gondola (so you can still do this, however it would likely involve at least one night camping along the way and more distance and incline than the next option). Lastly you can hike from Mount Shark trailhead taking either the Wonder Pass or Assiniboine Pass (the trail splits at about 15km mark).

    Wonder Pass is harder but well worth the effort on a sunny day during larch season

    Details/Tips/Tricks/Lessons Learnt

    Our tent can (and has) taken 1 foot of snow. We bring layers for dogs as well as humans, extra food, daypacks, rain gear and have seen deer, grouse, rabbit, grizzly, and marmot at camp.

    The trail from Mt Shark is about 30km to the campsite give or take 2kms and dogs are not allowed in the shelters along the way. The camping along the route isn’t very special (also buggy!) so I’ve always hiked straight in. There is also a special trick to make the whole thing easier- although dogs are not allowed on helicopters, you can pay to fly in your bag, or gear. However, there are a couple things to note with this “trick”. The first is that you pick up your gear at Assiniboine lodge which is 2kms away from the campgrounds so you must be able to walk your bag over and back easily (I do not suggest a 50lb duffle bag at the end of a 30km hike!). In order to fly your gear in, you must check in your gear in Canmore prior to driving to the trailhead so make sure you time it right or you might not get your gear in time! The second time I did this hike, there was no such option available during Covid, so we had to carrying everything in.

    Last note is that it makes much more financial sense to fly in a person with 40lbs allotted gear if you have that possibility (instead of paying per lb for gear) but I’ve never been in a group large enough that we could fly someone in. Also if you have a problem, they will not fly your dog out, so make sure you have everything you need to hike yourself and your dog out!

    Hiking in through Assiniboine Pass with a full 5 day load pack

    I’ve done this trip twice, and each time it’s not gone to plan. Mother Nature likes to remind us that she’s boss and we need to roll with whatever she throws. The first time I did this hike in September we got snowed in the second night waking up with more than 1 foot of snow on our tent. The weather report said there was more coming and everyone started clearing the campgrounds, however we couldn’t join the exodus into the cabins because of Whiskey (no dogs allowed), so we ended up hiking out early several days early during an early winter storm. It was a mentally tough hike in snow that turned into relentless rain for a really really long day and at the point our minds had become really numb we almost walked right into a bull moose in the middle of the trail. Thankfully the moose didn’t charge us and went into the forest and we continued on until we got back to our car and into warm dry clothes.

    The second trip I came with Erica and her hiking pole broke early on and she experienced some really bad leg pains with an already injured knee. Since we had to carry all our gear in (45lbs+packs), our hike slowed to a crawl and we adjusted our trip to have many more rest days and cancelled a side camp trip to Og Lake. On both trips the weather was very difficult to predict and far from perfect (I have this luck that it’s always freezing on my trips). However the bad weather seemed to coincide with rest days and just makes me want to go again so I can finally experience the elusive Assiniboine experience that doesn’t need all my winter and rain gear.

    Winter storm hitting us while we are on Nublet

    What I’ve learned from these adventures to Assiniboine is

    • Book extra nights at the campgrounds so you can adjust your trip accordingly. Let the rangers know if you are leaving early though, so someone else can take your tent spot.
    • Fly some of your gear in, but pay attention to drop off and pick up times (non-covid times)
    • Use an Inreach Garmin to get an accurate weather report of the day (pay for the detailed report) and for a safety communication device. The ability to predict weather is worth so much if you’re heading out on a 6 hour hike alone in spotty weather.
    • Train for this hike if you are doing it in one day, train your dog, and train carrying the weight!
    • This location is PACKED full of wildlife including meadows full of ground squirrels, marmots under the outhouses, grouse, rabbit, deer, grizzly bear, and moose (I’ve seen every one of those on this trail!). You MUST have control of your dog (and I’m not just talking about hooking up a leash!) because if your dog pulls you towards every single squirrel you are going to be damaging your dog’s neck and you’re going to be dragged around like a puppet. You’ll have a much better time if you can hike and watch the wildlife with a dog calmly at your side.
    • Use hiking poles, your knees will thank you
    • If you are camping with dogs, study the campground map and find a quiet corner to camp at. I like site 16, although furthest from bathrooms and the shelters/bear caches, I will bother the least amount of people. Whiskey will have less chances to feel like she needs to warn me of people approaching (less anxiety for everyone) and I’ll be able to relax more.
    We are so grateful to be able to experience this place with our pups

    The Hike in From Mt Shark

    Hike from Mt Shark to Lake Magog with two passes

    Mt Shark trailhead starts from a long dirt road from Canmore with loads of potholes and corrugation that might have your teeth rattling. The road is exceptionally beautiful at sunrise and sunset if you can time it well! The trail head has great facilities including bathrooms, picnic tables and a large garbage. The trail actually take you across province lines (from Alberta to BC) and across park lines (although NOT timezones funny enough).

    There are several side trails so make sure you have a good GPS map when you start (every wrong turn will cost you extra this day). The beginning of the trail is nice, wide and flat and is the quickest part of the hike. Once you pass the bridge over spray river/lake you start into the forest where the trail narrows but is till really easy to follow and hike. You’ll pass by BR9 campsite and keep going towards Bryant Creek Shelter. There is water at the Spray Lakes bridge, at the campsites, and at Bryant Creek Shelter (with Br 13 and 14 close by). Remember dogs are not allowed in the shelter but perhaps during a storm it could be life saving.

    Wonder Pass with Larches in full glory
    Erica with Bodhi halfway up Sunburst for sunset
    Weather is always changing (at least with my luck). Check the weather as much as possible

    Here you need to decide if you are continuing onto Wonder Pass or Assiniboine pass. This is where the incline starts and you need to start working! Assiniboine pass is easier if you are carrying a ton of weight- it’s slightly longer but feels easier overall. Erica and I chose this way as she was in pain and it was the least impact. I also chose the for the way down during the storm I was hiking in on the first trip. Assiniboine pass has two options- hikers trail or horse trail. The hikers trail is higher with better views but is technically harder with more bridge crossings. The horse trail is lower in the valley and can be muddy with lots of shallow water crossings. Earlier in season I wouldn’t suggest the horse trail unless you don’t mind your feet being soaked but later in season the hiker’s pass may be closed and that may be the only option (as we experienced during the storm).

    Wonder Pass with Larches
    Trail from the lodge to camp is 2km of amazing

    Wonderpass takes you to Marvel lake, around the side of the lake, and up some switchbacks into the pass between Wonder Peak and The Towers. If you miss this pass on the walk in, it’s definitely worth a day hike from the campground! In the right season the larches are just amazing and the pass is a very easy hike from the lodge. During the height of summer, watch carefully your water sources if it’s warm and know that not all the creeks on the maps may be flowing.

    Hiking back in a storm, we went from snowstorm to rainstorm and then to a bull moose
    Looking at Sunburst Peak from the lakes
    Looking at Sunburst and Assiniboine from Nublet

    Once you have set up camp, you have loads of day hike options. The money shot is from the Nublet/Nub, a quick 7km+ (to Nublet) hike return from the campground. There’s loads of places to scramble and climb depending on your comfort level, as well as your dogs. Remember this is very remote and wild country with no rescue or fly-outs for your dog so please know your level and stay well within it. Even the Nub hike can have grizzlies so always bring bear spray and call out for bears.

    We’ve scrambled halfway up Sunburst Peak (no trail), all the way up Chucks ridge (no trail), Nub Peak via Elizabeth Lake (no trail), Windy Ridge (14km trail) and there’s still so much I want to do! For rest days you can walk around Lake Magog, Sunburst Lake, Cerulean Lake and Elizabeth Lake. In all, remember that the goal for your 30km hike isn’t to just get to Lake Magog, it’s to get there to start hiking so make sure you’re up for it!

    Scrambling up Nub from Elizabeth Lake (no trail)
    Windy Ridge, not a single person on the trail, not a technical trail
    Erica and Bodhi at Windy Ridge looking into Banff with a rainbow
    Chuck’s ridge was an adventure, totally not most-dogs friendly
    Only take mountain goats up scrambles!

    There are very few wild places like this that still allow dogs so please represent us dog owners well! Clean up after your pup, keep clear of other campers, keep on leash, and respect the wildlife. There are loads of birds and chipmunks at every eating station, a marmot lives under one of the outhouses, and we saw deer and grouse right at our tent (and a grizzly mom and cubs had been through our campsite while we were out). Scrambles are not easy so please hike well within your dog’s limits and please do not use earphones so you can hear and see wildlife! Lastly, don’t let your dogs lick the frogs on the trail, Bodhi had a bit of a reaction when he (on leash) had a taste of one!

    Girls and their dogs! It’s a ton of effort but so worthwhile
    Whiskey’s second time around and we still didn’t clear skies…next time!

    Here’s a list of dog camping gear that I can’t live without

    and a list of human hiking gear that I’ve grown to depend on over the years

  • Berg Lake 43kms in one day with dogs

    Berg Lake 43kms in one day with dogs

    Kinney Lake at sunrise

    Berg Lake is one of the world’s most beautiful lakes situated in Mount Robson Provincial Park, British Columbia, Canada. The trail takes you past Kinney Lake, Emperor Falls and is heavily trafficked with an elevation gain of 1509m. There are several campsites along the way to Berg Lake as well as 2 campsites at Berg Lake itself, however dogs are not allowed overnight at any campsite on the route. I have since found that you can hike yourself out of Mt Robson Park and into Jasper National Park and camp at Adolphus Lake with your dog but it would be a good 28km+ day with your pack and the lake is nothing special compared to Berg. Either option is NOT for the unexperienced and involve long distances with incline and you must be able to exit the park yourself with your dog without assistance. Both you AND your dog need to be conditioned to hiking exceptionally long distances, work as a team, and be on leash throughout. The trail is mostly narrow and graded as well as busy, mostly follows a clean water source, and would be extremely hard to get lost on.

    Erica with Bodhi the ridgeback at Berg Lake

    My good friend Erica has always wanted to do this hike with her ridgeback Bodhi and I happily agreed to the 40+km day. We have been hiking together for a couple years and have a similar pace and goals (of taking photos, completing the hike, and dealing with dogs). The trail is long but not technically hard at all with only one section of major incline. We packed as light as possible, and with many water sources along the way were not concerned about carrying much water. We used harnesses on the dogs because even though they’re trained not to pull, it’s an extremely long day and it’s best to reduce the tension on their necks. Leashes were attached to our daypacks around our waist (except for photo breaks) so we were hands free for hiking poles (another helpful piece of gear!).

    Approaching Kinney Lake

    Getting the earliest start possible is key in order have some wiggle room should anything unforeseen happen so we hit the trail at sunrise and got to Kinney Lake easily and quickly (about 7km). You can also bike this section but you must lock up your bike at the campground and hike the rest of the trail (we didn’t have space in our car for two bikes and the speed difference for us wasn’t’ worth it). We spent at least an hour trying to find a place to take photos of the lake before moving on. There seemed to be tent pads set up at the south end of Kinney Lake but they were all flooded and not in use.

    Kinney Lake from the campground
    Bodhi really cautiously crossing the Whitehorn Suspension Bridge

    After Kinney Lake Campground at the North area of Kinney Lake, there’s an option on our map to take the Kinney Flats Trail or the Forest trail, although during our hike we found the Kinney Flat trail wasn’t an option as the water was too high and the area was flooded. After that there’s a couple small bridges and flat sections that connect to the large suspension bridge over Robson River. This suspension bridge was the only obstacle that could have derailed the day if Bodhi refused to cross. Whiskey pranced across before I could even take photo but Bodhi took quite a bit of convincing and cheering to cross. To safely cross we let the dogs off leash so that there was only one person or dog on the bridge at a time to reduce swaying and to reduce any tangles. For Bodhi I was on one side while Erica was on the other so we could cheer him on from either side (Whiskey had already crossed to show him). Bodhi crawled his was across to safety and had a little prance to celebrate!

    White Falls
    Incline from White Falls to Emperor Falls

    After the bridge we passed Whitehorn Campground and continued onto White Falls. Stupidly we didn’t rewater before the incline (about 500m) and being a hot day, we both ran out of water pretty fast. We knew (and could see on our maps) that the waterfall was coming up quickly so we just kept going towards Emperor falls instead of heading back down to refill. Once we got to Emperor Falls, it provided the perfect air conditioning mist so all thoughts of needing water disappeared. We took photos for another 45mins before heading on to refill water at Emperor Falls Camp and onto our first glimpse of Berg Lake.

    Emperor Falls
    Nature’s air-con
    Approaching Berg Lake

    We approached Berg from the SW corner with gigantic glaciers framing the lake. At Marmot Campground, we debated if we should finish the hike a bit further on the NW side (Berg Lake Campground) or just call it done but we finally decided another 2kms (4 km total) wasn’t going to add much anyways so we went for it! I’m thankful we did because the beach at Berg Lake Campground was so much nicer and we threw off our shoes and took a little summer nap on the beach overlooking a turquoise lake with glaciers. We had a lovely section of the beach all to ourselves and the dogs promptly took a well deserved nap. I think we took a 1.5 hour break there with photos, food, and a dip.

    Having a really well deserved rest

    Keeping a close eye on the time, it was soon getting late and we had to put our shoes back on and head back. This time we stopped only for bathroom breaks and water refills and a long break at the bridge convincing Bodhi to cross again. It’s amazing how much faster the way back can seem without photo breaks and inclines.

    Whiskey having a roll in the sun
    the last stretch to and from Berg Lake

    Something interesting on the return, we noticed that the trail didn’t look familiar on the section as we got back to Kinney Lake. It was dark at that point so we just assumed we had remembered wrong but we would find out later there had been an avalanche during the day which had erased part of the trail and flooded other sections. Since we had maps and knew where we were aiming, we didn’t have any navigational issues but were confused at the time about the status of the trail (some sections were fully flooded!). The last 7kms were the longest of the day as they normally are, but we were soon back to the car, feeling good, and ready to sleep and get ready for our next adventure!

    Whiskey patiently waiting for Bodhi to cross the bridge again

    With this distance being non-technical, I found both dogs were tired (Bodhi especially) but no one had any impact aches and pains. Erica had some worsening foot injuries from unrelated events but overall I really did find the 40km+ hike wasn’t anywhere near as hard on our bodies as some 10km days in serious backcountry mountains or a 25km day carrying weight. I’d love to be back in the future with Bourbon and maybe even with a pack on my back!

  • Dog Hiking Checklist: What to Bring on a Hike

    Dog Hiking Checklist: What to Bring on a Hike

    These items should be on your hiking checklist! Optional gear is in GREEN, Seasonal gear is in BLUE. This is assuming something like an 8 hour alpine hike in the backcountry with no reception and a dog.

    10 essentials for any hike
    1. Navigation
    2. Headlamp
    3. Sun protection
    4. First Aid
    5. Knife
    6. Fire
    7. shelter
    8. Extra food
    9. Extra Water
    10. Extra clothing

    On Body

    • Hiking shoes
    • Hiking pants/tights
    • Merino T-shirt
    • Merino long sleeve/zip
    • Shell jacket
    • Knee Brace
    • Gaiters
    • Dog leash
    • Merino Socks
    • Merino underwear
    • extra hair ties
    • hat

    On Dog

    • collar with tags
    • harness
    • dog jacket

    in Pack

    • Dog leash
    • phone
    • car keys
    • wallet
    • Garmin Inreach Mini
    • battery pack
    • headlamp
    • emergency blanket
    • gloves
    • toque
    • extra merino top layer
    • warm extra layers to share
    • dog sleeping bag
    • food (so much food)
    • emergency bars
    • drink/tea/water bladder
    • water filter
    • bear mace
    • air horn
    • jacket
    • sunglasses
    • extra socks
    • down jacket
    • waterproof shell
    • crampons
    • snowshoes
    • bugspray
    • sunscreen
    • poop bags
    • dog treats
    • dog food
    • dog bowl
    • carabiners
    • sunhat
    • salt stick (electrolytes)
    • hand warmer
    • knife
    • dog layers (clothing)
    • dog booties
    • dog lights

    First Aid Kit

    • Compeed Blister Packs (best ones I’ve found)
    • Advil
    • Reactine (can be used on dogs)
    • Benadryl (can be used on dogs)
    • Superglue
    • bandages
    • lighter/matches
    • duct tape
    • zip ties
    • gravol
    • polysporin
    • tick remover
    • alcohol pads
    • larger bandages
    • dog emergency bootie
    • electrolytes
    • earplugs
    • tape
    • mirror
    • shoelace
    • safety pins
    • small plastic bags
    • mutlitool

    Photography

    • Camera
    • lenses
    • extra batteries
    • camera clip
    • tripod

    in Car

    • shovel
    • clothes to change into afterwards
    • car shoes
    • drink
    • food
    • dog wipes/baby wipes
    • blankets
  • Our Best and Tested Gear for Camping with Dogs

    Our Best and Tested Gear for Camping with Dogs

    I’ve been backcountry camping with Whiskey since I’ve had her and we’ve tried so many different forms and types of gear. While I’ve gotten used to carrying a significant amount of weight, every piece that I bring needs to be purposeful, tough, and lightweight (in that order). For reference we hike and camp in bear country, usually with the threat of variable weather, rain, snow, river crossings, and in wild country. We avoid crowds and sometimes hike without trails. Normally I go with girlfriends but once a year tend to go alone. Over the year I tend to camp close to the snowline, in the alpine, and summit peaks close to camp. Ticks are not an issue for us being so cold, but other wildlife is, so keeping scent-free is very important. I hope our gear guide is helpful, please let me know if you have any specific questions! A few links may be affiliate but are meant as a guide as to where you can buy the product. I do not promote one brand above others and have purchased most of the gear myself.

    Whiskey rocking her Palisades Ruffwear bags and K9topcoat base layer

    The BASICS

    Dog leash- Wilderdog– I love gear that’s multi-purpose especially if I’m needing to carry it in on my back up a mountin! Wilderdog uses climbing rope and real locking carabiners. I’ve used the leash for everything from hanging a bear bag, lifting up my pup up some steep sections (from the harness, not neck), to even installing my tire chains. We’ve used the leashes for several years and they’re in top condition.

    Hiking Pack- Ruffwear Palisades Pack– My love of this bag matches the love of my own Osprey. I love LOVE how the packs can come off and on so easily so we can take it off during food breaks. I ask Whiskey to carry a hefty load on multidays and every break she can get really helps. The harness underneath is perfect for summiting trips so I don’t need to bring another piece of gear. It’s good to note that we did break one of the tiny buckles that secures the bag onto the side of the dog (it’s not a major problem), and I’ve been too lazy to ask for a replacement buckle. The material of the bag also does rub and wear overtime on bushes and trees but overall I’m just so impressed by the ease of this product.

    So much gear needed for backcountry camping, but so worth it

    Harness- Ruffwear Flagline Dog Harness– Whiskey doesn’t tend to pull but if you’re hiking all day long on-leash it’s much more comfortable for everyone if your pup is on a harness, especially around mountain tops and technical scrambles. Bourbon is new to technical scrambles so I would always recommend a handle on the harness to help your dog up sections and have the easiest way to grip them should they slip (also easiest for a friend to help as well). If you’re even thinking you may need a harness, I would always recommend one with a handle.

    Tent– Depending on the size of your dog, you may need to go up one person size of your tent (ie if you’re two people with one large dog you may need a 3ppl tent). I also highly recommend NOT getting an UL tent as the mesh on those are so easily torn with dog paws. Whiskey loves to “knock” on the mesh to ask to be let in and out and also to say hi to friends in the morning. UL tents also have snaggier zippers which aren’t good if you need to unzip in a pinch for a pee break/barf emergency.

    I use vintage Marmot tents that are really heavy compared to what’s available these days but I just find the doors are huge, zippers are great, and the material lasts so well. Our 3 person Ajax tent has been under a foot of snow, in all conditions and we’ve had it for a decade now. I also highly recommend that you leave the bottom of the tent unzippered and teach your dog how to go in and out without having to ask you to unzip and zip each time. I’m totally resigned to the fact my tent’s going to be messy with dogs so I just keep my clothes in the corners. Lastly even if the evening calls for blue skies, consider bringing the fly unless you’re sure your dog won’t be bothered by watching the outdoors. I find most dogs sleep better when they cannot see outside.

    The Klymit Moon Dog Mat

    Klymit Moon Dog Mat– A really tough blow up mat that makes all the difference when the ground is cold, or you just want a comfortable spot to put your pup. Like humans, dogs lose so much heat from the ground so having an elevated surface really helps. I don’t bring the outer cloth layer anymore as it just adds bulk and weight and I’ll almost always bring a doggy sleeping bag instead. The mat is also great in canoes or anywhere else you want a mat that’s waterproof. I love the inflation system and I’m not even nervous about dog nails on these tough mats.

    The Whlyd River Sleeping Bag that I carry on colder hikes

    Whlyd River sleeping bag– Discount code: WHISKEY10
    the best and warmest doggy sleeping bag out there. There’s so many options to adjust the bag to your needs and dog’s comfort, and a strap at the bottom to keep the bag on a mat. Available in 3 sizes we use Medium, Whiskey loves her bag and crawls right on as soon as I pull it out. There should be a down UL bag coming soon (the original uses synthetic insulation which is better for damp/wet conditions) that I would also totally recommend if you need to go light and don’t need the ultimate warmth the original provides. I use the UL bag during the day and slip the bag over the footbed of my own sleeping bag to keep me warm Whiskey Whiskey crawls in to join me. Another sidenote is that I normally take off most of Whiskey’s jackets if she’s going under the sleeping bag so she can warm up and so any dampness (it’s always damp where we are) doesn’t keep her cold.

    Gundogsupply collar– We have lots of fancy collars but tend to go to these basic collars with nameplates. I’ve lost too many collar tags to trust them and if for some reason I lose a dog, I want to know my contact information is going to be on her collar. The collars are super tough and reasonably priced.

    Our Ajax Marmot tent has lasted over a decade

    the Human

    Klymit extra wide sleeping bag– Whiskey sleeps in my sleeping bag with me at night (the dog mat and sleeping bag are for the rest of the time we are at camp because I don’t’ want her crawling in and out of my sleeping bag during the day). I haven’t found many options for extra wide bags and this one is amazing. It fits Whiskey and I with room to spare (I’ll report back if I can fit Bourbon as well) and comes in two warmth options. Please do note that when Whiskey’s in my bag I cannot keep the face section tightened so although Whiskey does add extra heat, the open bag does make it colder at the same time. Also, I take of Whiskey’s collar and clothing before she shares my bag so we don’t get tangled!

    Nemo Sleeping mat– Not a dog thing, but I find if I’m sleeping with a dog my mat needs to be higher, wider, and more comfortable since we’ll both be moving around. I love this mat and it’s been much warmer than other mats of the same warmth rating.

    for more Human hiking gear, here’s a more detailed post

    the Kitchen

    Dog bowl- I’ve tried the soft collapsible bowls but they break much easier (of two I’ve had both had holes from the dogs pawing at them). The fabric ones last but they’re a pain to clean when you feed something messy and leave food smells for the animals. I’m still looking for the perfect dog bowl!

    DogFood- I highly recommend Open Farm Freeze Dried Raw (code WHISKEY10). It’s super lightweight, comes with a suitable package (so you don’t need to repack), I use half of her daily allowance for recall treats, and Whiskey’s poops are always so good.

    Trying out my vintage 4 season tent, Whiskey chowing down on dinner with her dog mats

    Earth Rated Poop Bags- Use the compositable bags and dispose of dog poop when you also need to go (in a proper waste management method like a cat hole). Bring a freezer zip lock bag to place the poop until you can dispose of them so you don’t have an “accidents”. I normally ask Whiskey to carry her own.

    Bear Bag- Ursack- If you are camping in bear or critter country without suitable bear boxes, animals can easily get into your food at night. I really suggest these bear and critter proof bags to keep your food and seal it in a scent-proof bag (drybag) if you can. They’re heavy and an nuisance to carry but it also means you’re not attracting and feeding wildlife, putting yourself in danger, making sure your campsite stays open, and of course that your food isn’t eaten.

    My Ursack poking through the bottom of my frost covered tent

    the Extras

    night light dog collar– There are clip on lights for dogs in the evenings but I’ve preferred these light up collars as others can see it’s a dog easier (it’s so scary if your dog walks by someone else’s campsite at night but much less threatening if they look like they’re ready to party). It’s also less likely that your dog may turn around and the light is obscured.

    Bug Protection- I’ve tried everything and nothing “natural” works for more than 5 mins. If it’s bad I’ll keep Whiskey in the tent, cover her with a jacket/blanket, or put a jacket on her that I’ve sprayed with DEET. Otherwise you just have to keep moving. I believe Hurtta makes a bug suit but I’ve never tried it as Whiskey’s not allergic.

    Winter camping involves more gear, but cabin winter camping is at least tent-less

    Dog jackets- We’ve done loads of reviews on dog jackets but I didn’t want to ignore the need of protection in the evening when the temperature drops. Like humans it’s good to have layers, fleece, waterproof options, and maybe even a base layer depending on where you are going. The doggy bag is super warm but if you’re going to be out for long periods of time, having options is always great!

    H2O4K9 Stainless Steel K9 Water Bottle– the “insulated” leaks- I normally carry a water bladder and hike in locations with loads of water so I don’t normally ever need to carry water for Whiskey. However if you do need a dog water bottle, this is the best one I’ve found. You can pour the unused water right back in so nothing is wasted and the lid doesn’t add much weight and works really well for Whiskey.

    Sometimes I bring too much! This hike I have my boat and paddles attached to my bag

    First Aid

    Paw Wax- Pup Wax– I keep a tiny tin and apply on my pups paws at night while giving the paws a close inspection especially on rocky and long multi-days. It’s so important to check their paws as much as possible because if you can catch a cut early and boot it, you can save yourself the trip, a rescue call, or carrying your dog the rest of the way. Try and make it a nightly ritual! You can also apply to sunburnt noses and your own hands and feet if they’ve been overworked.

    Allergy Pills- I keep Benedryl and Reactine with me on most hikes. Allergy reactions are one of the most common issues (wasps, bugs, plants, etc). It’s good to know your dog’s dose of the drugs and write them down.

    Activated Charcoal– Eating human feces with THC is highly poisonous and getting more common. Write your dog’s dose of charcoal and keep on hand if you are on a busier campground/trail/bike trail. I’m the crazy dog owner that goes out of my way to inform anyone I see smoking that my dog can die if they don’t dig a deep enough cat hole.

    Duct Tape/Zip lock baggy/bandages- These are part of my normal human first aid kit that I find the most useful crossover to dogs. Duct tape can help wounds, make booties, mend broken gear. Zip lock bags (go for the freezer ones) are useful in so many ways but can help keep something waterproof. Bandages are self explanatory!

    Whiskey wearing her emergency bootie (she had a small cut) on a lunch break (packs off)

    Booties– I normally bring an emergency bootie on long or serious camp trips. Boots that fit every single paw is best if you don’t want to bring the entire set so we go with Muttlucks (I can strap on really tightly and kept one on for 5 days of backcountry last year). If there’s any reason you may suspect your dog may need boots outside of an emergency (bad cut on glass for example) then bring an entire set and stay on the safer side.

    Garmin InReach Device– should anything happen on your hike where you would need help (or come across someone else that may need help), you can communicate out of reception with any cell phone number or email (as well as SOS emergency systems). You can also track your location with GPS and check weather systems coming in.

    Emergency Harness- I mention this as it’s something my friends have been pondering, some buying. You need to have some way to carry out your own dog should they become injured or sick. Whiskey’s just over 50lbs and I can carry her slowly over short distances on my shoulders and I do prefer that over a harness situation. Regardless, make sure you have a way to carry your dog and that you practice it before you need to. If you don’t regularly bring an emergency harness, practice carrying your dog over your shoulders (behind your neck) with their legs on either side so your dog feels comfortable and so you can get in and out of the position.

  • Our Best and Tested Canine Winter Gear

    Our Best and Tested Canine Winter Gear

    Canine Jackets

    When you select a jacket for your dog, think of the conditions you are going out in, and the type of dog you have. Are they normally cold? Do you only need rain/snow protection (some dogs ball up), perhaps you have a summer dog like Whiskey! Are they going to be on a long hike, in wet snow? deep snow? or playing rough with other dogs?

    I find wet snow is much more difficult to protect against as it sticks to the top of alot of jackets and then melts into the jacket instead of just falling off like dryer colder snow. Wet snow also then refreezes and becomes ice causing even more problems. In this case, find a jacket that has a smooth surface so the snow falls off quicker. If warmth is the only issue, then focus on the thickness of the jacket and what areas it covers. Perhaps you use a harness and need to make sure there are openings in the jacket?

    Abby has a double coat of fur that’s long and Whiskey has a single very short coat of fur. Whiskey is wearing Backcountry gaiters and Voyagers k9

    Hurtta Extreme Warmer– best for- dogs with thicker fur, harnesses, dogs that need ear protection (doesn’t stay on a fast moving dog), thicker dogs, size down if between sizes, no velcro

    Hurtta Expedition Parka– best for- dogs that have shorter fur, slimmer dogs, size down if between sizes, no velcro

    Voyagers k9– best for- wet snow, rough play, velcro only, does not fully cover chest but thicker fleece than chillydogs. The most Waterproof winter jacket we have.

    Chillydogs winter jacket fits Whiskey

    Chillydogs.ca – best for- best fit for Whiskey, velcro and clips so it won’t come off even if your puppy tries! Full tummy coverage, fleece is slightly thinner then k9voyagers.

    Hurtta Extreme Overalls– The newest warmest “jacket” with legs that we have tried. Fully adjustable points and ankle tighteners. Can be hard to put on a moving dog and the legs can get tangled into the jacket if you are doing extreme activities (bushwacking/technical climbing) but most activities and range is fine. Snow does stick to the cuffs and and ice over.

    K9topcoat Waterproof Bodysuit– The best and warmest underlayer (or solo layer) we have tried. Whiskey has actually panted in this which is SO rare. Perfect underneath a traditional jacket. Doesn’t collect or gather snow and is waterproof (be careful about ripping with playing dogs or sharp bushes) code WHISKEY15

    Layering Options

    Another layer here would have been helpful! Hurtta Expedition Jacket

    If it gets colder, I would first add boots (dogs lose alot of heat from their paws). Whiskey will lift her paws when she needs boots (she looks uncomfortable, shivering, tail tucked, and lifts one paw after another). After boots are added, think about a fleece layer, or a body-suit underneath. Perhaps a snow suit option. We haven’t tried all the brands yet! Lastly, if it’s very windy (or sunny) Rexspec googles are great. I tend to keep this in my bag until it’s needed (the training to wear these is higher than boots).

    Dog Booties

    Testing out Voyagersk9 dog boots

    No matter what we’ve tried, nothing has been perfect. Velcro on the feet balls up in snow and gets stuck into the teeth causing it to fall off eventually. Boots that fit dogs with fur (ie thicker ankles) don’t do well with dogs with skinny hairless legs. The leg holes end up collecting snow that becomes ice and can be painful if not cleaned up. If the boots are too thin, they can become wet and frozen which doesn’t help. Thick boots rub the ankles, and doesn’t allow the dog to feel the ground. Also no boots give the same grip as a dog’s own paws and claws while climbing obstacles (I assume most people aren’t scrambling rocks in sub-zero conditions but this is a problem for us). There’s a longer blogpost about boots here, but these are what I use

    Hurtta– comfortable, no rubs, holes in the joints after a season’s hard use, must wrap and tuck the strap tightly inside itself to stay put, still comes off after an hour or so

    Canine Equipment Ultimate Trail Boots- comfortable, haven’t tested fully, velcro strap can come off, lightest bootie set (I put this in my bag as a “just in case”)

    Dog gaiters are amazing

    Backcountry Paws– dog gaiters DO NOT COME OFF (won’t lose boots), boots are attached to gaiters, can be an ordeal to put on if multiple dogs, velcro straps can come loose, so you still have to strap really tightly and keep an eye on the velcro, in deep snow can collect inside the leg holes and then the gaiters are useless (do not use in fresh deep snow), offers more protection then just boots

    Muttluks– only good for short periods of calm walking, fabric isn’t waterproof and freezes into ice, paws get wet, good for protection against salt in the city, strap will not stay on long

    Voyagers K9– higher with two straps, fleece so fabric isn’t waterproof outside of the bottom section, can collect snow inside and freeze, not good in wet snow conditions, can be used for shorter periods of time, dryer snow, inside the home, straps don’t have a tightening device

    A well prepped short-haired winter dog

    Dog Goggles

    Goggles are pretty specialized. In most conditions you won’t ever need them. Outside of hunting in bush where their eyes can be damaged, and dogs that already have eye damage, winter use is limited to very windy days, very cold days (yes they really do provide protection from cold) and also long snowy hikes in bright sunshine (eyes can be damaged and sunblind with frequent exposure and will show as they age, Whiskey’s now got many black spots building around her eyes). They take specialized training to use so please think of them as a process, not a quick gimick.

    Dog Mats

    A Vizsla dog in a dog sleeping bag on ice
    Whyld River dog bed

    If we are stopped for awhile or camping, there’s some options that might help-

    Dog mat- Klymit now makes blow up dog beds that separates your dog from the cold ground (like human mats).

    Dog sleeping bagsWhyld River (Discount code: WHISKEY10 ) makes a really thick synthetic insulated sleeping bag. Sometimes I bring just the bottom layer for rest stops on longer hikes (I end up sitting on it, because Whiskey prefers a warm lap)

    Extra down jacket- For multi-use bring an extra down jacket or blanket that anyone can use. I lay it out for Whiskey to sit on if needed.

    Human Gear

    A group of women hiking in snow all geared up for winter
    All geared up for subzero temps

    Crampons/Microspikes- I prefer to use microspikes when the start of a hike isn’t snowy or needing the spikes, and if a hike is fully in snow/ice, then I prefer crampons (the type for hiking, not ice climbing). Crampons do not ball up but are alot more aggressive, they also do bot break as easily as the stretchy microspikes but I would not want to use them over rock or trails not fully covered in snow. My preferred brand is Hillsound

    aggressive crampons in action for hiking
    Hillsound Crampons

    Snowshoes– only needed with lots of fresh powder, otherwise use crampons/microspikes. They can be cumbersome and unnecessary on a packed trail, if hiking proper incline, get snowshoes with metal spikes that go along the sides, not just the teeth under the toes (MSRs)

    Hiking poles with baskets– Hiking poles that have the ability to take on and take off snow baskets are great! I prefer black diamond poles so far.

    Snowshoes and gaiters are key to hiking in snow
    Hillsound Gaiters, MSR snowshoes

    Gaiters– gaiters prevent snow from entering your boots should you be post-holing. They aren’t needed if you are only sticking to well trekked out trails and won’t be going into deeper snow, however if there is a chance you might, better be safe! I prefer Hillsound

    Boots- Ankle high boots with a solid support and thickness to keep you warm. Boots are super personal so make sure yours is comfortable with winter socks

    Socks/Clothes- I prefer merino wool! It keeps you warm even when wet which is so useful if you’re sweating in sub zero temperatures. Select socks with more than 75% merino and carry an extra pair if you might be doing any river crossings.

    Headlamp– in Canada winter hiking means less daylight and the likelyhood of heading back in the dark (or starting in the dark). It’s always good practice to bring a headlamp with extra batteries (cold batteries drain faster) that are NOT rechargeable (those drain much faster), or a charger for usb headlamps.

    Extras- Gloves, mittens, hats, neck gaiters, down jackets, and a good shell are all important. There’s more than enough options for these but bring more than you think you might need. Your friend might!

  • Adventure in Edziza- Hiking the Spectacular Spectrum Range

    Adventure in Edziza- Hiking the Spectacular Spectrum Range

    When I passed by this section of Northern BC a couple years ago, I looked at the parks nearby and made a mental note to research more for a multiday hike in the future. Just the photos of the Spectrum range alone makes one spend a couple hours looking into the possibility of checking out this region.

    The bright colored mountains drew us in

    Previously called the Rainbow Mountains, the range is so colorful from the heavy mineralization from the Mount Edziza volcanic complex. As well, this location is the main source of obsidian in Northern BC and First Nations travelled from as far away as Alaska and northern Alberta for the sharp stone.

    The wild Spectrum range

    There are very few trails in the region, mostly not marked, often overgrown and always difficult to hike. There’s two main areas in the Mount Edziza Park, the Spectrum range (South of the Raspberry Pass) and the Edziza area, neither of which has vehicle access, all very remote, and home to Grizzlies, moose, mountain goats and sheep, and wolves.

    The little plane that took us in, and all our gear

    With little information and no trails, we made our own trail plan, traversing from Little Ball Lake to Mowdade Lake in a U-shape heading over the range. Everyday we passed by one or two mountain ranges, and normally crossed at least one river/stream. Our maps were old (glaciers having receeded a large amount) but with barely any trees, we were able to find our route relatively easy. Scrambling passes were more difficult, as sometimes you would climb most of the way up a mountain only to pop over the other side and realize you couldn’t get down safely. Another time we scrambled up a pass with loose scree that just kept getting steeper to the point we ended up climbing up a waterfall as it had the largest stable rocks to cling to.

    The crew, 3 humans, one pup

    River crossings were another challenge and there was a day we reached a river towards the end of our day. We could have camped and then attempted the crossing in the morning, but we chose to attempt the crossing in the evening in case someone fell in and needed to spend the day warming up. The river was ranging, and we scouted until we found a narrows (which made the river even faster). There was a 1 meter jump that could not be missed. Packs were thrown over separately and Whiskey made it on her own (with alot ALOT of encouragement and a rope tied to her harness).

    Vistas were at every turn

    Water was everywhere, and filtered it was clean and easy to cook and drink with. We never needed to carry much with us, as everyday we would pass countless sources of water or snow.

    Limited food supplies but still yums

    Finding suitable camp spots was also easy, the main question being, “should we keep going, would it be better further on”. We buried our bear bags (Ursacks), with all our food overnight far from our camp spots and never had any issues. We carried dehydrated food packs, and with very limited spaces in our ursacks (the determining factor in what we could bring), packed dried fruits, bars, and shared double

    Whiskey and the humans were exhausted every night

    Communication became key, as our last day ended up being longer than any of us expected (with no trail, we didn’t know how long anything would take). With my InReach mini device I was able to speak to our plane for a pickup as late as possible. We were racing the sun as we finally got to Mowdade Lake (with a couple wrong turns) and boy the elation when we saw our plane picking us up!

    The most loyal, strongest, sweetest trail dog ever
    Hanging out above glaciers
    What a wild country

  • Paddling with Dogs 101

    Paddling with Dogs 101

    We have always loved different ways of exploring the great outdoors and paddling has always been a wonderful option and complement to all the hiking and camping we do. Over her life, Whiskey has been on paddleboards, canoes of all types, kayaks, and rafts, as well as motorized boats and if you’re wanting to introduce your own pup to watercraft, I hope this gives you a couple tricks and tips we’ve learned!

    One of our first longer canoe rides

    Choose a Location and Watercraft

    Although normally the goal is to stay dry, it’s a good idea to start in an area where the consequences of falling in are not going to be traumatizing or dangerous. If possible find a smaller lake or pool where the water isn’t too cold, on a day without much wind. Beach access is normally easier than docks for getting in and out (especially while holding a dog) and of course it helps if the location is dog-friendly! It also helps if you choose an area with very little distractions (no people, noises, wildlife) so your dog is already calm before adding in a boat.

    packrafts are really stable and can be taken to shallow areas (this is our Alpacka raft)

    Paddleboards and rafts are the most stable, and hardest to flip while also being easier to lift a swimming dog back in and load up. If you’re using a canoe or kayak, try to aim for one that’s as large and wide as possible for stability.

    Whiskey likes to point at things and put her paws up on the

    Because Whiskey loves her comforts, it helps our princess to always have plenty of soft blankets for her to lie on. Start on land, just asking your pup to sit in the watercraft and lie down with treats on hand and lots of praise. I always bring treats when we try something new, and I don’t skimp on them at all! It also really helps to have a calm tired dog, like after a long walk.

    Loading Up

    Start with small sessions and with each success, take a break, enjoy the sun, and then try for a longer one if all is going well (and there is no stress). If you feel like it was a bit of a challenge, then call it a day and end with a success.

    Paddling gets us away from the crowds

    Keep everyone involved calm, even bored acting when you launch. It can also help if you have a friend hold your pup until you’re settled before bringing the dog with you on the watercraft.

    sitting on a paddleboard is a good way to start

    If you’re using a paddleboard, sit or kneel so you’re closest to your dog. If your watercraft is large enough and you can fit two people, see if one person can have 100% of their attention on the dog.

    Once your dog is doing well, move away from the shore or dock to discourage them trying to jump back out (Whiskey sometimes jumps onto shore if we are too close, and then will hop back in at her leisure which makes everything wet and tippy for the humans!).

    we now have our own Oru kayak!

    Be aware that if your family is spread between different boats, your dog might try to get to the other people, so keep the boats further apart until everyone is comfortable. Whiskey is much calmer when I’m the only one out, but if dad is on shore, or in another boat, she constantly wants to say hi and will stand up and wander around.

    little Ginger is a bit easier to train in a canoe as she can’t jump out as easily or tip the boat

    With puppies you will have less control so it’s really essential that they are tired! It’s really great to introduce your puppy before they’ve developed fears so just watch your puppy and go at their comfort level and pace. Treats and commands aren’t usually as effective with puppies, so make sure they can be comfortable and keep everything positive and happy, even if you end up in the water!

    Dog Training commands that help in boats

    Sit/Stay prevent premature exits
    Lie down/Stay during distractions and to make life easy
    Leave it for distractions on the water including birds, seals, other boaters
    In/Out (release command) so you can get into the boat first comfortably

    Safety gear

    We use the Outward Hound jacket

    For calm water, smaller lakes, and paddles close to shore we don’t normally use a life jacket (I’m a long distance swimmer, and Whiskey has no problem swimming distances). However, we do have a lifejacket for ocean paddles, or trickier situations. We use an Outward Hound Standley Sport Life Jacket with Whiskey but other brands should also work well (we see alot people happy with the Ruffwear version). The main thing to look for is that the jacket has a handle so you can easily lift your dog back into the watercraft (or keep your dog from jumping out), a place to clip on a leash, sufficient padding, and a good fit. If you have a dog that might take off swimming after a duck, keep a long leash on them just in case!

  • Sunshine Coast Trail

    Sunshine Coast Trail

    Tinhat Hut-> Elk Hut-> Walt Hill Hut// Fiddlehead Landing -> Dixon Road

    The Sunshine Coast trail has been on my “must do” list for a couple of years now, and it was only recently I finally put aside all excuses and found a crew who were keen to try. We were all photographers who had weekdays free, and since I don’t go without Whiskey, I wanted to ensure that it would be the least busy on the trail. Scroll to the end of the article for map links and other resources!

    The Sunshine Coast Trail

    The Sunshine Coast trail is located on the northern Sunshine Coast which involves 2 ferries from mainland Vancouver. With the timing of the ferries and the drive across the Southern Sunshine Coast, parking at the end of the trail, and shuttling to the beginning being so time-consuming, we decided to sleep over at Egmont, near Earls Cove. This way we could pick up an early ferry and have a fresh start at the trail the next day, freshly showered and with a good nights rest. There is also so much to do on the drive to Egmont, so we checked out one of my favorite spots, Smuggler Cove, and reached our cabin at the BackEddy well before sunset.

    Smugglers Cove Sunshine Coast

    In the morning, we took off early and headed to meet Jesse of the Sunshine Coast Shuttle Services so he could help drop us off at the beginning of the hike (this way we could do a one-way hike to reach our car). We parked around the 137 km mark of the trail and he shuttled us to Fiddlehead Landing with his truck (dog friendly, yey!). We hit the trail in the rain, knowing that our first day was over 1100m incline with full packs.

    Ask Jessie to shuttle you to the start of your hike!

    Pretty soon we were seeing views between trees and with a couple sketchy log crossings and some very muddy patches. Eventually we made our way to a huge junction at km 88 where the trail meets a rugged forest road. Going straight would keep us on the SCT and turning right would take us a couple kilometers to the Tin Hat hut and some pretty epic views. The snow started around this point and we kept climbing until we finally broke through the trees when Brice, who was (usually) in the lead saw the first glimpses of the cabin. I was sooo happy to drop my pack at the hut and magically the sun came out and lit up the best views on the entire trail. We had slammed this section, of around 9km in only 3 hours 45mins (including breaks) so we had tons of daylight left. A benefit of off-season camping is that the snow meant we didn’t need to go off in search of water (there is no water source at the cabin normally). Also, sharing a tight space with a dog (even a short haired, well behaved and non-smelling one) can understandably be difficult for non-dog lovers, and so I also go out of my way to go to huts off-season.

    The cabin is small, but well built and would be cramped with about 8 people in the loft. It sits on the best views of the trail and has a compositing outhouse in really good condition. There is a wood pellet stove to keep warm and even in the spring, there was more than enough pellets for a couple months more. We even had reception! After a really well deserved dinner we grabbed our cameras and headed out to the view point for sunset. Crampons really helped as we were making fresh tracks and we were rewarded with one of the best sunsets yet this year!

    Sunset at Tinhat peak

    After a really warm night’s sleep in the winterized cabin loft, we took our time eating breakfast, making lunch, and headed out. The weather was calling for rain in the evening so we tried to keep moving. There are two options to head to the next part of the trail, the quicker South trail, or the longer trail that loops around Lewis Lake. The Lewis lake trail was unbroken snow and is a scramble in sections, and also adds about 5kms but is more scenic and avoids some of the logging roads. We chose the south route because of the snow and the weather. About the halfway point, we had a quick lunch break at Coyote lake where the sun popped through he clouds for a couple minutes, and then kept going, arriving at Elk Hut just before the downpour started in earnest.

    The crew

    Elk hut is an open hut, with 3 sides walled in, and one open. The loft is also open to air, so it was going to be a chilly night. On a dry summer day, I can imagine this would be a lovely place with a firepit outside (that was totally soaked), places to hang out, and a log dock. We even saw a canoe underneath the cabin but as it was pouring rain our whole time there, we didn’t get to enjoy it much! To warm up, we quickly changed into dry(ish) clothing, boiled up some water for tea, cooked up some dinner and crawled into our sleeping bags really early hoping for an early head start the next day.

    Not happy it was raining

    13 hours later, we crawled out of our bags back into rain. I suppose we had been pretty tired from a cold day’s trek so we all slept really well. After breakfast and packing up again, we started to our last hut of the trip- Walt Hill. It looked like this would be our easiest day so far, and most of the hike was lovely but as soon as we hit the snowline, everything changed. Although this section is lower in elevation than Tinhat, the snow was deeper and softer so we spent what seemed like an eternity taking turns breaking trail and post-holing up a path that no one had visited recently. The views are really nice on this section, and I can imagine without snow this would be one of the best parts of the trail to hike. When we finally saw glimpses of the hut, we were absolutely elated to have 4 walls and a fire to warm up and dry out for the evening. We had about an hour after reaching the Walt Hill hut before the rain really came down again. We still had lots of snow so we didn’t have to worry about a water source once again and huddled inside drying out the shoes, socks, and clothes for the evening.

    All the snow
    all the shoes and socks drying

    Our last day on the trail was calling for the a downpour, so I threw on all the rain gear, packed up my camera deep into my bag, and raced down the mountain thinking only of that dry car! Thankfully it was a quick section on a very well marked trail with only a couple water crossings (which probably aren’t anything on a dry day). We cheered at every kilometer marking (or at least I did!) until we reached the road where I parked and all scrambled into the car making really good time (2 hours 50 mins 12 kilometers).

    View from Tinhat

    Overall I would love to do this trail again! I really recommend it for those that aren’t as comfortable tenting in bear country, or would prefer to shed the weight of a tent and have a roof and space to sprawl out in the evenings. I can imagine the huts would be pretty busy in the summer and could be quite tight in space if there were too many people (it has been full on weekends in the summer). There isn’t a way to book the hut, so plan accordingly by bringing a backup tent or aim for a weekday (or day when the weather isn’t great). Definitely take advantage of Jesse’s shuttle service and ask him questions when you are in the car about the conditions and trail reports he’s heard about. Also please consider donating to PR PAWS who maintain the trail and huts if you are using the trail.

    Until next time

    Resources:

  • Vancouver Nov 2017 Vizsla Meetup

    Vancouver Nov 2017 Vizsla Meetup

    I’ve been pretty busy launching my Parawild company so it’s been a stretch to keep up with everything but I decided I needed to get my Vizsla fix and lo and behold, it was time for another Vizsla meetup! Of course November tends to be extremely rainy so I was really worried no one would show up on a rainy Sunday long weekend but of course, Vizsla people are not the norm. I’m not even sure how many ended up joining us as people came and went but I believe we were around 15+. The rain wasn’t too bad, and with puppies to a couple sugarfaces, it was so amazing to see the community out and taking over Barnett Marine Park. Taking photos of insanely fast dogs, in the rain, on a dark day, with wide aperture, covered with mud, and sand is….not easy! It’s really lots of luck, praying some autofocus will work, and setting the ISO very high and of course putting the camera down to give butt rubs when asked 🙂

    [envira-gallery id=”1535″]