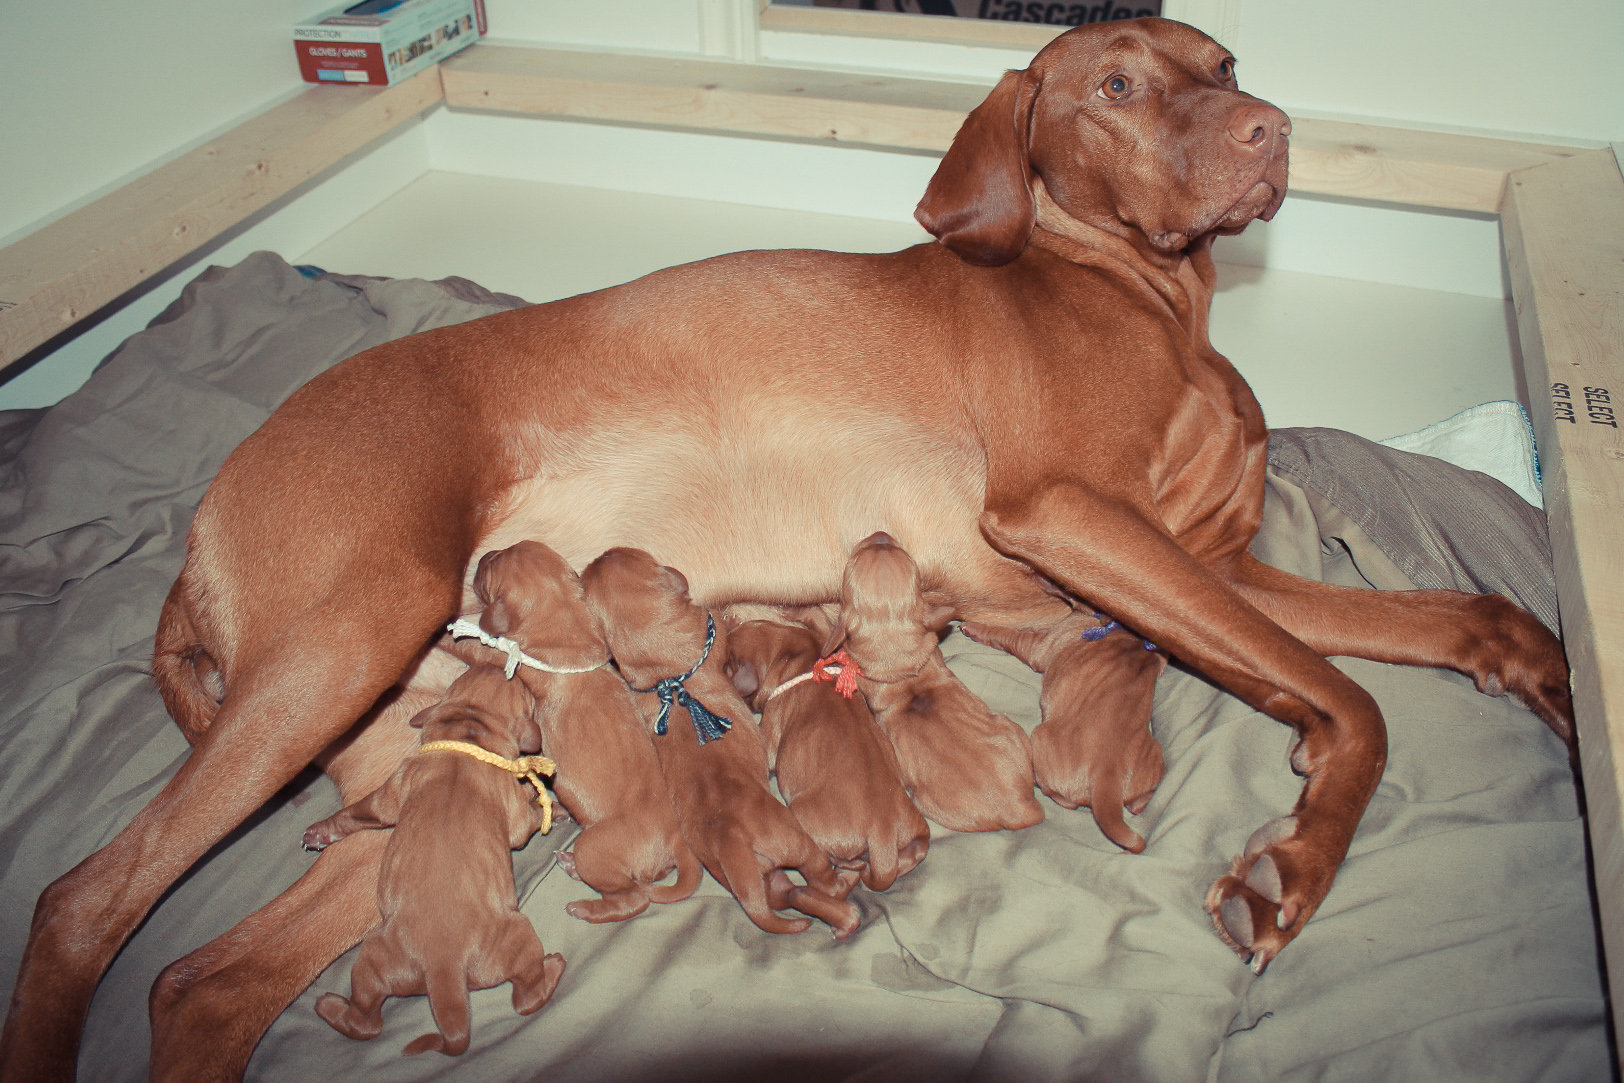
So you’re sure you want a Vizsla? But how do you find a breeder, a great breeder that will support and help you throughout your pup’s lifetime? What IS a good breeder and what should you look for? These are all subjective of course, but here’s what I find important
Communication is super high on my list. Do they respond to emails quickly and personally? Are they answering all your questions in detail, perhaps they are asking you lots of questions as well (which is great!). If you can, ask to jump on a phone call and ask them about their dogs, their experience, and what they are looking for in a potential client. VISIT if it’s at all possible, and see the living space, meet the parents if possible, and see how the puppies will be brought up.
Testing for health is partially why you don’t just go to a rescue and pick up a dog (if it’s even possible). Make sure both parents have had their eyes, hips, elbows, and what is required in your area tested and the results are good or excellent. ASK about allergies, ask about anxieties, and if any previous puppies have had early deaths, seizures, or history of aggression in any manner.
Dogs have been shown in the showring and/or tested for work (champions in the field). The purpose of this is that to ethically breed, there needs to a purpose, not just monetary to further the breed. There should be thought put into which dog to breed with, their genetics, and if the dogs meet a standard judged by a trained 3rd party. Also, the dog isn’t under the age of 2, or has been bred under the age of 2 (hip tests are generally done after 2).
References from others have had dogs from the breeder, but mostly references from other breeders is key. If multiple reputable breeders respect and would recommend another breeder, that’s a really good sign. When you are rejected, or told that a waiting list is years long (this will happen!), ask the breeder whom they would recommend and why, and don’t forget to ask whom to avoid!
Hard vetting, health guarantees, and contracts that insist the dog will go back the breeder should you not be able to keep the dog. When you approach a breeder, you’ll be asked loads of questions so they can be sure you’re an appropriate family and is a good fit for their dogs. It can seem excessive and I’ve been turned down over and over, but placing a puppy isn’t just a one time business transaction. A good breeder is responsible for all their puppies for their entire lifetimes. This is super important and makes sure that these dogs will never be found in a shelter or rescue. It also gives you recourse if your dog develops health issues early, or is delivered sick.
Whiskey’s Breeder
Whiskey’s breeder doesn’t breed anymore but her lines are from Akar in Quebec City. There are a couple breeders I’ve met in person in BC that I would recommended and a couple I’ve heard of from friends as well. We’ve been unlucky with some potential breeders (small litters, no litter, or male only litters) in the past so don’t expect a breeding to work out.
How to look for a breeder
Check your local clubs to start with a list. Join a Vizsla meetup to meet the breed and talk to owners. Head over to a local show, or field test day and meet the breeders. Email, call, talk and keep it up!
It’s been awhile since I’ve updated on Whiskey’s allergies. I suppose it’s because we’ve “solved” them or at least found a solution that works well.
To quickly summarize, we had noticed that Whiskey would get bumps on her exposed skin (normally ears/head) sometimes when she was outside. These bumps would quickly go away (within an hour or two) once she was inside and sometimes would be so bad she would resemble a Shar-pei. It was pretty clearly environmental, not only because they went away so quickly once out of the elements, but also because it never appeared where she wore a jacket, and sometimes they would appear only on the front of her legs (where she got splashed more) for places where she was more exposed.
If we miss a dosage, minor bumps
These allergies were worse when it was raining, especially after a period of dryness (corresponds with high allergens being released and popped by rainfall). We went to a dermatologist, did a full allergy testing (intradermal and blood) and tried Benadryl (no effect) and personalized immunotherapy (no effect).
Eventually the vet suggested Reactine, which I thought wouldn’t work since Benedryl had no impact, however it worked! And right away! Whiskey is now on two pills of Reactine a day (2x10mg pills in the morning). If I skip a day, sometimes I can see bumps by noon, the effect is so obvious. I buy a large brie (or Camembert) cheese that last a month or longer and wrap her pills in the cheese (cheaper than pill pockets). The Reactine I get at Costco (no-name brand, cheapest option I’ve found). I haven’t noticed any side-effects or issues and I’m SO thankful we’ve found an easy solution although Whiskey will probably be on Reactine for her lifetime.
When you select a jacket for your dog, think of the conditions you are going out in, and the type of dog you have. Are they normally cold? Do you only need rain/snow protection (some dogs ball up), perhaps you have a summer dog like Whiskey! Are they going to be on a long hike, in wet snow? deep snow? or playing rough with other dogs?
I find wet snow is much more difficult to protect against as it sticks to the top of alot of jackets and then melts into the jacket instead of just falling off like dryer colder snow. Wet snow also then refreezes and becomes ice causing even more problems. In this case, find a jacket that has a smooth surface so the snow falls off quicker. If warmth is the only issue, then focus on the thickness of the jacket and what areas it covers. Perhaps you use a harness and need to make sure there are openings in the jacket?
Abby has a double coat of fur that’s long and Whiskey has a single very short coat of fur. Whiskey is wearing Backcountry gaiters and Voyagers k9
Hurtta Extreme Warmer– best for- dogs with thicker fur, harnesses, dogs that need ear protection (doesn’t stay on a fast moving dog), thicker dogs, size down if between sizes, no velcro
Hurtta Expedition Parka– best for- dogs that have shorter fur, slimmer dogs, size down if between sizes, no velcro
Voyagers k9– best for- wet snow, rough play, velcro only, does not fully cover chest but thicker fleece than chillydogs. The most Waterproof winter jacket we have.
Chillydogs winter jacket fits Whiskey
Chillydogs.ca – best for- best fit for Whiskey, velcro and clips so it won’t come off even if your puppy tries! Full tummy coverage, fleece is slightly thinner then k9voyagers.
Hurtta Extreme Overalls– The newest warmest “jacket” with legs that we have tried. Fully adjustable points and ankle tighteners. Can be hard to put on a moving dog and the legs can get tangled into the jacket if you are doing extreme activities (bushwacking/technical climbing) but most activities and range is fine. Snow does stick to the cuffs and and ice over.
K9topcoat Waterproof Bodysuit– The best and warmest underlayer (or solo layer) we have tried. Whiskey has actually panted in this which is SO rare. Perfect underneath a traditional jacket. Doesn’t collect or gather snow and is waterproof (be careful about ripping with playing dogs or sharp bushes) code WHISKEY15
Layering Options
Another layer here would have been helpful! Hurtta Expedition Jacket
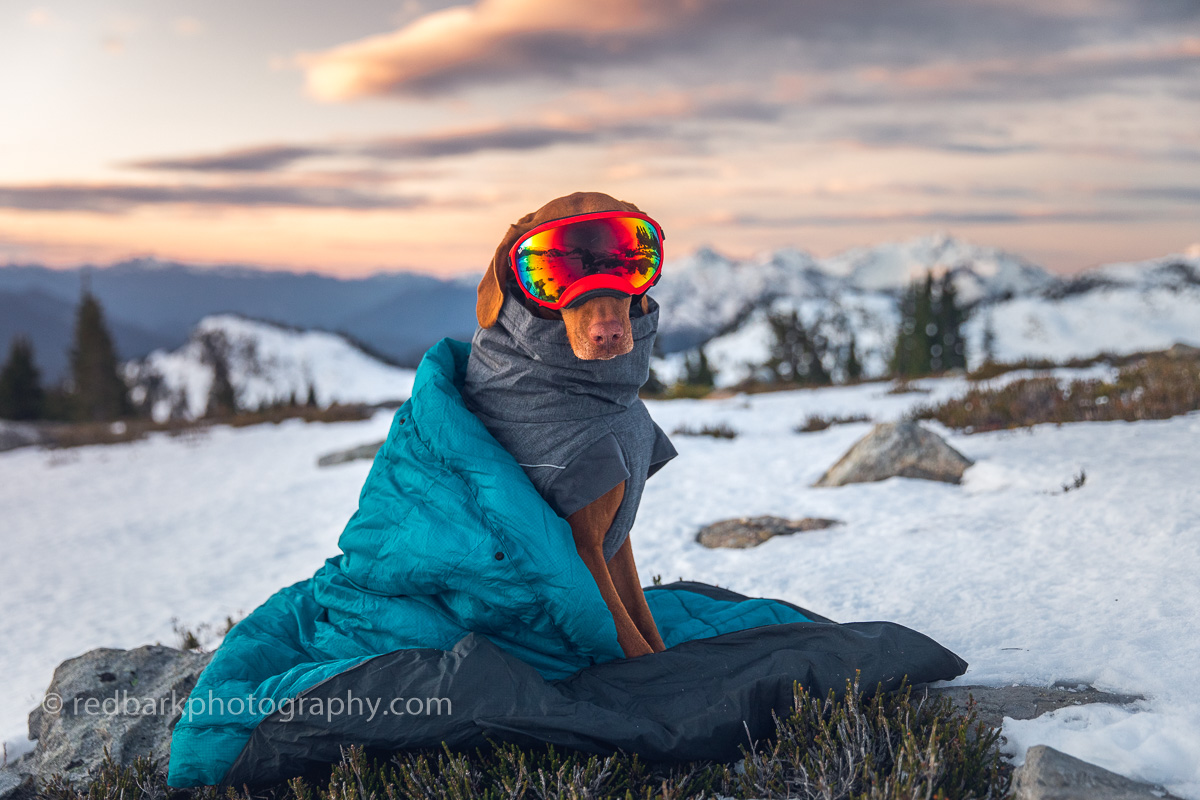
If it gets colder, I would first add boots (dogs lose alot of heat from their paws). Whiskey will lift her paws when she needs boots (she looks uncomfortable, shivering, tail tucked, and lifts one paw after another). After boots are added, think about a fleece layer, or a body-suit underneath. Perhaps a snow suit option. We haven’t tried all the brands yet! Lastly, if it’s very windy (or sunny) Rexspec googles are great. I tend to keep this in my bag until it’s needed (the training to wear these is higher than boots).
Dog Booties
Testing out Voyagersk9 dog boots
No matter what we’ve tried, nothing has been perfect. Velcro on the feet balls up in snow and gets stuck into the teeth causing it to fall off eventually. Boots that fit dogs with fur (ie thicker ankles) don’t do well with dogs with skinny hairless legs. The leg holes end up collecting snow that becomes ice and can be painful if not cleaned up. If the boots are too thin, they can become wet and frozen which doesn’t help. Thick boots rub the ankles, and doesn’t allow the dog to feel the ground. Also no boots give the same grip as a dog’s own paws and claws while climbing obstacles (I assume most people aren’t scrambling rocks in sub-zero conditions but this is a problem for us). There’s a longer blogpost about boots here, but these are what I use
Hurtta– comfortable, no rubs, holes in the joints after a season’s hard use, must wrap and tuck the strap tightly inside itself to stay put, still comes off after an hour or so
Canine Equipment Ultimate Trail Boots- comfortable, haven’t tested fully, velcro strap can come off, lightest bootie set (I put this in my bag as a “just in case”)
Backcountry Paws– dog gaiters DO NOT COME OFF (won’t lose boots), boots are attached to gaiters, can be an ordeal to put on if multiple dogs, velcro straps can come loose, so you still have to strap really tightly and keep an eye on the velcro, in deep snow can collect inside the leg holes and then the gaiters are useless (do not use in fresh deep snow), offers more protection then just boots
Muttluks– only good for short periods of calm walking, fabric isn’t waterproof and freezes into ice, paws get wet, good for protection against salt in the city, strap will not stay on long
Voyagers K9– higher with two straps, fleece so fabric isn’t waterproof outside of the bottom section, can collect snow inside and freeze, not good in wet snow conditions, can be used for shorter periods of time, dryer snow, inside the home, straps don’t have a tightening device
Dog Goggles
Goggles are pretty specialized. In most conditions you won’t ever need them. Outside of hunting in bush where their eyes can be damaged, and dogs that already have eye damage, winter use is limited to very windy days, very cold days (yes they really do provide protection from cold) and also long snowy hikes in bright sunshine (eyes can be damaged and sunblind with frequent exposure and will show as they age, Whiskey’s now got many black spots building around her eyes). They take specialized training to use so please think of them as a process, not a quick gimick.
Dog Mats
Whyld River dog bed
If we are stopped for awhile or camping, there’s some options that might help-
Dog mat- Klymit now makes blow up dog beds that separates your dog from the cold ground (like human mats).
Dog sleeping bags– Whyld River (Discount code: WHISKEY10 ) makes a really thick synthetic insulated sleeping bag. Sometimes I bring just the bottom layer for rest stops on longer hikes (I end up sitting on it, because Whiskey prefers a warm lap)
Extra down jacket- For multi-use bring an extra down jacket or blanket that anyone can use. I lay it out for Whiskey to sit on if needed.
Human Gear
All geared up for subzero temps
Crampons/Microspikes- I prefer to use microspikes when the start of a hike isn’t snowy or needing the spikes, and if a hike is fully in snow/ice, then I prefer crampons (the type for hiking, not ice climbing). Crampons do not ball up but are alot more aggressive, they also do bot break as easily as the stretchy microspikes but I would not want to use them over rock or trails not fully covered in snow. My preferred brand is Hillsound
Hillsound Crampons
Snowshoes– only needed with lots of fresh powder, otherwise use crampons/microspikes. They can be cumbersome and unnecessary on a packed trail, if hiking proper incline, get snowshoes with metal spikes that go along the sides, not just the teeth under the toes (MSRs)
Hiking poles with baskets– Hiking poles that have the ability to take on and take off snow baskets are great! I prefer black diamond poles so far.
Hillsound Gaiters, MSR snowshoes
Gaiters– gaiters prevent snow from entering your boots should you be post-holing. They aren’t needed if you are only sticking to well trekked out trails and won’t be going into deeper snow, however if there is a chance you might, better be safe! I prefer Hillsound
Boots- Ankle high boots with a solid support and thickness to keep you warm. Boots are super personal so make sure yours is comfortable with winter socks
Socks/Clothes- I prefer merino wool! It keeps you warm even when wet which is so useful if you’re sweating in sub zero temperatures. Select socks with more than 75% merino and carry an extra pair if you might be doing any river crossings.
Headlamp– in Canada winter hiking means less daylight and the likelyhood of heading back in the dark (or starting in the dark). It’s always good practice to bring a headlamp with extra batteries (cold batteries drain faster) that are NOT rechargeable (those drain much faster), or a charger for usb headlamps.
Extras- Gloves, mittens, hats, neck gaiters, down jackets, and a good shell are all important. There’s more than enough options for these but bring more than you think you might need. Your friend might!
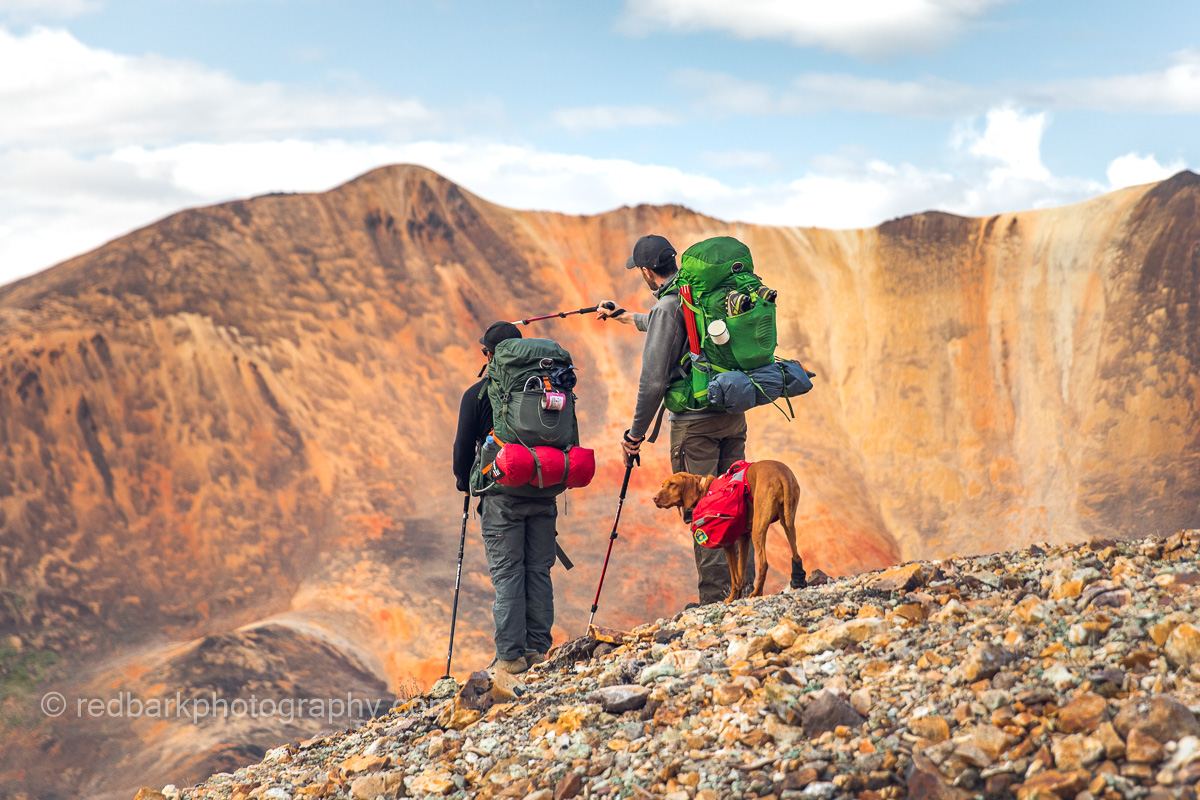
When I passed by this section of Northern BC a couple years ago, I looked at the parks nearby and made a mental note to research more for a multiday hike in the future. Just the photos of the Spectrum range alone makes one spend a couple hours looking into the possibility of checking out this region.
The bright colored mountains drew us in
Previously called the Rainbow Mountains, the range is so colorful from the heavy mineralization from the Mount Edziza volcanic complex. As well, this location is the main source of obsidian in Northern BC and First Nations travelled from as far away as Alaska and northern Alberta for the sharp stone.
The wild Spectrum range
There are very few trails in the region, mostly not marked, often overgrown and always difficult to hike. There’s two main areas in the Mount Edziza Park, the Spectrum range (South of the Raspberry Pass) and the Edziza area, neither of which has vehicle access, all very remote, and home to Grizzlies, moose, mountain goats and sheep, and wolves.
The little plane that took us in, and all our gear
With little information and no trails, we made our own trail plan, traversing from Little Ball Lake to Mowdade Lake in a U-shape heading over the range. Everyday we passed by one or two mountain ranges, and normally crossed at least one river/stream. Our maps were old (glaciers having receeded a large amount) but with barely any trees, we were able to find our route relatively easy. Scrambling passes were more difficult, as sometimes you would climb most of the way up a mountain only to pop over the other side and realize you couldn’t get down safely. Another time we scrambled up a pass with loose scree that just kept getting steeper to the point we ended up climbing up a waterfall as it had the largest stable rocks to cling to.
The crew, 3 humans, one pup
River crossings were another challenge and there was a day we reached a river towards the end of our day. We could have camped and then attempted the crossing in the morning, but we chose to attempt the crossing in the evening in case someone fell in and needed to spend the day warming up. The river was ranging, and we scouted until we found a narrows (which made the river even faster). There was a 1 meter jump that could not be missed. Packs were thrown over separately and Whiskey made it on her own (with alot ALOT of encouragement and a rope tied to her harness).
Vistas were at every turn
Water was everywhere, and filtered it was clean and easy to cook and drink with. We never needed to carry much with us, as everyday we would pass countless sources of water or snow.
Limited food supplies but still yums
Finding suitable camp spots was also easy, the main question being, “should we keep going, would it be better further on”. We buried our bear bags (Ursacks), with all our food overnight far from our camp spots and never had any issues. We carried dehydrated food packs, and with very limited spaces in our ursacks (the determining factor in what we could bring), packed dried fruits, bars, and shared double
Whiskey and the humans were exhausted every night
Communication became key, as our last day ended up being longer than any of us expected (with no trail, we didn’t know how long anything would take). With my InReach mini device I was able to speak to our plane for a pickup as late as possible. We were racing the sun as we finally got to Mowdade Lake (with a couple wrong turns) and boy the elation when we saw our plane picking us up!
The most loyal, strongest, sweetest trail dog everHanging out above glaciersWhat a wild country
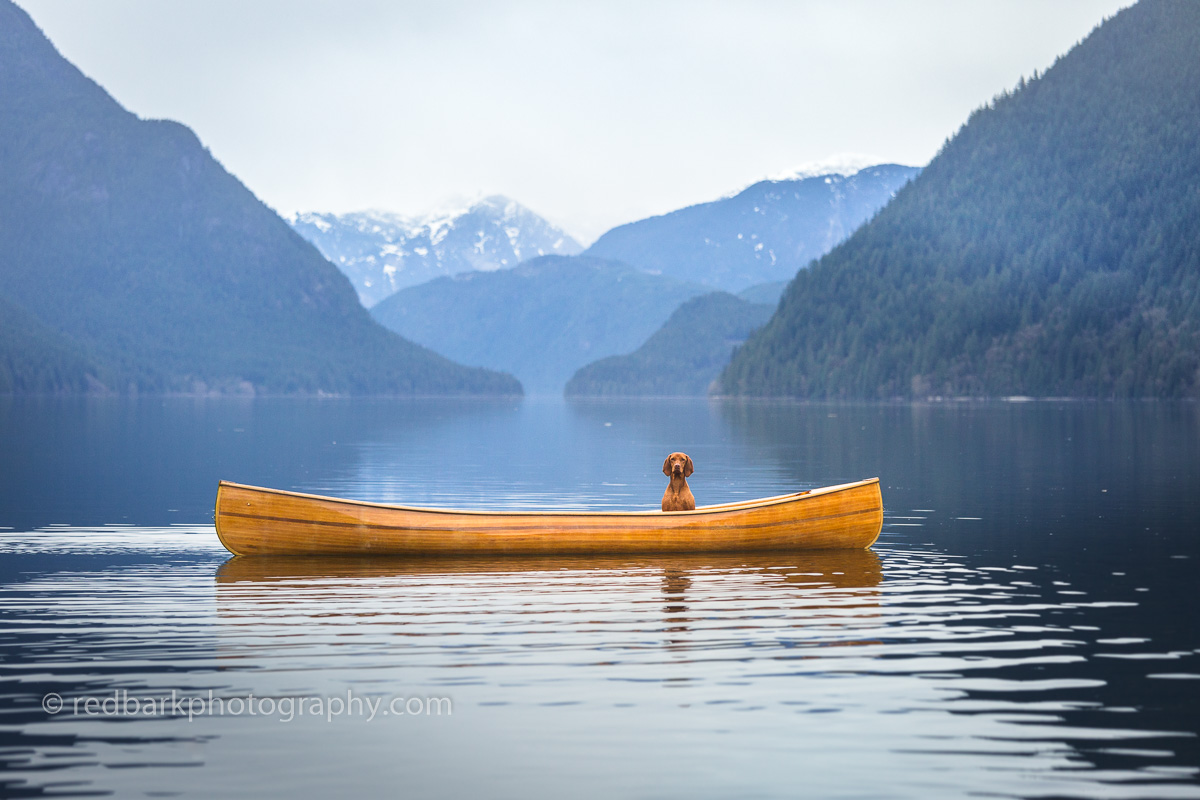
We have always loved different ways of exploring the great outdoors and paddling has always been a wonderful option and complement to all the hiking and camping we do. Over her life, Whiskey has been on paddleboards, canoes of all types, kayaks, and rafts, as well as motorized boats and if you’re wanting to introduce your own pup to watercraft, I hope this gives you a couple tricks and tips we’ve learned!
One of our first longer canoe rides
Choose a Location and Watercraft
Although normally the goal is to stay dry, it’s a good idea to start in an area where the consequences of falling in are not going to be traumatizing or dangerous. If possible find a smaller lake or pool where the water isn’t too cold, on a day without much wind. Beach access is normally easier than docks for getting in and out (especially while holding a dog) and of course it helps if the location is dog-friendly! It also helps if you choose an area with very little distractions (no people, noises, wildlife) so your dog is already calm before adding in a boat.
packrafts are really stable and can be taken to shallow areas (this is our Alpacka raft)
Paddleboards and rafts are the most stable, and hardest to flip while also being easier to lift a swimming dog back in and load up. If you’re using a canoe or kayak, try to aim for one that’s as large and wide as possible for stability.
Whiskey likes to point at things and put her paws up on the
Because Whiskey loves her comforts, it helps our princess to always have plenty of soft blankets for her to lie on. Start on land, just asking your pup to sit in the watercraft and lie down with treats on hand and lots of praise. I always bring treats when we try something new, and I don’t skimp on them at all! It also really helps to have a calm tired dog, like after a long walk.
Loading Up
Start with small sessions and with each success, take a break, enjoy the sun, and then try for a longer one if all is going well (and there is no stress). If you feel like it was a bit of a challenge, then call it a day and end with a success.
Paddling gets us away from the crowds
Keep everyone involved calm, even bored acting when you launch. It can also help if you have a friend hold your pup until you’re settled before bringing the dog with you on the watercraft.
sitting on a paddleboard is a good way to start
If you’re using a paddleboard, sit or kneel so you’re closest to your dog. If your watercraft is large enough and you can fit two people, see if one person can have 100% of their attention on the dog.
Once your dog is doing well, move away from the shore or dock to discourage them trying to jump back out (Whiskey sometimes jumps onto shore if we are too close, and then will hop back in at her leisure which makes everything wet and tippy for the humans!).
we now have our own Oru kayak!
Be aware that if your family is spread between different boats, your dog might try to get to the other people, so keep the boats further apart until everyone is comfortable. Whiskey is much calmer when I’m the only one out, but if dad is on shore, or in another boat, she constantly wants to say hi and will stand up and wander around.
little Ginger is a bit easier to train in a canoe as she can’t jump out as easily or tip the boat
With puppies you will have less control so it’s really essential that they are tired! It’s really great to introduce your puppy before they’ve developed fears so just watch your puppy and go at their comfort level and pace. Treats and commands aren’t usually as effective with puppies, so make sure they can be comfortable and keep everything positive and happy, even if you end up in the water!
Dog Training commands that help in boats
–Sit/Stay prevent premature exits –Lie down/Stay during distractions and to make life easy –Leave it for distractions on the water including birds, seals, other boaters –In/Out (release command) so you can get into the boat first comfortably
Safety gear
We use the Outward Hound jacket
For calm water, smaller lakes, and paddles close to shore we don’t normally use a life jacket (I’m a long distance swimmer, and Whiskey has no problem swimming distances). However, we do have a lifejacket for ocean paddles, or trickier situations. We use an Outward Hound Standley Sport Life Jacket with Whiskey but other brands should also work well (we see alot people happy with the Ruffwear version). The main thing to look for is that the jacket has a handle so you can easily lift your dog back into the watercraft (or keep your dog from jumping out), a place to clip on a leash, sufficient padding, and a good fit. If you have a dog that might take off swimming after a duck, keep a long leash on them just in case!
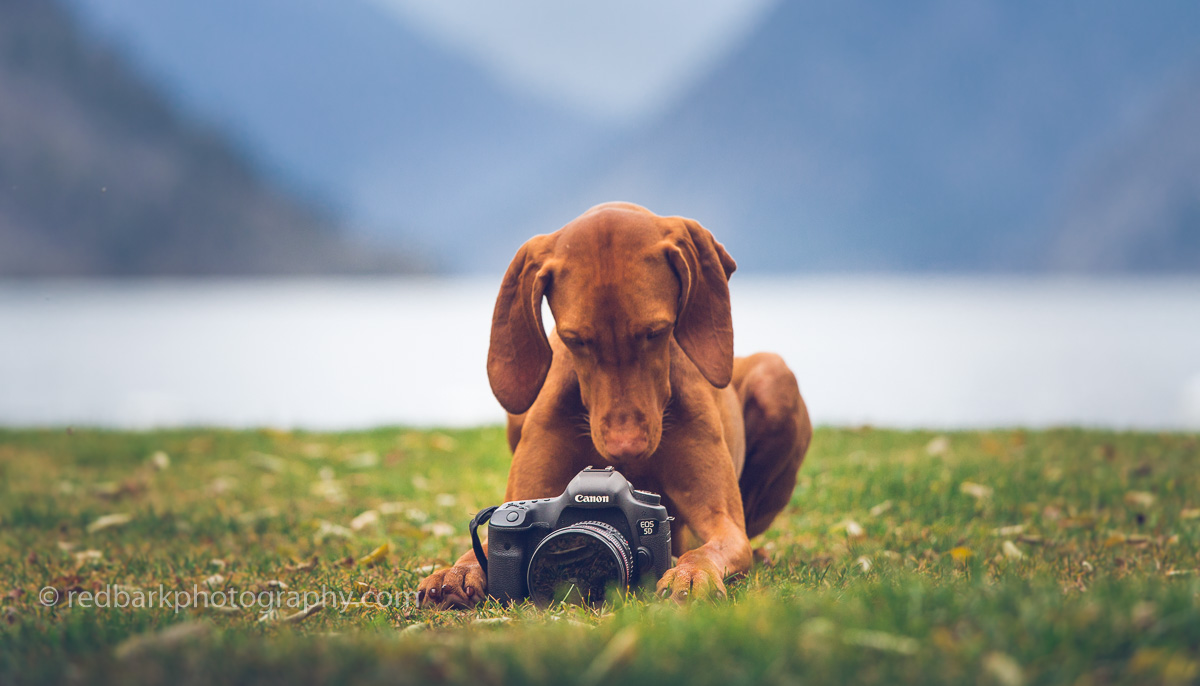
Canon 5d (this one was a Mark 3 but I have a Mark 4 now)
This is my most asked question online. If you only want the answer, it’s currently a Canon 5D mark 4 but if you really want to know how to take great photos, the answer is much more complex and buying the same camera may not be your answer.
My current arsenal of lenses include the 17-40mm f4, 24-70mm mark 2 f2.8, 70-200mm f4, 50mm f1.2, 85mm f1.8, 135mm f2. When I hike, my current favorite is normally the 24-70mm. With the camera body, this is serious weight (2lbs for the body and 2lbs for the 24-70mm). It’s also pretty darn big hanging off your body as you scramble up rocks and it’s almost too big to hide under a spacious rain jacket if the rain starts pouring down unexpectedly. I have this camera for several reasons- I would like the option to print large and to seriously crop my images. For me, the full frame camera is great but I don’t think most pet owners want to carry such a large weight for those reasons. I’m also working in photography so have an “excuse” for a camera in this price range, and the willingness to carry the kit up and down the mountains. If you already own a dslr and the size/weight becomes an excuse to leave it behind, then I would not suggest anything larger.
135mm f2 gives a really creamy bokeh
I really believe the picture you take is always better than the picture you don’t take and a wonderful option are the mirrorless options that are out there now. I just LOVED the Fuji XT1 that we had. It was tiny, pretty tough in the rain, light, perfect for female hands, and the lenses were amazing quality. I much prefered the Fuji body but technically it didn’t stand up to the 5D. I’m also considering moving to the Sony A7 III, and may do soon enough, just for the potential of a better autofocus system (they have dog specific focusing that I’ve not yet tested). Mirrorless cameras include the Canon M100, Canon RP, Nikon Z6, the Sonys (thinking about moving to) and Fujis (I really love the Fuji body).
50mm f1.2 at it’s widest
Another option is a cropped frame DSLR sporty camera that has great auto-focusing abilities but is smaller and cheaper than the full frame options. We used to own two cropped-frame Nikon D-90s that were wonderful and lasted 5+ years of photos. Cropped frame cameras include the Nikon D3500, D7200, D500, Canon 80D, Canon 760D, Canon Rebel (my first!), and so many others.
Lenses
24-70mm f2.4 that I carry on most of my trips70-200mm f4 at the longest, you need two people for this one for dogs
Lens choices are personal. They depend on the type of photos you like to take, your ability to carry them, and the environment and situation you shoot in. I prefer zoom lenses in most places because as Whiskey moves, I can quickly adapt and get shots that are not just her posing in a certain location. I’m also usually in very restricted spaces where backing up is not an option (like a cliff) so zoom lenses really help with flexibility. In so many cases something amazing is happening and I wouldn’t have much time to switch lenses and I don’t want to be stuck on a prime without knowing what type of photo I’m taking before I start a hike. Also, Whiskey is trained to stay really close to me on trails, and unless my husband is with me, she’s not usually far away enough for me to control (pose) from a great length, so I don’t usually bring a long lens. Overall my go-to is the 24-70mm f2.8 mark 2 which is a big lens but covers most of the range and just captures wonderfully sharp images in difficult situations (ie flares, backlighting, little distortion). Of course, my ability to carry lenses up mountains and hikes severely restrict my options.
50mm f1.2 I struggle for the lens to pick her eye
Primes are better if you are not hiking for hours with a pack on, or if you are aiming for a particular look with short depth of field. If we are going out for a photoshoot, I do love my 135mm. It’s a very specialized lens but has the creamiest bokeh and makes anything look great.
135mm f2 is beautiful but I was backing up in snowshoes in hip deep snow!
Remember, I shoot dogs which are shorter and smaller than humans so the same lens might not look the same for humans. I’m constantly trying to learn how to use and work with my lenses, and sometimes will just go out with one I haven’t tried in ages. The 50mm 1.2 is the hardest for Whiskey, the short depth of field with a camouflage dog seems like an autofocus challenge, especially in the forest or busy environment. I don’t have as much trouble with a person, but once I start adding foreground elements, it seems like everything including the ground, the trees, and the leaves have more contrast and interest for the autofocus to grab onto than Whiskey’s soft monochrome fur.
Tinhat Hut-> Elk Hut-> Walt Hill Hut// Fiddlehead Landing -> Dixon Road
The Sunshine Coast trail has been on my “must do” list for a couple of years now, and it was only recently I finally put aside all excuses and found a crew who were keen to try. We were all photographers who had weekdays free, and since I don’t go without Whiskey, I wanted to ensure that it would be the least busy on the trail. Scroll to the end of the article for map links and other resources!
The Sunshine Coast Trail
The Sunshine Coast trail is located on the northern Sunshine Coast which involves 2 ferries from mainland Vancouver. With the timing of the ferries and the drive across the Southern Sunshine Coast, parking at the end of the trail, and shuttling to the beginning being so time-consuming, we decided to sleep over at Egmont, near Earls Cove. This way we could pick up an early ferry and have a fresh start at the trail the next day, freshly showered and with a good nights rest. There is also so much to do on the drive to Egmont, so we checked out one of my favorite spots, Smuggler Cove, and reached our cabin at the BackEddy well before sunset.
Smugglers Cove Sunshine Coast
In the morning, we took off early and headed to meet Jesse of the Sunshine Coast Shuttle Services so he could help drop us off at the beginning of the hike (this way we could do a one-way hike to reach our car). We parked around the 137 km mark of the trail and he shuttled us to Fiddlehead Landing with his truck (dog friendly, yey!). We hit the trail in the rain, knowing that our first day was over 1100m incline with full packs.
Ask Jessie to shuttle you to the start of your hike!
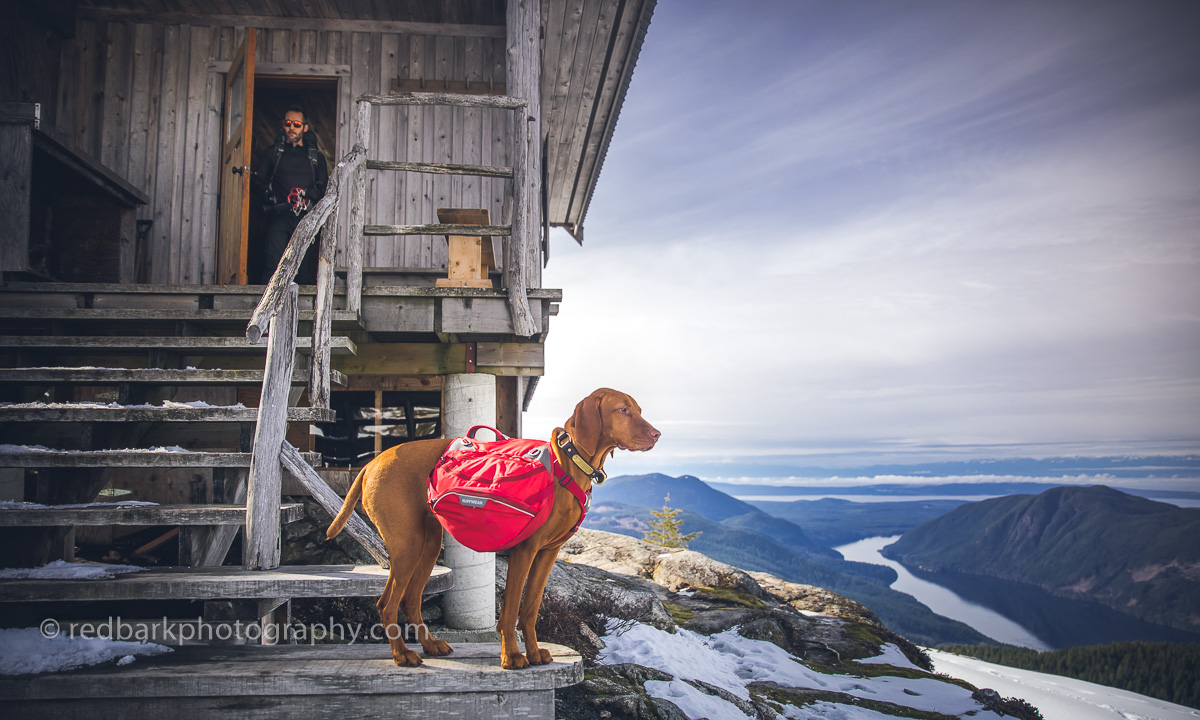
Pretty soon we were seeing views between trees and with a couple sketchy log crossings and some very muddy patches. Eventually we made our way to a huge junction at km 88 where the trail meets a rugged forest road. Going straight would keep us on the SCT and turning right would take us a couple kilometers to the Tin Hat hut and some pretty epic views. The snow started around this point and we kept climbing until we finally broke through the trees when Brice, who was (usually) in the lead saw the first glimpses of the cabin. I was sooo happy to drop my pack at the hut and magically the sun came out and lit up the best views on the entire trail. We had slammed this section, of around 9km in only 3 hours 45mins (including breaks) so we had tons of daylight left. A benefit of off-season camping is that the snow meant we didn’t need to go off in search of water (there is no water source at the cabin normally). Also, sharing a tight space with a dog (even a short haired, well behaved and non-smelling one) can understandably be difficult for non-dog lovers, and so I also go out of my way to go to huts off-season.
The cabin is small, but well built and would be cramped with about 8 people in the loft. It sits on the best views of the trail and has a compositing outhouse in really good condition. There is a wood pellet stove to keep warm and even in the spring, there was more than enough pellets for a couple months more. We even had reception! After a really well deserved dinner we grabbed our cameras and headed out to the view point for sunset. Crampons really helped as we were making fresh tracks and we were rewarded with one of the best sunsets yet this year!
Sunset at Tinhat peak
After a really warm night’s sleep in the winterized cabin loft, we took our time eating breakfast, making lunch, and headed out. The weather was calling for rain in the evening so we tried to keep moving. There are two options to head to the next part of the trail, the quicker South trail, or the longer trail that loops around Lewis Lake. The Lewis lake trail was unbroken snow and is a scramble in sections, and also adds about 5kms but is more scenic and avoids some of the logging roads. We chose the south route because of the snow and the weather. About the halfway point, we had a quick lunch break at Coyote lake where the sun popped through he clouds for a couple minutes, and then kept going, arriving at Elk Hut just before the downpour started in earnest.
The crew
Elk hut is an open hut, with 3 sides walled in, and one open. The loft is also open to air, so it was going to be a chilly night. On a dry summer day, I can imagine this would be a lovely place with a firepit outside (that was totally soaked), places to hang out, and a log dock. We even saw a canoe underneath the cabin but as it was pouring rain our whole time there, we didn’t get to enjoy it much! To warm up, we quickly changed into dry(ish) clothing, boiled up some water for tea, cooked up some dinner and crawled into our sleeping bags really early hoping for an early head start the next day.
Not happy it was raining
13 hours later, we crawled out of our bags back into rain. I suppose we had been pretty tired from a cold day’s trek so we all slept really well. After breakfast and packing up again, we started to our last hut of the trip- Walt Hill. It looked like this would be our easiest day so far, and most of the hike was lovely but as soon as we hit the snowline, everything changed. Although this section is lower in elevation than Tinhat, the snow was deeper and softer so we spent what seemed like an eternity taking turns breaking trail and post-holing up a path that no one had visited recently. The views are really nice on this section, and I can imagine without snow this would be one of the best parts of the trail to hike. When we finally saw glimpses of the hut, we were absolutely elated to have 4 walls and a fire to warm up and dry out for the evening. We had about an hour after reaching the Walt Hill hut before the rain really came down again. We still had lots of snow so we didn’t have to worry about a water source once again and huddled inside drying out the shoes, socks, and clothes for the evening.
All the snowall the shoes and socks drying
Our last day on the trail was calling for the a downpour, so I threw on all the rain gear, packed up my camera deep into my bag, and raced down the mountain thinking only of that dry car! Thankfully it was a quick section on a very well marked trail with only a couple water crossings (which probably aren’t anything on a dry day). We cheered at every kilometer marking (or at least I did!) until we reached the road where I parked and all scrambled into the car making really good time (2 hours 50 mins 12 kilometers).
View from Tinhat
Overall I would love to do this trail again! I really recommend it for those that aren’t as comfortable tenting in bear country, or would prefer to shed the weight of a tent and have a roof and space to sprawl out in the evenings. I can imagine the huts would be pretty busy in the summer and could be quite tight in space if there were too many people (it has been full on weekends in the summer). There isn’t a way to book the hut, so plan accordingly by bringing a backup tent or aim for a weekday (or day when the weather isn’t great). Definitely take advantage of Jesse’s shuttle service and ask him questions when you are in the car about the conditions and trail reports he’s heard about. Also please consider donating to PR PAWS who maintain the trail and huts if you are using the trail.
We’ve been getting so many questions about dog boots that we finally decided to put together a bunch, test them, and review them in real trail conditions. Please let us know your experience in winter boots! Whiskey has no dewclaws so it was only because of personal messages we were able to record what has and hasn’t’ worked for others. There are alot of other brands we didn’t get to try and we concentrated on some of the higher-end boots. Remember, a rectangle pocket with a velcro at the top is what most sled dogs use (although loads go missing) in the arctic and it’s a real option too!
Specialized winter boots designed for warmth, softshell fabric, Vibram outsole, velcro strap and pullover stretch gaiters. Ankle high but height extended with gaiters
We’ve had these for several seasons and taken them on numerous occasions in hip deep dry snow to, packed snowy trails, on longer and shorter hikes. Our friends have also used these.
-The only boots made of fleece, good for dry days, or dry (cold) snow, packed snowy trails, or a thin layer of snow. -Simple to put on and off (each boot is the same), boots are much higher than other in the market. -Boots are easy to wash and dry -Are also good for indoor use
-Specialized for snow, not mixed terrain (also good for indoors). Snow collects on the fleece when it’s wet (packing snowball) snow, and the top of the boots are not lined, so once they are wet, they will freeze. They will slowly slip down the leg if the velcro is not tight enough, but due to the length that’s alot easier to catch than short boots which will disappear easier. Missing a cinch to tighten the straps so harder to do up -not dewclaw friendly
-dry snow -packed snow -up to 6inches fresh powder
We tried these on a packed 8km snowy packed hike with 350 incline. Our friends have used these as well.
-These are the one of the lightest boots with very thin soles so Whiskey can easily feel the ground with her paws. -She seemed really happy in these and when we tightended the top of the boots we didn’t see much snow entering on a packed trail -Canine Equipment is the only brand that I know of here that will repair or replace a boot without limitations on their guarantee -Great customer service
The soft shell material is not waterproof and will get wet if it’s not cold enough to keep the snow from melting on the booties. The soles can be a bit slippery on ice -needs more sizes -are sold in 4s with assumption that back paw is summer than front (so out of luck if your paws don’t fit their measurements, luckily we did!)
We tried these on a packed 5km trail, about 200m incline
-These boots are specifically made for winter hiking and have the thickest soles of the ankle high boots that we’ve tried (I’m thinking the soles would last the longest) -They are the only ones that come with gaiters included. -Great customer service
-Whiskey’s ankles are so thin that the top of the gaiters were not tight on her and instead of keeping snow out, they let and kept snow inside leading her paws to be really cold and wet. -She did not seem overly comfortable in these, I’m not sure if it’s the inflexible sole or the shape of the boot -and we’ve heard of other dogs having blisters on the top of their paws from these boots. We’ve also heard these can be uncomfortable with dewclaws
We tried these on a local walk as well as a 4km 150m incline on packed and loose snow
-The only boots made of Neoprene which is a material that keeps it’s warmth even when wet -These are also the only boots that are recommended for watersports (we have not tried) -The brand also makes attachable ice cleats and gaiters. -The velcro strap is super long and lets you adjust the tightness up the leg easily -Made with dewclaws in mind -The largest amount of different sizes available that I could find -comes in regular and orthopedic options
-The boot is overall pretty heavy and thick and might keep a dog too warm in the summer (they have summer options though) -because the boot is thicker and inflexible, it takes longer for Whiskey to become accustomed to wearing them -The website is a pain to navigate and badly needs an update -There is a longer learning curve to putting on these boots than others and takes more due diligence -Customer service can be a problem -In terms of the boot covers, there isn’t measurable sizing and the M was too big for Whiskey, the ice cleats made the entire boot too chunky
-all snow, wet and dry -packed and powder snow -all terrain in all seasons outside where your dog may be too warm -good for water use
We’ve had these for several years and have used these on loads of trails in both snowy and rocky conditions
-With modification on how you deal with the strap, these can be great boots -flexible sole, Whiskey feels comfortable in these and feeling the ground
-top concern is the velcro strap does not stay on unless you tuck it up and underneath itself -the loop part of the velcro at the back of the boot sewing is coming undone over time and the bottom of the boot where it meets the sole also is having holes -needs more sizes
-dry snow -packed snow -all terrain in summer but will wear out near edges
We’ve had these boots the longest since Whiskey was 1 years old and have tried these in the city as well as snowy trails. Our friends also have the same.
-if you modify the strap, the can be great boots -easy to fit, all paws are the same -the leather sole has more grip than most boots we found -can be modified to be waterproof with was -very multi purpose (we use with an injured paw on sidewalks and great to slip one in your first aid kit for hiking because one bootie will cover any injured paw)
-not waterproof unless you modify -straps are assuming an ankle that is alot bigger than Whiskeys’ -tends to slide off (we have to be careful not to lose one) -velcro tends to get undone and boot can flip around with an energetic running dog -snow goes inside the top of the boot and collects there, so not recommended with deeper snow -not dewclaw friendly
-dry/wet snow -packed snow (powder to 4 inches, wet snow packed only) -all terrain in summer
We’ve tried these on two longer hikes in both packed and very deep and loose snow (Whiskey deep snow).
Losing a boot is not a problem anymore! On packed snow basically guranteed paws will not get wet or cold. Works really well paired with a jacket for a full winter suit. Whiskey seemed really happy in these. The boots didn’t restrict at all and are thin enough she can fee the ground well.
-In very deep snow, we had snow piling into the back legs and no way to get the snow out, outside of taking off the gaiters (we finished the hike with just front gaiters on) -Difficult to put on, legs would be alot looser on skinny dogs -Very specialized, only good for snowy trails
These can be tough to estimate size and can be a bit difficult to get the paw all the way inside (especially if your front paws are larger). We’ve had readers tell us dewclaws can be an issue. The velcro straps do not have cinch closure.
Good for packed trails and cold snowy conditions. Also good for indoors. Would not recomend for rocks or summer use.
I would use these on shorter packed snowy trails and inside the house
These are harder to get into, the gusset isn’t as large as others and can be more difficult with a gaiter in the way. Cinch closure is quick to tighten. Reported problems with dewclaws.
Good for cold conditions, snow conditions, but could be too warm for summer
I would use these in packed snowy trails, or mix of snow/rocky trails.
These took us a couple tries to learn how to put on properly. Neoprene is a more difficult material to hold down and tighten a strap over. Flip the boot inside out to help place the paw and gather the strap tightly over itself around the ankle before working your way up. You must layer the boot properly and takes some practice.
-good for most conditions including swimming, but not hot conditions when a dog can overheat
-I would use these in colder conditions on trails that were not technical
These boots are easy to slip on but are difficult to wrap the strap in a way that doesn’t detach itself over time. We’ve learned that we need to wrap the strap very tightly over itself and tuck the end into the strap as far as we can in order for the boot to stay put. If you wrap like in the photo, it will come off.
These are pretty involved to put on and involve several straps on top of the dog. You’ll need to size properly at home first before attempting to put on in a car while your dog has decided it really wants to run out the door onto the trail! Make sure you strap those ankles tightly and get all straps tight enough to keep on but loose enough that they don’t rub. At least you’re almost guaranteed never to loose a boot!
-good for snowy conditions (but not super deep snow)
I would use these in all snowy conditions except for super deep snow
So in conclusion if you asked me which I would recommend I would say it really depends on what your lifestyle is like, and what dog you have. Firstly, what boots actually fit your dog? What is your budget? Then, I would highly recommend you see if you can go try on boots at any local dog store and see what your dog tolerates. My suggestion to get a dog used to boots is to bring lots of treats and keep them moving and doing tricks, running and basically forgetting about the boots. Try them over short periods of time with lots of praise, fun, treats, and in an exciting location. Most of these boots are fine for packed trails, but when you get to deeper snow, then pay attention to the top of the boots and see if you think snow could get in and collect. Each dog’s ankles fit differently, check to see the top of the boot, if you think rubbing might be an issue, and of course keep an eye on dewclaws if you have them. See if you need a boot for all occasions, or can pick a specialized boot. We are going to keep updating this chart as we work with all these boots for the next winters coming, please help us!
Whiskey is between a size medium and small so we went with the Medium (she most likely will gain not lose weight over time). The straps are great and adjust in so many ways and the pack fits really well. It’s nice that she can help me carry her own food on overnighters and the pack is really well built. They don’t make the blue color anymore, ours is so old! We are also looking at trying a fancier model and will report back!
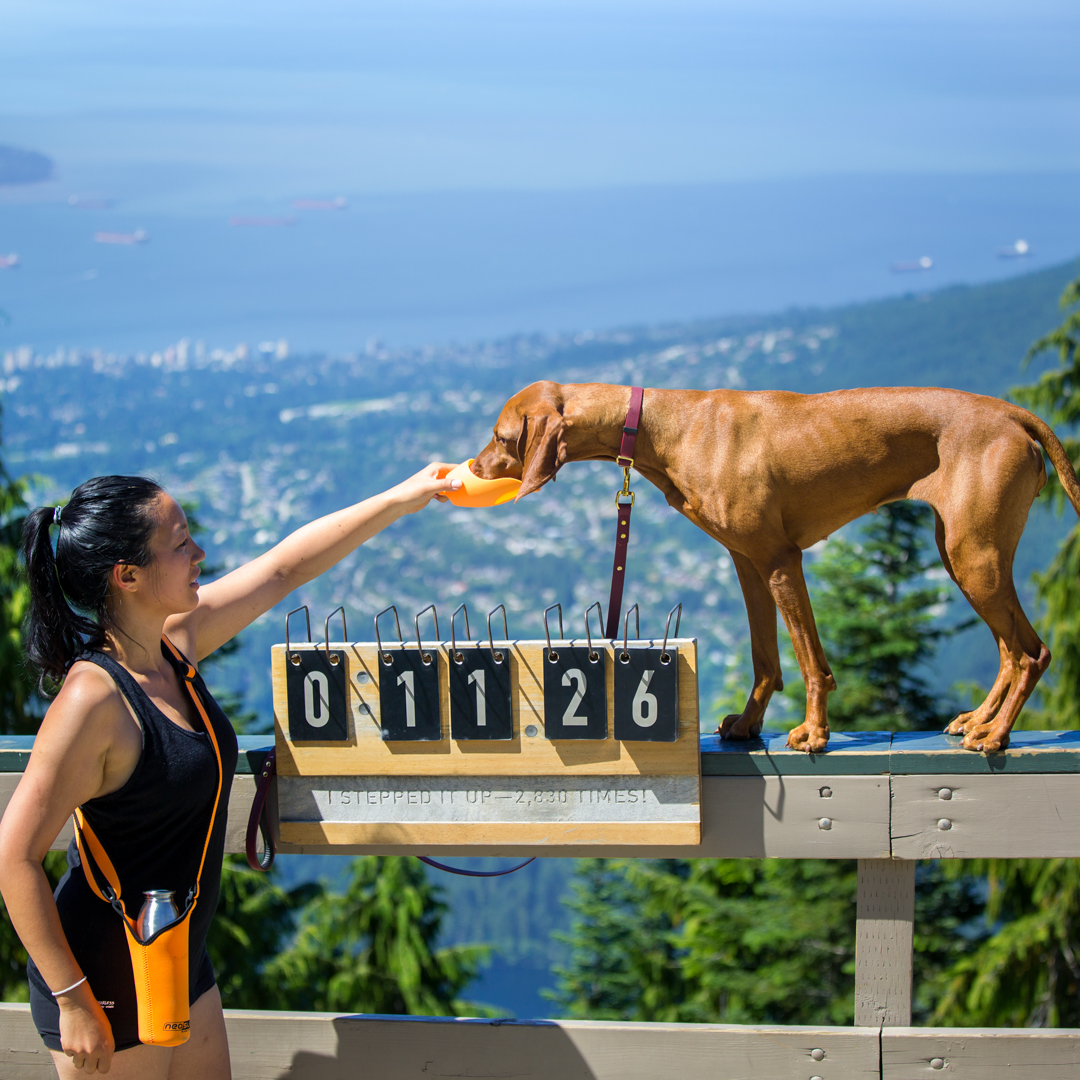
The easiest way we found to carry water on a long hike. The lid doubles as a bowl and I’ve always much preferred stainless steel over plastic to carry water. A super simple solution to bringing an extra bowl. If you’re weird like me, you can share the water with your dog too!
One of our favorite jackets! Whiskey has an amazing nose that we have trained even further with sniff training but unfortunately that means she finds poop or smelly things to roll in much more than the regular dog. That means her jackets must stand countless washes while also fitting perfectly and looking great for photos. The fleece is extra thick in the brand and the shape is just wonderful. The Trail Blazer is warm and water proof and the Great White North has been through the deepest snow and trails where Whiskey is practically swimming. The price is high, but it’s worth it!
This breed-specific brand is great for those long and skinny dogs where nothing “regular” fits! The winter jacket is similar to the chillydogs brand (if you are in Canada, order the chillydogs, if you’re in the US order Voyagers for cheaper shipping) but the rainjacket is unique and super cute!
This Finnish line is sort of like the “North Face” of dog clothing. They use reflective materials to trap in bodyheat in their Extreme Warmer and their leash is our favorite for hiking with woven reflectivity. Because their jackets are on the larger side, we can layer in a fleece if we are winter camping and everything has gone through the wash numerous times and have come out great. However, they don’t make breed specific clothes so if your V is extra lean or long I would go with one of the other brands. If you have a long-haired dog, I would check out the rest of their line, there’s so many amazing options!
The best dog beds we have tried. When we got a new puppy, we were told to buy a cheap bed until she grew older but I couldn’t help it. Our doughnut bed has been washed countless times, been peed on, dug in, vomited in, ever since she was a puppy and most of it looks brand new. We have gone through several other cheaper dog beds but she’s made it abundantly clear this one is the best one. We’ve since gotten another for travel and love it just the same! Again, the beds are really expensive, but I found it’s totally worth it.
Whiskey loves cuddling in this during the winter. It’s not as useful for warm climates but it’s a must-have for short haired dogs and doesn’t last as long as the Bowser beds but Whiskey loves hers. She uses a Large size, if you have 2 Vs then get an XL! The link goes to the company site but we buy on Amazon as shipping is free for Prime. The plastic tube that keeps the shape has problems staying in place and the stuffing isn’t’ as plump but it still the favorite spot on a cold day. Whiskey normally spends a good 6 months “digging” inside this bed to defluff it though so it’s been “worked in” before she’s happy. We are currently in the “breaking in” stage on a new one.
We’ve had many collars and these are the ones we keep going back to. I hate tags jingling for a long hike (imagine how much they must annoy the dogs with their hearing!) and any cloth/strap/rope collar has not stood the test of rolling in bbq grease and poop. This one has the extra loop at the back for another place to connect a leash and the reflector is great in the rain and the short winter days. We did try a really expensive rope collar for a bit but after standing at the sink for ages scrubbing poop off, we decided to keep this one on for any long trips. The fancy collars are wonderful but if we are going on a long backcountry trip, we’re most likely going to bring one of these.
We love this Shampoo! It works triple duty as it repels fleas and it also smells amazing. We only ever need to give Whiskey a shower when she rolls in something extra foul so its’ great that it’s very gentle and she comes out smelling wonderful for a couple days. Since Whiskey is self-cleaning, we are still working on our first bottle.
Whiskey’s chew treats. Antlers are always avaliable and she still has the one from when she was a puppy. Since our little girl isn’t much of a chewer compared to other dogs, she takes a very long time to wear these down and we can afford to buy Himalayan Chews. The extra large pieces will last her a month, whereas it can last other Vizslas an hour or so. Bullysticks are only used when we absolutely need her to leave us alone for 20-30mins and we only let her work through a couple inches each time. We buy Bullysticks in packs of 25 or 50 extra extra large ones.
A really great alternative to a chuck-it ball. It’s large so you won’t lose it as easy and it floats. The string lets you throw it extra far and the texture is softer yet durable. I tend to bring several toys to the dog park in case one of her toys gets “stolen”, I can switch to a different shape while someone tracks down the “culprit”.
A staple! I don’t use tennis balls as the material can wear down a dog’s teeth. I don’t like to play fetch too much as the back and forth isnt’ good for a dog’s joints over time but Whiskey will become obsessed with another dog’s ball so I do bring them sometimes. In the winter when it’s dark and rainy, I resort to playing fetch as the only way to get her to run instead of shivering miserably and hating me. We use a glow in the dark ball that I “charge up” at an outdoor light (hold it right next to the light for 30 seconds) and it lasts about 20 mins.
This thing is magical. There’s something about the way it bounces, or the texture but this is Whiskey’s ultimate prize. The squeaky and the bottom section is long gone but it’s still amazing. It’s the first thing she’s ever consistently fetched with intense focus and it only comes out on special occasions or as a reward for a good search-and-find. All the dogs want it at the park. It comes in small or large (we need large).
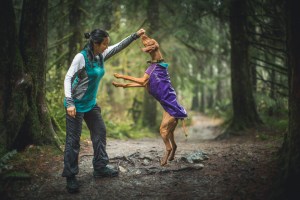
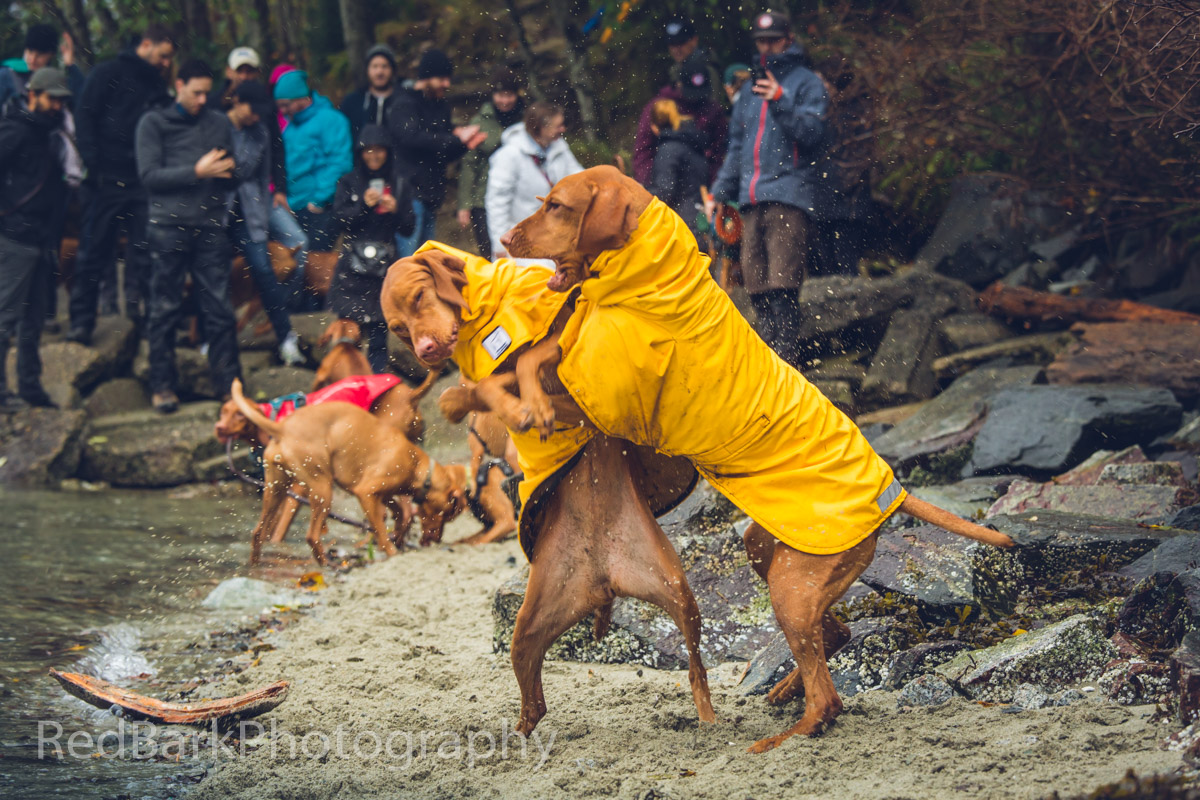
I’ve been pretty busy launching my Parawild company so it’s been a stretch to keep up with everything but I decided I needed to get my Vizsla fix and lo and behold, it was time for another Vizsla meetup! Of course November tends to be extremely rainy so I was really worried no one would show up on a rainy Sunday long weekend but of course, Vizsla people are not the norm. I’m not even sure how many ended up joining us as people came and went but I believe we were around 15+. The rain wasn’t too bad, and with puppies to a couple sugarfaces, it was so amazing to see the community out and taking over Barnett Marine Park. Taking photos of insanely fast dogs, in the rain, on a dark day, with wide aperture, covered with mud, and sand is….not easy! It’s really lots of luck, praying some autofocus will work, and setting the ISO very high and of course putting the camera down to give butt rubs when asked 🙂