Tag: backcountry

  • Guide to Hiking and Camping at Assiniboine with Dogs

    Guide to Hiking and Camping at Assiniboine with Dogs

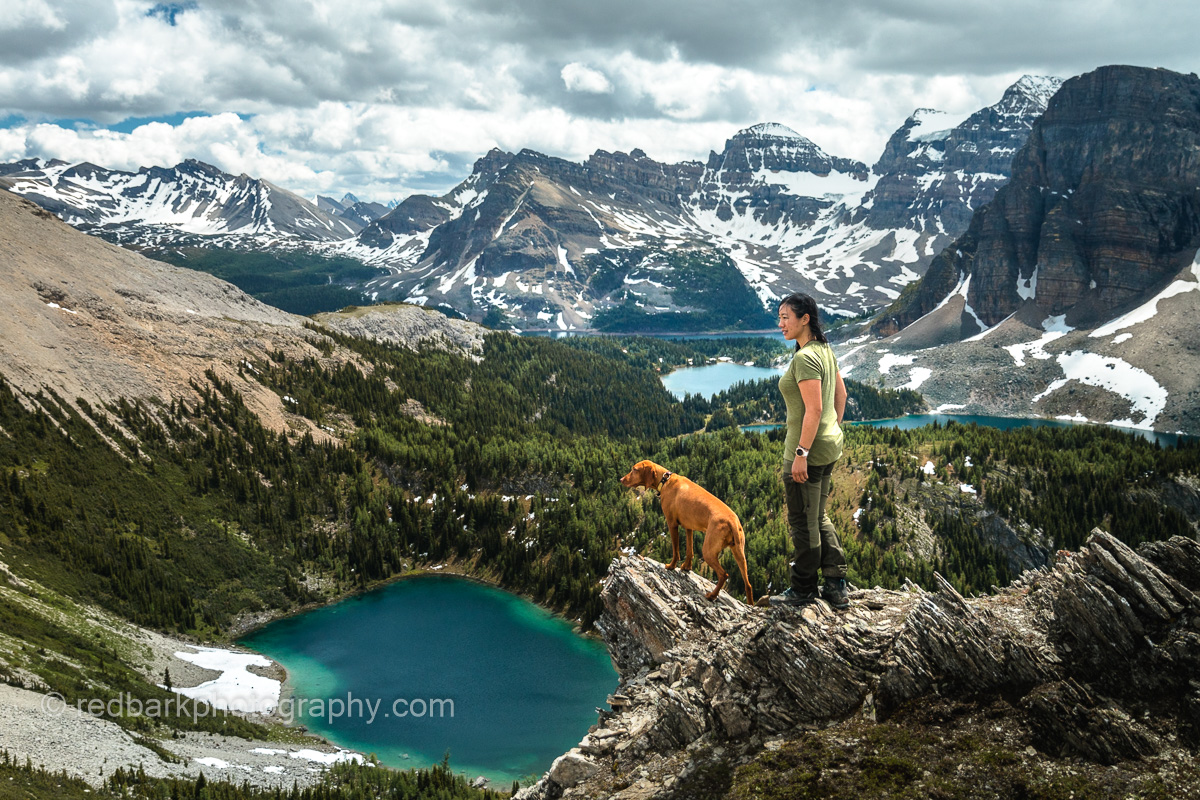
    Reaching Assiniboine’s epic views involves some logistics, and planning but it isn’t very difficult. Getting there with dogs is a whole different experience! For all the right reasons, dogs are not encouraged in the park and there are loads of limitations that can take quite a bit of researching to find out. I’m all for limiting the backcountry to dogs that are trained and have experience (imagine if anyone at your local dog park could fly their dog in for the weekend) as this place is so special and is chalk full of wildlife and there are a list of things to consider before attempting to come.

    Nub Peak with an oncoming winter storm to the left. We had to abandon camp early
    An easy day hike around Magog Lake

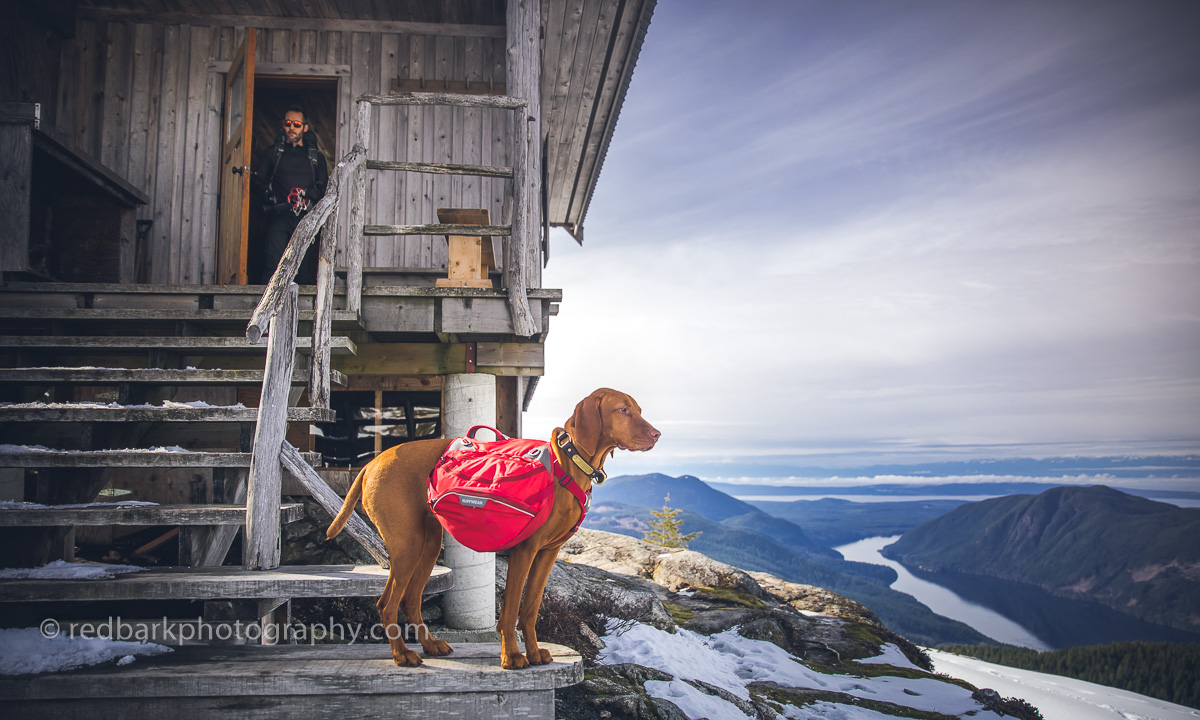
    Dogs are not allowed in any shelter, building, on the helicopter, on the bus to Sunshine valley, nor the gondola. They must be under control and on leash. There is abundant wildlife everywhere!

    At Lake Magog with Mount Assiniboine looking over
    With Erica coming in through the Assiniboine pass and meadows full of ground squirrels
    Views from Nublet are hard to beat

    Sunshine Village Route from top of Gondola

    There are 3 main ways of arriving into the main campground at Lake Magog (there’s others that are less well travelled, I’ll stick to the 3 main ones). The first and easiest is a quick helicopter ride from Mt Shark Trailhead but dogs are not allowed. The second is hiking in from Sunshine Village, however dogs are not allowed on the bus to Sunshine village, nor are they allowed up the gondola (so you can still do this, however it would likely involve at least one night camping along the way and more distance and incline than the next option). Lastly you can hike from Mount Shark trailhead taking either the Wonder Pass or Assiniboine Pass (the trail splits at about 15km mark).

    Wonder Pass is harder but well worth the effort on a sunny day during larch season

    Details/Tips/Tricks/Lessons Learnt

    Our tent can (and has) taken 1 foot of snow. We bring layers for dogs as well as humans, extra food, daypacks, rain gear and have seen deer, grouse, rabbit, grizzly, and marmot at camp.

    The trail from Mt Shark is about 30km to the campsite give or take 2kms and dogs are not allowed in the shelters along the way. The camping along the route isn’t very special (also buggy!) so I’ve always hiked straight in. There is also a special trick to make the whole thing easier- although dogs are not allowed on helicopters, you can pay to fly in your bag, or gear. However, there are a couple things to note with this “trick”. The first is that you pick up your gear at Assiniboine lodge which is 2kms away from the campgrounds so you must be able to walk your bag over and back easily (I do not suggest a 50lb duffle bag at the end of a 30km hike!). In order to fly your gear in, you must check in your gear in Canmore prior to driving to the trailhead so make sure you time it right or you might not get your gear in time! The second time I did this hike, there was no such option available during Covid, so we had to carrying everything in.

    Last note is that it makes much more financial sense to fly in a person with 40lbs allotted gear if you have that possibility (instead of paying per lb for gear) but I’ve never been in a group large enough that we could fly someone in. Also if you have a problem, they will not fly your dog out, so make sure you have everything you need to hike yourself and your dog out!

    Hiking in through Assiniboine Pass with a full 5 day load pack

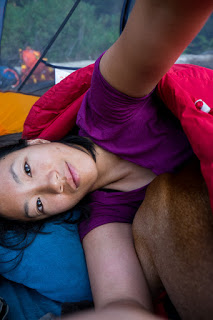
    I’ve done this trip twice, and each time it’s not gone to plan. Mother Nature likes to remind us that she’s boss and we need to roll with whatever she throws. The first time I did this hike in September we got snowed in the second night waking up with more than 1 foot of snow on our tent. The weather report said there was more coming and everyone started clearing the campgrounds, however we couldn’t join the exodus into the cabins because of Whiskey (no dogs allowed), so we ended up hiking out early several days early during an early winter storm. It was a mentally tough hike in snow that turned into relentless rain for a really really long day and at the point our minds had become really numb we almost walked right into a bull moose in the middle of the trail. Thankfully the moose didn’t charge us and went into the forest and we continued on until we got back to our car and into warm dry clothes.

    The second trip I came with Erica and her hiking pole broke early on and she experienced some really bad leg pains with an already injured knee. Since we had to carry all our gear in (45lbs+packs), our hike slowed to a crawl and we adjusted our trip to have many more rest days and cancelled a side camp trip to Og Lake. On both trips the weather was very difficult to predict and far from perfect (I have this luck that it’s always freezing on my trips). However the bad weather seemed to coincide with rest days and just makes me want to go again so I can finally experience the elusive Assiniboine experience that doesn’t need all my winter and rain gear.

    Winter storm hitting us while we are on Nublet

    What I’ve learned from these adventures to Assiniboine is

    • Book extra nights at the campgrounds so you can adjust your trip accordingly. Let the rangers know if you are leaving early though, so someone else can take your tent spot.
    • Fly some of your gear in, but pay attention to drop off and pick up times (non-covid times)
    • Use an Inreach Garmin to get an accurate weather report of the day (pay for the detailed report) and for a safety communication device. The ability to predict weather is worth so much if you’re heading out on a 6 hour hike alone in spotty weather.
    • Train for this hike if you are doing it in one day, train your dog, and train carrying the weight!
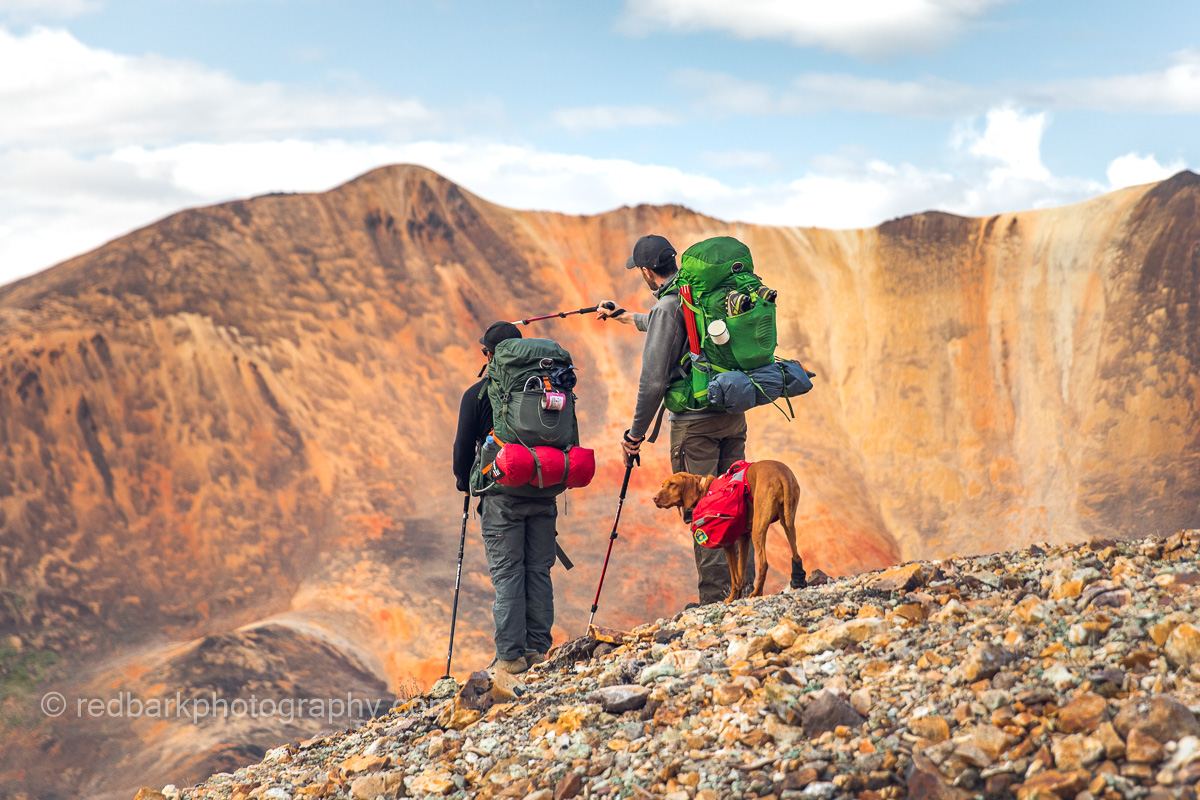
    • This location is PACKED full of wildlife including meadows full of ground squirrels, marmots under the outhouses, grouse, rabbit, deer, grizzly bear, and moose (I’ve seen every one of those on this trail!). You MUST have control of your dog (and I’m not just talking about hooking up a leash!) because if your dog pulls you towards every single squirrel you are going to be damaging your dog’s neck and you’re going to be dragged around like a puppet. You’ll have a much better time if you can hike and watch the wildlife with a dog calmly at your side.
    • Use hiking poles, your knees will thank you
    • If you are camping with dogs, study the campground map and find a quiet corner to camp at. I like site 16, although furthest from bathrooms and the shelters/bear caches, I will bother the least amount of people. Whiskey will have less chances to feel like she needs to warn me of people approaching (less anxiety for everyone) and I’ll be able to relax more.
    We are so grateful to be able to experience this place with our pups

    The Hike in From Mt Shark

    Hike from Mt Shark to Lake Magog with two passes

    Mt Shark trailhead starts from a long dirt road from Canmore with loads of potholes and corrugation that might have your teeth rattling. The road is exceptionally beautiful at sunrise and sunset if you can time it well! The trail head has great facilities including bathrooms, picnic tables and a large garbage. The trail actually take you across province lines (from Alberta to BC) and across park lines (although NOT timezones funny enough).

    There are several side trails so make sure you have a good GPS map when you start (every wrong turn will cost you extra this day). The beginning of the trail is nice, wide and flat and is the quickest part of the hike. Once you pass the bridge over spray river/lake you start into the forest where the trail narrows but is till really easy to follow and hike. You’ll pass by BR9 campsite and keep going towards Bryant Creek Shelter. There is water at the Spray Lakes bridge, at the campsites, and at Bryant Creek Shelter (with Br 13 and 14 close by). Remember dogs are not allowed in the shelter but perhaps during a storm it could be life saving.

    Wonder Pass with Larches in full glory
    Erica with Bodhi halfway up Sunburst for sunset
    Weather is always changing (at least with my luck). Check the weather as much as possible

    Here you need to decide if you are continuing onto Wonder Pass or Assiniboine pass. This is where the incline starts and you need to start working! Assiniboine pass is easier if you are carrying a ton of weight- it’s slightly longer but feels easier overall. Erica and I chose this way as she was in pain and it was the least impact. I also chose the for the way down during the storm I was hiking in on the first trip. Assiniboine pass has two options- hikers trail or horse trail. The hikers trail is higher with better views but is technically harder with more bridge crossings. The horse trail is lower in the valley and can be muddy with lots of shallow water crossings. Earlier in season I wouldn’t suggest the horse trail unless you don’t mind your feet being soaked but later in season the hiker’s pass may be closed and that may be the only option (as we experienced during the storm).

    Wonder Pass with Larches
    Trail from the lodge to camp is 2km of amazing

    Wonderpass takes you to Marvel lake, around the side of the lake, and up some switchbacks into the pass between Wonder Peak and The Towers. If you miss this pass on the walk in, it’s definitely worth a day hike from the campground! In the right season the larches are just amazing and the pass is a very easy hike from the lodge. During the height of summer, watch carefully your water sources if it’s warm and know that not all the creeks on the maps may be flowing.

    Hiking back in a storm, we went from snowstorm to rainstorm and then to a bull moose
    Looking at Sunburst Peak from the lakes
    Looking at Sunburst and Assiniboine from Nublet

    Once you have set up camp, you have loads of day hike options. The money shot is from the Nublet/Nub, a quick 7km+ (to Nublet) hike return from the campground. There’s loads of places to scramble and climb depending on your comfort level, as well as your dogs. Remember this is very remote and wild country with no rescue or fly-outs for your dog so please know your level and stay well within it. Even the Nub hike can have grizzlies so always bring bear spray and call out for bears.

    We’ve scrambled halfway up Sunburst Peak (no trail), all the way up Chucks ridge (no trail), Nub Peak via Elizabeth Lake (no trail), Windy Ridge (14km trail) and there’s still so much I want to do! For rest days you can walk around Lake Magog, Sunburst Lake, Cerulean Lake and Elizabeth Lake. In all, remember that the goal for your 30km hike isn’t to just get to Lake Magog, it’s to get there to start hiking so make sure you’re up for it!

    Scrambling up Nub from Elizabeth Lake (no trail)
    Windy Ridge, not a single person on the trail, not a technical trail
    Erica and Bodhi at Windy Ridge looking into Banff with a rainbow
    Chuck’s ridge was an adventure, totally not most-dogs friendly
    Only take mountain goats up scrambles!

    There are very few wild places like this that still allow dogs so please represent us dog owners well! Clean up after your pup, keep clear of other campers, keep on leash, and respect the wildlife. There are loads of birds and chipmunks at every eating station, a marmot lives under one of the outhouses, and we saw deer and grouse right at our tent (and a grizzly mom and cubs had been through our campsite while we were out). Scrambles are not easy so please hike well within your dog’s limits and please do not use earphones so you can hear and see wildlife! Lastly, don’t let your dogs lick the frogs on the trail, Bodhi had a bit of a reaction when he (on leash) had a taste of one!

    Girls and their dogs! It’s a ton of effort but so worthwhile
    Whiskey’s second time around and we still didn’t clear skies…next time!

    Here’s a list of dog camping gear that I can’t live without

    and a list of human hiking gear that I’ve grown to depend on over the years

  • Adventure in Edziza- Hiking the Spectacular Spectrum Range

    Adventure in Edziza- Hiking the Spectacular Spectrum Range

    When I passed by this section of Northern BC a couple years ago, I looked at the parks nearby and made a mental note to research more for a multiday hike in the future. Just the photos of the Spectrum range alone makes one spend a couple hours looking into the possibility of checking out this region.

    The bright colored mountains drew us in

    Previously called the Rainbow Mountains, the range is so colorful from the heavy mineralization from the Mount Edziza volcanic complex. As well, this location is the main source of obsidian in Northern BC and First Nations travelled from as far away as Alaska and northern Alberta for the sharp stone.

    The wild Spectrum range

    There are very few trails in the region, mostly not marked, often overgrown and always difficult to hike. There’s two main areas in the Mount Edziza Park, the Spectrum range (South of the Raspberry Pass) and the Edziza area, neither of which has vehicle access, all very remote, and home to Grizzlies, moose, mountain goats and sheep, and wolves.

    The little plane that took us in, and all our gear

    With little information and no trails, we made our own trail plan, traversing from Little Ball Lake to Mowdade Lake in a U-shape heading over the range. Everyday we passed by one or two mountain ranges, and normally crossed at least one river/stream. Our maps were old (glaciers having receeded a large amount) but with barely any trees, we were able to find our route relatively easy. Scrambling passes were more difficult, as sometimes you would climb most of the way up a mountain only to pop over the other side and realize you couldn’t get down safely. Another time we scrambled up a pass with loose scree that just kept getting steeper to the point we ended up climbing up a waterfall as it had the largest stable rocks to cling to.

    The crew, 3 humans, one pup

    River crossings were another challenge and there was a day we reached a river towards the end of our day. We could have camped and then attempted the crossing in the morning, but we chose to attempt the crossing in the evening in case someone fell in and needed to spend the day warming up. The river was ranging, and we scouted until we found a narrows (which made the river even faster). There was a 1 meter jump that could not be missed. Packs were thrown over separately and Whiskey made it on her own (with alot ALOT of encouragement and a rope tied to her harness).

    Vistas were at every turn

    Water was everywhere, and filtered it was clean and easy to cook and drink with. We never needed to carry much with us, as everyday we would pass countless sources of water or snow.

    Limited food supplies but still yums

    Finding suitable camp spots was also easy, the main question being, “should we keep going, would it be better further on”. We buried our bear bags (Ursacks), with all our food overnight far from our camp spots and never had any issues. We carried dehydrated food packs, and with very limited spaces in our ursacks (the determining factor in what we could bring), packed dried fruits, bars, and shared double

    Whiskey and the humans were exhausted every night

    Communication became key, as our last day ended up being longer than any of us expected (with no trail, we didn’t know how long anything would take). With my InReach mini device I was able to speak to our plane for a pickup as late as possible. We were racing the sun as we finally got to Mowdade Lake (with a couple wrong turns) and boy the elation when we saw our plane picking us up!

    The most loyal, strongest, sweetest trail dog ever
    Hanging out above glaciers
    What a wild country

  • Sunshine Coast Trail

    Sunshine Coast Trail

    Tinhat Hut-> Elk Hut-> Walt Hill Hut// Fiddlehead Landing -> Dixon Road

    The Sunshine Coast trail has been on my “must do” list for a couple of years now, and it was only recently I finally put aside all excuses and found a crew who were keen to try. We were all photographers who had weekdays free, and since I don’t go without Whiskey, I wanted to ensure that it would be the least busy on the trail. Scroll to the end of the article for map links and other resources!

    The Sunshine Coast Trail

    The Sunshine Coast trail is located on the northern Sunshine Coast which involves 2 ferries from mainland Vancouver. With the timing of the ferries and the drive across the Southern Sunshine Coast, parking at the end of the trail, and shuttling to the beginning being so time-consuming, we decided to sleep over at Egmont, near Earls Cove. This way we could pick up an early ferry and have a fresh start at the trail the next day, freshly showered and with a good nights rest. There is also so much to do on the drive to Egmont, so we checked out one of my favorite spots, Smuggler Cove, and reached our cabin at the BackEddy well before sunset.

    Smugglers Cove Sunshine Coast

    In the morning, we took off early and headed to meet Jesse of the Sunshine Coast Shuttle Services so he could help drop us off at the beginning of the hike (this way we could do a one-way hike to reach our car). We parked around the 137 km mark of the trail and he shuttled us to Fiddlehead Landing with his truck (dog friendly, yey!). We hit the trail in the rain, knowing that our first day was over 1100m incline with full packs.

    Ask Jessie to shuttle you to the start of your hike!

    Pretty soon we were seeing views between trees and with a couple sketchy log crossings and some very muddy patches. Eventually we made our way to a huge junction at km 88 where the trail meets a rugged forest road. Going straight would keep us on the SCT and turning right would take us a couple kilometers to the Tin Hat hut and some pretty epic views. The snow started around this point and we kept climbing until we finally broke through the trees when Brice, who was (usually) in the lead saw the first glimpses of the cabin. I was sooo happy to drop my pack at the hut and magically the sun came out and lit up the best views on the entire trail. We had slammed this section, of around 9km in only 3 hours 45mins (including breaks) so we had tons of daylight left. A benefit of off-season camping is that the snow meant we didn’t need to go off in search of water (there is no water source at the cabin normally). Also, sharing a tight space with a dog (even a short haired, well behaved and non-smelling one) can understandably be difficult for non-dog lovers, and so I also go out of my way to go to huts off-season.

    The cabin is small, but well built and would be cramped with about 8 people in the loft. It sits on the best views of the trail and has a compositing outhouse in really good condition. There is a wood pellet stove to keep warm and even in the spring, there was more than enough pellets for a couple months more. We even had reception! After a really well deserved dinner we grabbed our cameras and headed out to the view point for sunset. Crampons really helped as we were making fresh tracks and we were rewarded with one of the best sunsets yet this year!

    Sunset at Tinhat peak

    After a really warm night’s sleep in the winterized cabin loft, we took our time eating breakfast, making lunch, and headed out. The weather was calling for rain in the evening so we tried to keep moving. There are two options to head to the next part of the trail, the quicker South trail, or the longer trail that loops around Lewis Lake. The Lewis lake trail was unbroken snow and is a scramble in sections, and also adds about 5kms but is more scenic and avoids some of the logging roads. We chose the south route because of the snow and the weather. About the halfway point, we had a quick lunch break at Coyote lake where the sun popped through he clouds for a couple minutes, and then kept going, arriving at Elk Hut just before the downpour started in earnest.

    The crew

    Elk hut is an open hut, with 3 sides walled in, and one open. The loft is also open to air, so it was going to be a chilly night. On a dry summer day, I can imagine this would be a lovely place with a firepit outside (that was totally soaked), places to hang out, and a log dock. We even saw a canoe underneath the cabin but as it was pouring rain our whole time there, we didn’t get to enjoy it much! To warm up, we quickly changed into dry(ish) clothing, boiled up some water for tea, cooked up some dinner and crawled into our sleeping bags really early hoping for an early head start the next day.

    Not happy it was raining

    13 hours later, we crawled out of our bags back into rain. I suppose we had been pretty tired from a cold day’s trek so we all slept really well. After breakfast and packing up again, we started to our last hut of the trip- Walt Hill. It looked like this would be our easiest day so far, and most of the hike was lovely but as soon as we hit the snowline, everything changed. Although this section is lower in elevation than Tinhat, the snow was deeper and softer so we spent what seemed like an eternity taking turns breaking trail and post-holing up a path that no one had visited recently. The views are really nice on this section, and I can imagine without snow this would be one of the best parts of the trail to hike. When we finally saw glimpses of the hut, we were absolutely elated to have 4 walls and a fire to warm up and dry out for the evening. We had about an hour after reaching the Walt Hill hut before the rain really came down again. We still had lots of snow so we didn’t have to worry about a water source once again and huddled inside drying out the shoes, socks, and clothes for the evening.

    All the snow
    all the shoes and socks drying

    Our last day on the trail was calling for the a downpour, so I threw on all the rain gear, packed up my camera deep into my bag, and raced down the mountain thinking only of that dry car! Thankfully it was a quick section on a very well marked trail with only a couple water crossings (which probably aren’t anything on a dry day). We cheered at every kilometer marking (or at least I did!) until we reached the road where I parked and all scrambled into the car making really good time (2 hours 50 mins 12 kilometers).

    View from Tinhat

    Overall I would love to do this trail again! I really recommend it for those that aren’t as comfortable tenting in bear country, or would prefer to shed the weight of a tent and have a roof and space to sprawl out in the evenings. I can imagine the huts would be pretty busy in the summer and could be quite tight in space if there were too many people (it has been full on weekends in the summer). There isn’t a way to book the hut, so plan accordingly by bringing a backup tent or aim for a weekday (or day when the weather isn’t great). Definitely take advantage of Jesse’s shuttle service and ask him questions when you are in the car about the conditions and trail reports he’s heard about. Also please consider donating to PR PAWS who maintain the trail and huts if you are using the trail.

    Until next time

    Resources:

  • Grizzly Lake- Tombstone overnighter

    Grizzly Lake- Tombstone overnighter

    Camping at Yukon’s Grizzly Lake

    With the speed of our road trip, we didn’t have much time for backcountry adventures but we did want to do at least one overnight trip in a beautiful location (especially since we had brought our backpacks and gear). Tombstone Territorial Park is one of the most accessible northern parks, and not only are the mountains and tundra jaw-droppingly beautiful, it’s also home to moose, caribou, bear, Dall sheep, marmots, ground squirrels, and loads of falcons and birds. Since it is located at the base of the Dempster road, we would be passing through the park twice and were a bit more flexible on camping dates.  This was necessary because the Tombstone’s Grizzly lake site was almost booked out for a week (max 10 sites), and we were able to secure a spot a week later after on the return from the Dempster.


    a really cute marmot
    Amazing scenery on the way to the site
    The mountains surrounding the campground behind us
    some rocky bits to travel through
    Carrying her share!
    Just really beautiful!

    When you overnight at Grizzly lake, you must pick up a pass from the Interpretive Center and also a bear container. Why they don’t just keep the containers in the camp site’s bear lock-ups (as they do in BC) is a bit beyond me as they are large and hard to pack and heavy. We had a little intro to the hike with a very friendly ranger, loaded with lots of warnings and were given estimated hiking times that were really quite extreme (8-12 hours one way). Just as a reference, we asked lots of hikers along the way and campers at the campsite, and got an average one-way time of about 5-7 hours (but we didn’t meet too many older hikers). Without a backpack I would estimate one could do a return trip in about 9-12 hours with lots of breaks and rests. We finished in about 7 hours one way with about 1.5 hours of total rest and photography time.


    Starting in the subalpine
    the first section is a climb and you get views quickly
    up up and up!
    saying hi to some rangers at the top of the first incline
    having no issues with the “tough” terrain
    lots of resting and photos
    The highest point of the trail
    The terrain is varied and beautiful with lots of changes but is not technical and the path is very easy to find and follow. A hiker from Vancouver wouldn’t have a problem at all, but I can see that anyone not used to mountainous inclines might find the hike difficult with a full pack. We kept Whiskey on a leash most of the time as we passed by lots of marmot territory but did have to let her off where being attached to a leashed dog is actually quite dangerous (jumping over large boulders and areas with exposed sides). In these cases, for us it’s safer to let her find her own path since one wrong pull from a larger dog could bring you tumbling (and also we are used to off leash hiking so Whiskey is also safer as well).

    You can see the campground coming up! more than half done
    Whiskey pulling her daddy along
    You can see the lake clearly now
    A tiny bit of snow left in July, with the most amazing views
    At this point everyone is tired of me taking pictures
    rocky sections separate a couple marmot meadows

    The campsite was really muddy and had roped off trails to and from the eating shelters which was really the worst part about this entire trip, but at least the camp spots were raised off the ground (great for squirrels not to eat through your tent). Ground squirrels are famous for eating through everything since they are so salt-deprived and will even eat your shoelaces if left outside of the tent. It was not advised to use the lake water, rather the running water from the streams on the way to the campsite but we saw people using the lake water with filters. For Whiskey’s food we packed her dehydrated dog food which she of course, carried herself.


    Walking through some meadows
    ground squirrels are really chirpy!
    marmots shrill as we walk by (keep dogs on leash!)
    They blend in so well here!
    Living in paradise 
    a pointer doing her thing
    lots of breaks to look at the scenery
    mom! enough pictures!
    watching us set up camp
    at the food shelter
    waking dad up
    the hardest part is getting up when it’s cold and rainy
    Overall we were extremely lucky with the weather as we only had a sprinkling of rain on the trail, but once we set up the tent for the night and started cooking under the shelters, the rain started coming down in earnest. It rained the entire night, but in the morning it stopped just long enough for us to hike back (and started again when we got back to the car).

    a mini waterfall for collecting water
    massage stops along the way, of course
    Heading back was much faster
    I still couldn’t get enough of the scenery
    looking back down at the rest of tombstone
    We are tiny in a beautiful Earth
    Just missing the proper rain, but we had a few sprinkles
    the entire trail has views except for the first km
    The trail was easy to follow with no chance of getting lost
    Racing to the car before those pregnant clouds let loose!

    There were many options for a 3rd and 4th night, unfortunately, we didn’t have time and headed back . Quick doggy cheat: Thierry attached Whiskey’s leash to his pack, and then to his belt so she would power him up the inclines. It’s a bit trickier heading down though! On the return trip we were an hour faster (and took fewer photos) and just arrived in time to drive back to the Interpretive Center to return the bear can before they closed. I’d love to come back again!


    Until next time!


  • Elsay Lake Overnighter

    Elsay Lake Overnighter

    20km (roundtrip), 8-10 hours starting from Seymour Mountain Parking lot
    Link to hike OR this link 

    Lake Elsay

    This was a tough one as we didn’t expect such technical terrain and had started later than planned. Carrying heavy backpacks we took about 5.5 hours each way with lots of breaks. While it was my first time on this trail, I found the trail pretty easy to follow even though there are loads of warnings about the “poorly marked trail”. There were orange markers everywhere although I can see how it would be difficult to find the trail with fog or snow so make sure you are fit and experienced before attempting this one in less than ideal conditions. Also, there are a couple creek crossings which may be difficult in high water (we are currently in a drought so no issue there).

    photobombed!
    It would be so nice to sit down…
    Well marked path in the summer
    technical terrain
    We parked at the 2nd Seymour parking lot (designated for overnighters) and started on the trail to Seymour peak’s first pump. Right before first pump, there was a marker to veer off towards the Elsay Lake trail. From here there are about 8kms to get to the camp site and about 6kms of it is technical and tough terrain going down down down. Just a note of warning, we did see someone carrying their dog back the trail in a backpack because the poor pup had warn through their pads on the hot rocks, so make sure your dog is used to hiking on rocks and check their feet often.

    starting out with Seymour’s first pump ahead
    my vizsla-goat
    turn off to Elsay trail

    From the turn off, we soon turned a corner to see an enormous panorama of the valley. We crossed about 4 rockslides and followed one more down. There are some streams along the way (about 2kms to the lake) and the lake itself was pretty large for swimming. For space in the emergency hut, make sure you get there early (houses 6). It was a long weekend and we were a bit surprised to find another 6 tents up and a group staying at the hut.

    She loved the rocks
    just wow!
    my hiking buddies
    Taking a well needed break
    crossing a creek

    The way back seemed so much easier although it took the same amount of time (this time going uphill). We had run out of water in the summer heat so we stopped by the creek to filter a couple liters while Whiskey rested on some mossy rocks. I was surprised since this is the first time I’ve seen her lay down on a hike! We made sure she had plenty of dehydrated food, water, hard boiled eggs, and she shared all our food. She even crawled into our sleeping bags at night taking turns with mommy and daddy.

    setting up camp while Whiskey supervises
    so hungry!! feed me
    it was too hazy for stars
    waking up with a Vizsla in the sleeping bag
    swimming in the lake
    heading back home

    Overall the hike would be much faster without the packs, but it’s still pretty long for a one day hike unless you are a trail runner. The payoff wasn’t as amazing as many of the other trails we’ve done though I acknowledge we are spoiled for choice in BC. In the end I’m glad we did it but I won’t be planning another hike or overnighter here for a couple years.

    resting on the moss
    so small in an epic landscape
    my poor tired dog! only 2km left