Tag: beach

  • Guide to Beaches and Paddling Lakes on the Sea to Sky Highway

    Guide to Beaches and Paddling Lakes on the Sea to Sky Highway

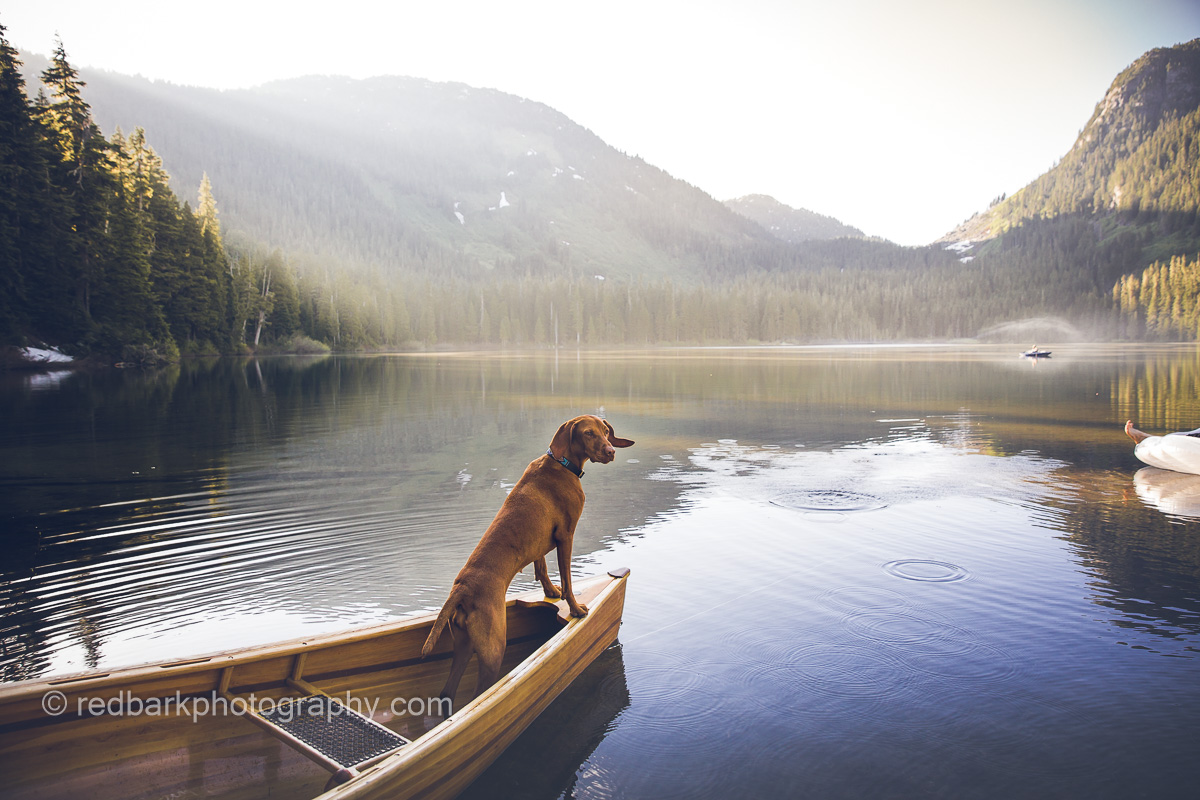
    The Sea to Sky Highway linking Vancouver to Whistler and Pemberton is one of the most beautiful drives in the world. Weekend warriors load up every Friday evening and fill up the parking lots to every easily accessible lake, trail, and park along the road. Here’s a guide to the Lakes and beaches of the Howe Sound along the highway, and places I like to take a kayak, paddleboard, or canoe with my two Vizsla dogs Whiskey and Bourbon.

    Many of these places do fill up quickly on weekends and parking is not allowed on the highway so I would suggest weekdays or very early weekends to get a parking spot! The guide moves from Vancouver to Pemberton and is location based. Check the tides for anything in Howe Sound and wear a life jacket! In case you’re a dog owner, here’s a blog on how to get started paddling with your dog.

    ๐Ÿš— Car Access
    ๐Ÿšถโ€โ™‚๏ธ Walk to Access
    ๐Ÿ’ชHike to Access
    ๐Ÿšฝ Toilets
    ๐Ÿ—‘๏ธ Garbage Bins
    ๐Ÿ›‘Difficult Parking
    ๐ŸšซNo Dogs

    Vancouver-Squamish

    Whytecliff Park ๐Ÿšถโ€โ™‚๏ธ๐Ÿšฝ ๐Ÿ—‘๏ธ – The access is down a set of stairs and a rocky beach. Check the tides before you go! There are seals, periodic whales, and an islet (island sometimes connected) to paddle around. Sunset is gorgeous. This is also a common diving spot so watch for divers! Bathrooms and a small food concession is on site as well as a small trail, green grassy space.

    Kelvin Grove Beach ๐Ÿšถโ€โ™‚๏ธ๐Ÿ—‘๏ธ- Lions Bay Beach Park may be preferable for those without dogs, but Kelvin Grove Beach is Dog Friendly. There is paid parking, and the access is down a short trail to a small set of rocks with logs. Depending on the tide you will have more or less beach to launch from with your dogs. No bathrooms.

    Porteau Cove ๐Ÿš—๐Ÿšฝ ๐Ÿ—‘๏ธ -A much larger beach and area to launch from. There is a campground connected to the beach as well as a large dock. Bathrooms are available and there’s lots of places to launch especially when the tide is low. Very quick and easy access from the car to beach.

    Furry Creek Beach ๐Ÿšถโ€โ™‚๏ธ๐Ÿšฝ๐Ÿ—‘๏ธ- There is less parking and a bit more walking involved than Poteau Cove to the beach access at Furry Creek Beach, however because of this the area is a bit more quiet. There is very little beach on high tide so be aware!

    Squamish-Whistler

    Mamquam Beach ๐Ÿšถโ€โ™‚๏ธ-in Squamish is currently under a series of construction so it’s hard to tell how access is lately. Right now there’s a decent walk to the beach from easy parking downtown Squamish but the beach has the best view of the Chief especially during sunset.

    Spit Road ๐Ÿšถโ€โ™‚๏ธ- in Squamish has lots of options to park and launch a boat, however be warned that the river can move quickly and you’ll likely be hiking your way back up the road when you’re done. Have knowledge of river paddling, the waterflow, and tides before putting into the Squamish River (especially if you’re going to drop in further upstream).

    Alice Lake ๐Ÿ’ช๐Ÿšฝ ๐Ÿ—‘๏ธ – Alice Lake Provincial park has 4 lakes. The easiest accessible lake for paddling is Alice Lake itself but it’s not dog friendly (even the trails around the lake prohibit dogs). Stump Lake is the easiest accessible lake for paddling with dogs and is quite quiet for boats and swimming even on a busy day.

    Cat Lake ๐Ÿšถโ€โ™‚๏ธ๐Ÿšฝ๐Ÿ—‘๏ธ – Cat Lake a small lake with loads of docks. It’s great to practice paddling as it’s so small with so many access points and lots of parking. Even so, on weekends the campground fills out and it can get extremely busy. An AWD is advised as the road can get rough and in winter it can be impassible. Boat access is a short walk down a wide trail to the main dock. There are pit toilets at parking and lots of garbage bins.

    Brohm Lake ๐Ÿ’ช๐Ÿšฝ- Brohm lake has very limited parking, especially in the summer weekends. There can be a lineup of cars waiting to get in further up the highway. It’s a long narrow lake and water access isn’t the easiest. If you take the trail going south from the parking lot, you get to the lake quicker but you’re launching from rocks. There’s also water access if you walk up north but you’ll be hiking up and down big rocks. The area is beautiful and there are pit toilets up the North trail from the parking lot but no garbage bins currently (please take your garbage out!).

    Levette Lake ๐Ÿšถโ€โ™‚๏ธ๐Ÿšฝ๐Ÿ—‘๏ธ- A beautiful lake up a FSR (Forest Service Road). You will need AWD on your car in order to get up the road and there’s limited parking. The water access is a short walk from the parking, which has garbage bins and pit toilets. There is very little “beach” to launch from and the area can get very busy on weekends. This may not be accessible in the winter and there are cougars and bears in the area.

    Hut Lake ๐Ÿ’ช๐Ÿ›‘- 4.5km hike down a wider easy trail from Levette Lake. You can drive further up the road shortening this hike if you have a 4wd and if you have a monster truck you can drive the entire way to the lake HOWEVER I have seen several trucks attempt this and be stuck and it is not an easy location for someone to come pull you out! A much quieter lake because of the hiking access but with no toilets, bins, and extra cougars and bears.

    Starvation Lake ๐Ÿ’ช- Either 2.6km from the highway or 3.5km from Paradise Valley Road (AWD advisable). An easy walk down a trail to the lake provides a lovely paddle on a nice summer day. There is limited parking on the Highway and you’ll have to walk along the highway for a small stretch before the trail starts down. Paradise Valley can get busy with campers and cars as well.

    Lucille Lake ๐Ÿ’ช- Halfway to Whistler sits Lucille Lake. Again, busy on weekend especially with locals, there is a limited parking on the FSR over Chance Creek Bridge. There are two launch points that involve a short walk in. The further beach has a nice sandy beach, great to lounge or launch from. There’s also a huge questionable bike ramp on one side of the lake. With no toilets or bins, keep your dogs really close and don’t wander too far into the woods.

    Daisy Lake ๐Ÿ’ช๐Ÿ›‘- A large lake on the way to Whistler but this one is NOT easily accessible. It’s also closed to organized recreational activity and BC Hydro has it damned so the water level changes radically.

    Callaghan Lake ๐Ÿš—๐Ÿšฝ- Callaghan Lake needs AWD access up a longer road filled with waterbars off the Sea to Sky Hwy. Launch access couldn’t be easier as you can drive right up to the lake to drop off a boat. The lake is large and surrounded by mountains. There are campsites, pit toilet but no bins.

    Madeley Lake ๐Ÿ’ช- Access by an easy walk off the FSR that leads to this lake. AWD accessible the last I checked (perhaps 4WD now) and less visited and paddled lake. Small beach access with wild camping, no toilets or bins.

    Whistler-Pemberton

    Alpha Lake ๐Ÿšถโ€โ™‚๏ธ๐Ÿšฝ๐Ÿ—‘๏ธ- A smaller lake with a dog friendly area, Alpha lake has lots to see and like most of the other lakes can get busy on summer weekends. Being a smaller lake in an exclusive neighborhood, parking can be more difficult but there are so many lakes to choose from in this location.

    Nita Lake ๐Ÿšถโ€โ™‚๏ธ๐Ÿ—‘๏ธ ๐Ÿ›‘- A smaller lake that doesn’t have the easiest parking access. I Haven’t paddled this lake but there is a trail around most of the lake with access to drop a boat in.

    Alta Lake- ๐Ÿš—๐Ÿšฝ๐Ÿ—‘๏ธ With a dog-friendly beach, this is another beach I occasionally visit. The rainbow Park area has bathrooms, parking, and bins as well as a swimming area and dock. There are beautiful views of Whistler from the lake as well as lots of docks and big houses to check out.

    Green Lake- ๐Ÿš—๐Ÿšฝ๐Ÿ—‘๏ธ My favorite lake to paddle in Whistler. Green lake has easy access from many different trail and neighborhood parking along the lake. There’s also high end restaurants, chalets, and a gold course right by. Watch the seaplanes take off right in front of you (and please get out of the way!) and paddle around the gigantic mineral rich green lake.

    Whistler River– Golden Dreams Route- Paddle from Alta lake to Green Lake on this slow moving 5km route. You’ll see geese, maybe some bear, and lots of beautiful scenery. Aim for early summer as late summer the water can be low and you might need to portage a section. Check the water level before heading out as there’s a tricky section that might have you in the water. There are also tours you can take!

    Lost Lake– ๐Ÿšถโ€โ™‚๏ธ๐Ÿšฝ ๐Ÿ—‘๏ธ A lovely little lake with an easy beach to spend a summer day. Dogs are not permitted on the beach however but they’re welcome at “Canine Cove” 400m to the north.

    Pemberton and further

    One Mile Lake ๐Ÿš—๐Ÿšฝ ๐Ÿ—‘๏ธ – A lovely small lake with easy parking and beach access. The dock is easy to launch from and although the beach doesn’t allow dogs, no one has complained as we launched a boat with dogs from the dock. This is a lovely place to paddle for sunset and has lots of trails to hike when you’re done paddling.

    Lillooet Lake ๐Ÿšถโ€โ™‚๏ธ๐Ÿšฝ๐Ÿ—‘๏ธ- The largest lake on this page by far! There are many access points along the In-shuck-ch FSR the easiest being Strawberry Point site with pit toilets, bins, and campgrounds. Access is down a dirt path to a rocky beach that stretches for a very very very long time. Because the lake is larger, pay attention to winds, however you can paddle here all day and still have loads to discover.

    Lower Joffre Lake ๐Ÿšถโ€โ™‚๏ธ๐Ÿšฝ๐Ÿ—‘๏ธ๐Ÿ›‘๐Ÿšซ- One of the most beautiful turquoise lakes, this park is now NOT dog friendly and also needs a day-pass. There is no reception at the lake so the pass must be garnered before heading up to the lakes and it is almost always packed. The lower lake is a short walk in and there is a small area to launch from. Pitt toilets and bins are available but sometimes both can be full.

    Duffey Lake- ๐Ÿš—๐Ÿ›‘ There is very little access to Duffey Lake but the area isn’t usually too busy. There are some places to pull over on the Duffey Lake Rd, or a viewpoint area on the East side with parking for several cars. The lake is huge and turquoise and surrounded by mountains. No bins or toilets, nor beach though!

    Seton Lake- ๐Ÿš—๐Ÿšฝ๐Ÿ—‘๏ธ Another absolutely gorgeous lake with limited parking access in the summer. If you’re feeling adventurous with a good car, you can drive around the lake and find quieter places to launch from or just to take photos.

    Birkenhead Lake ๐Ÿš—๐Ÿšฝ๐Ÿ—‘๏ธ- Another provincial park with camping sites, toilets, and bins. The road is a bit rough but most cars can make it just fine, and I’m pretty sure there’s no reception. The area is beautiful with mountain backdrops and a beautiful lake. Perfect for swimming, there is a beach to launch from and it’s very easy to find a quiet spot to yourself on the lake

    Support my blog! Check out my little shop
  • Alaska’s Mint-Bomber Traverse with Dogs (and a Snowstorm)

    Alaska’s Mint-Bomber Traverse with Dogs (and a Snowstorm)

    Goldmint Trailhead to Mint Hut

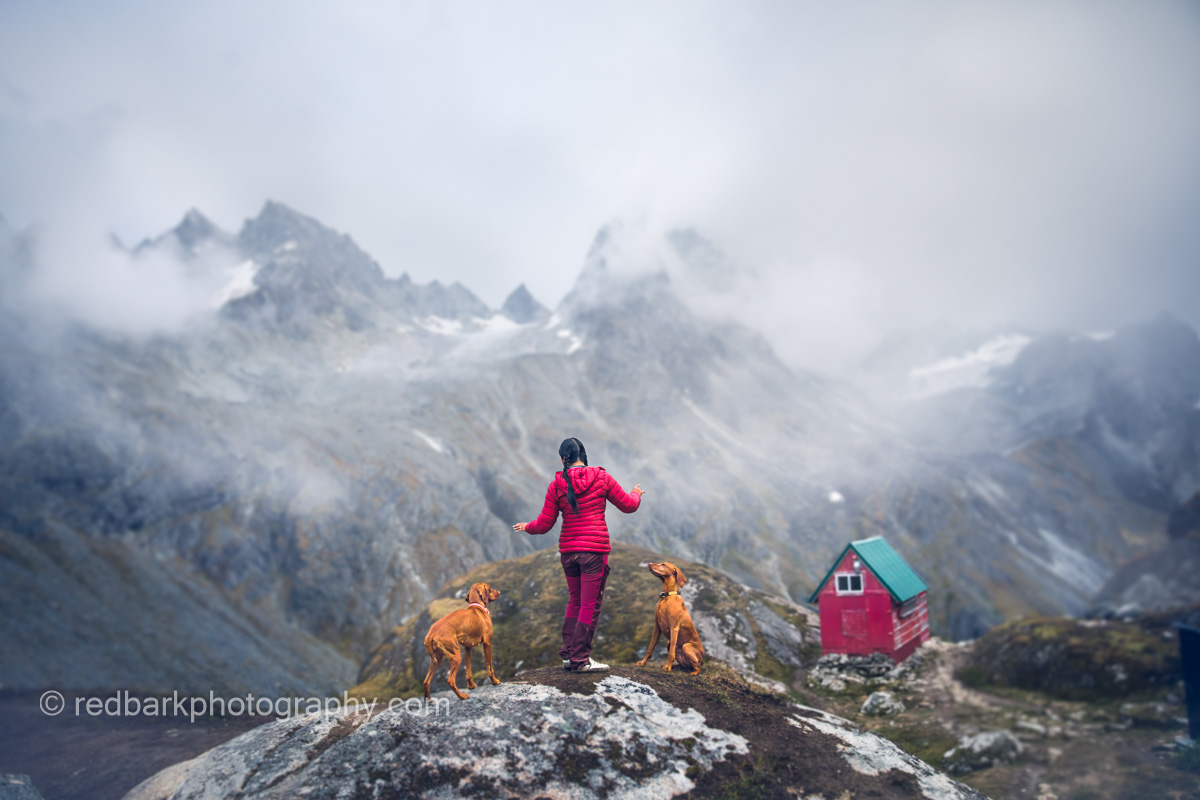
    Deep in the Talkeetna Mountains in Alaska, a local favorite trail Hatcher Pass became world famous. Within the area, there are loads of options for hiking and exploration, but we only had a couple days, and very few days without an abundance of rain. My friend Kristina and our dogs Whiskey, Bourbon, and Cooper set out on a backcountry adventure exploring several huts and passes in the backcountry. As with most backcountry adventures in Alaska, our hike did not go according to plan.

    Bourbon’s first year with a pack

    First off was the 8 mile (13km) hike on the Gold Mint Trail to Mint Hut, where we planned to stay the first evening. The weather was beautiful and sunny (the only day it was!) and the hike in was the easiest part of the entire trip. We still did manage to get lost close to the hut, but we spent that time eating berries off the ground and taking photos so nothing very problematic. Because there had been so much rain, much of the trail was extremely muddy (re: a pond) so poles and waterproof boots were really helpful.

    Above Mint Hut, got a little lost

    When we finally found the hut, we spent the evening taking photos and enjoying the views. The clouds were coming in thicker so we were glad to have a hut to sleep in. Unfortunately the hut was also pretty damp and moldy smelling and all the pots and cups were pretty covered in black muck, so if you’re using anything stored inside, clean it well first. Also frustrating was the amount of dog poop left all around the hut. I’ve never experienced such poor management of dog feces on any trail or hut before (and that’s saying alot!) so PLEASE PLEASE pick up after your dog should you come here.

    Mint Hut exterior and views from Hatchers Pass
    Pick up after your dog here!

    Mint and Bomber huts are maintained by the MCA (Mountaineering Club of Alaska) so make sure you pay your yearly $20 fee online before you go. Because the weather had not been great, and we were at the end of the season (end of August), we were excited to try out the huts. Any of the huts along the route can be very busy so we brought an extra tent just in case, but luckily, there was only one other couple that ended up there that evening. With dogs, you must climb up a vertical ladder, or let them sleep on the ground. Our dogs are all smaller and hairless (and sleep inside our sleeping bags) so we had them up with us.

    Mint Hut interior and views from Hatchers Pass
    Mint Hut

    Mint Hut to Bomber Hut Via The Backdoor Gap (6.5km)

    This was so much fun! After Mint Hut, there are no more trails and you must be able to make your own way. You start heading up the steep scree boulder field heading towards the Backdoor Gap. The boulder field can be quite tough on dogs that are not used to climbing scree and rock. The rocks can rub paws raw, and the steep terrain can be dangerous if not navigated properly. Again, we didn’t take the most direct route, but we eventually did find the gap with extra scrambling and climbing and had quite a bit of fun doing so.

    Scree up to Backdoor gab
    Boulder field to Backdoor Gap

    The Gap itself is at the top of a glacier. You are climbing a small gap that can be snow-filled depending on the time of the year, or, in our case was currently snowing. Because it was so cold, windy, and snowing, we didn’t take too many photos and concentrated on descending. There were several questionable ropes hanging down that we used, but this section would be very steep for dogs.

    Backdoor Gap from Mint hut to Bomber Hut
    Kristina heading down the Backdoor Gap

    Next, you need to hike from the top of Penny Royal Glacier, all the way down. There were no crevasses we saw, and the glacier was pretty easy although quite slippery and was a nice break from scree climbing all morning. Eventually you drop down to the tundra and keep hiking until you find Bomber Hut. At this point it was starting to rain and we were quite tired from carrying our huge packs over the day.

    Backdoor Gab with Whiskey
    Kristina look over the Tundra heading to Bomber Hut
    Kristina look over the Tundra heading to Bomber Hut
    Bomber Hut and tundra in hatchers pass area
    Bomber hut in the background

    Bomber Hut was much nicer than Mint (although maybe not so pretty from the outside). It’s newer and with better airflow so it didn’t smell like mold. Again we were the first ones in so we made ourselves at home and started exploring outside between spells of rain.

    Bomber Pass from Bomber Hut, Alaska
    Bomber Pass

    The view from Bomber Hut were breathtaking. As the rains came and went, we were audience to moody lighting over an arena of mountain passes. Over the afternoon, more people came to join us and we had a lovely crew to chat with for the evening.

    Clouds coming in and out with Whiskey
    Bomber Hut
    Bomber Hut with snow

    Our next day, we had been hoping to hike to Snowbird Hut, however it was pouring rain and snow so we decided it would be nicer to take a day in rather than soaking everything we owned in cold rain for 5 hours without seeing any views.

    Kristina in Bomber Hut Interior
    Spending a day inside Bomber Hut

    We spent the laziest day in reading comics that had been left behind and chatting to the huge group of people that wandered through. Somehow Bomber Hut became the meeting place and over the day we had over 10 people max out the sleeping space. There were even several outside in tents in the drenching rain.

    Full House at Bomber Hut

    Bomber Hut To Reed Lakes Trailhead Via Bomber Pass (10.5km)

    Bomber Pass, Alaska
    Looking at Bomber Pass, hiking between these mountains up Bomber Glacier

    Since we changed our plans not to go to Snowbird, we ended up hiking out of Bomber Hut through Bomber Pass on our last day. We woke up to snow. So much snow! The snow turned to rain, but we could see at higher elevations it would be very very white. After a quick breakfast we started to head out and were the first group up the boulder field and onto the Bomber glacier to Bomber Pass.

    Bomber
    1950s TB-29 Bomber Wreckage and Memorial
    A plane wheel in a crevasse

    Bomber Pass is named as such because there is a TB-29 Superfortress Bomber Plane that crashed during a training mission in 1957 killing 6. Because it was snowing so hard, the other group that was heading up had decided to bypass the wreckage (it’s on the other side of the glacier). By the time we had located and explored the wreckage the other group had caught up to us and we were able to head up the pass to drop down onto Upper Reed Lake.

    A very snowy and rainy day

    The pass was quite dangerous with a new foot of snow that had fallen over the past day (making it 2 feet of fresh snow). Underneath the snow was pure ice and I hadn’t brought my ice axe so at one point I slipped and slid and slid, thankfully catching my foot on some rocks before I slid down a kilometer down the glacier. The top of the pass was totally covered in snow (snow covered rocks) so it became very very tricky to make our way up. Normally there should be a clearer path with rope but everything was so covered in snow.

    Bomber Pass in fresh snow
    Bomber Pass was treacherous with many injuries this day

    Upper and Lower Reed Lake

    Unfortunately since it was snowing so hard, we made our way through Upper Reed Lake and down through the boulder field only thinking about survival. Steep fresh snow covered boulders are a minefield and not fun on a sunny day. We were soaked to the bone with huge packs on and dogs to control. The snowy rocks are even more dangerous for dogs, especially inexperienced ones and a dog following us later that day tore a nail or toe and had to be carried the rest of the way. Someone else also injured their leg on the descent so be very methodical and careful.

    Once to Upper Reed Lake, the trails started again. I could see that normally these trails would be absolutely beautiful, but snow turned to pounding rain and we were quite tired from the pass so we just put our heads down and hiked out as fast as we could. Everything was so soaked my phone stopped working and our dogs were quite miserable. The trails had turned into muddy river that I fell in (and just laid my head down for a minute). Another area was so flooded with water that it was higher than my knee level when I sloshed through. I think my dog was swimming.

    From the parking lot we were able to hitch a ride to Mint Trailhead and were able to change our clothes and dry out finally!

    I would love to visit again!

    If you wonder why my bag was so heavy, check out here to see what I carry with me for camping. If you’d like to try out tent camping with dogs, here’s how, and if you’re looking for winter dog gear, first aid kits for dogs, or just other adventures, check out the links!

  • Guide to a well-dressed Dog: Vizsla Jackets and Sweaters

    Guide to a well-dressed Dog: Vizsla Jackets and Sweaters

    Are you confused with the amount of options of canine jackets and sweaters available on the market? Or maybe you’ve tried several and find nothing fits your skinny long dog properly? There is such a variety of dog breeds from short and stout to long and lean and unless your dog magically fits the “standard” size it can be hard to find something that fits and stays on an athletic crazy running machine. We’ve tried so many different options and this is what I’ve learned.

    Velcro vs Buckles vs Zippers

    This is a big point of difference in choosing a jacket. Ideally you find a jacket with the least amount of connection/adjustment points. This can be counterintuitive as the more adjustment points, the easier it is to get a good fit right? Perhaps, they’re more adjustable, however these jackets will rub more, and will also come off easier with an active playing dog. Jackets with 3-5 Velcro panels are the bane of my existence. They look awful and these panels will come off easily over time.

    Velcro is great for easy of use and quickness, for fitting different dogs without adjustment, and for not rubbing or chaffing on the pup. The downside to Velcro is that it can come off with thick brush, with deep snow collecting, and with rough play. Velcro also degrades with use, especially the cheaper Velcro (there’s a huge difference in quality) so make sure that Velcro jackets are high quality if you want them to last.

    Buckles solve alot of Velcro issues such as inadvertently coming off after rubbing past bush, or a dog pulling the panel with play. Buckles snap easily and can adjust with straps. Sometimes buckles are used in conjunction with Velcro for the best of both worlds. The problem with Buckles is that they don’t have a clean profile, they can rub or get in the way with harnesses, and they’re a small point of connection so jackets have to be structured well in order for them not to unravel or lose shape.

    Zippers are a very clean look and connect a large panel of fabric together. They’re wonderful not coming apart or wearing out, however they are not adjustable so the fit has to be somewhat perfect for only a zipper to be used in a jacket

    Finally, there are jackets and sweaters that do not have any attachment points and depend on the jacket fitting perfectly to the dog to not fall off. I love these the best, but they are the hardest to find and fit as your dog grows and changes!

    Fit for skinny dogs- length vs chest

    Fitting jackets on different shaped dogs are difficult. I find most of the mass produced clothing fit a stout, somewhat rounder and and shorter dog than mine. I’ve had to find specialty dog clothing to fit my Vizslas, or just accept that the length will be shorter and the stomach panel barely covering. These jackets usually twist on the dogs as they run, or leave their backs and stomach open to the elements.

    Here’s a list of dog companies that make long/skinny/lean dog jackets, many of these are custom

    Voyagers K9 Apparel

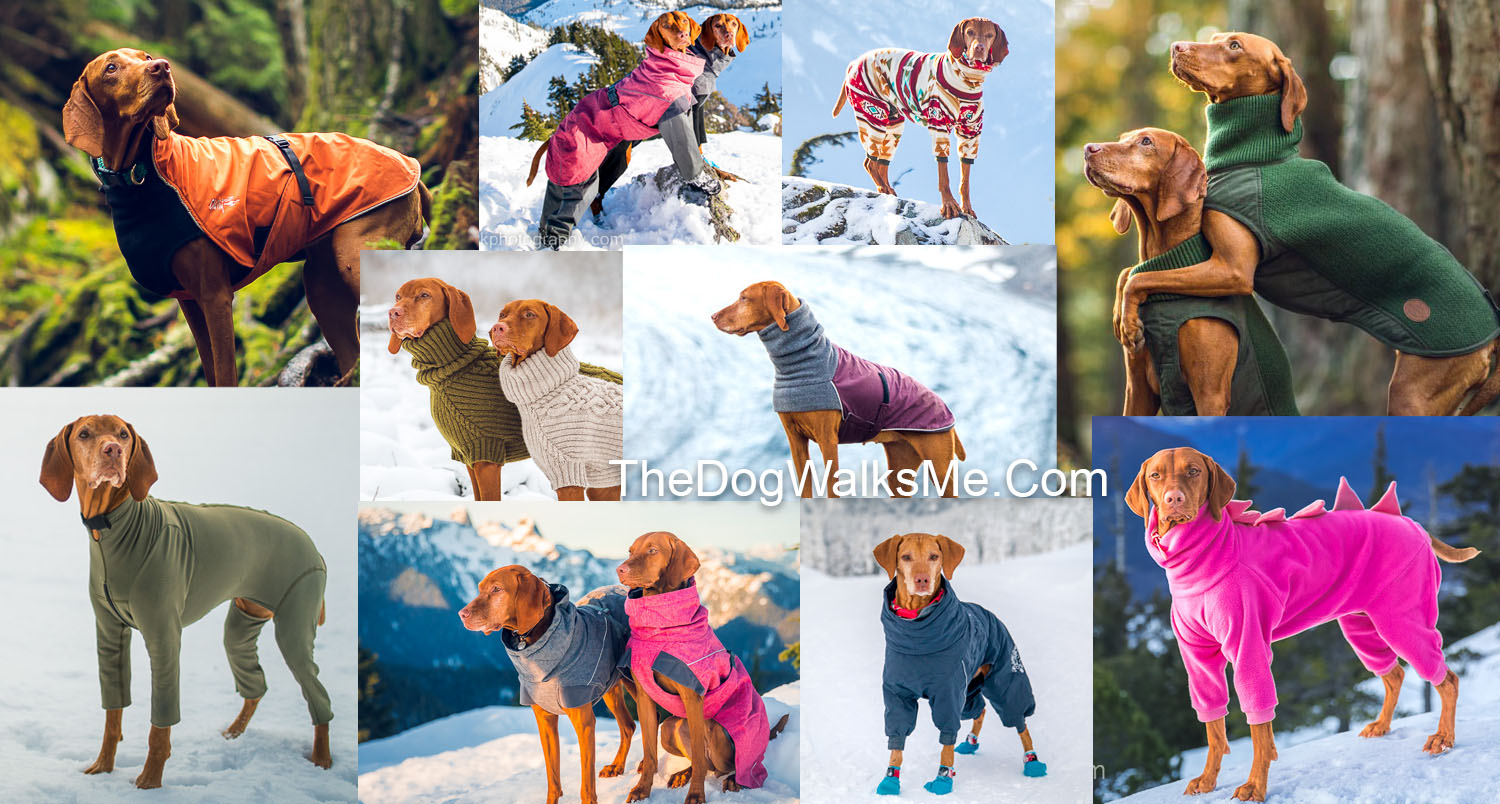
    Our most used rain jackets and winter jackets come from this brand. They are breed-specific fits and are easy-on easy off with Velcro. There are two Velcro straps which really help keep the jacket on crazy dogs and it’s great quality (I have much experience with sewing and Velcro). The fleece is also very high quality and extra thick. No matter the amount of washing these jackets have gone through, they haven’t seemed to degrade.

    Voyagers is run by an American family with the mother sewing all the jackets and they can be custom to your own dog for an extra fee. There can be added harness holes and custom shapes for an oddly shaped dog. Although puppy teeth and barbed wire will tear the fabric, it holds up much better than other cheaper jackets. *wash these jackets with tech wash

    K9 Voyagers winter jacket

    Chillydogs.ca

    These jackets (the standard option) fit Vizslas perfectly. They also have long and lean (greyhounds) and another cut for short and broad dogs (Bullies). The jackets use both buckles and Velcro, and are quick to put on, never coming off because of the buckle. The winter option covers the front of the chest and has a fleece-lined shell for added wearability. The neck is a bit shorter and less thick fleece than Voyagers but there is the chest panel and buckle. I find the Alpine Blazer to be a great all-round jacket for those days that aren’t too cold, or too wet but just chilly enough to need a jacket.

    Chillydogs Great White North Winter Dog Coat
    Chillydogs Alpine Blazer

    Hurtta

    Hurtta is a company from Finland that have recently expanded to North America. They have some really interesting products that I haven’t seen elsewhere. I especially love the Eco line that uses 100% recycled polyester fabric. Not all Hurtta jackets fit skinny/lean/hairless dogs well but the ones that do are keepers!

    Hurtta’s Expedition Parka was made especially for lean dogs without undercoats like Vizslas. The fabric hugs the dogs (vs a shell that leaves so much air between jacket and muscles) and includes adjustment points as well as a snow trap on the neck that really keeps heat in. There’s a fully chest panel, and the jacket is coated with water wicking properties (not fully waterproof but fine with snow). The jackets use only one buckle but stay in place really nicely.

    Another jacket I love and use is the Extreme Overall. This one is the warmest one-piece clothing I have for the dogs. It’s good for about -15 (once it gets to -20 for 5 hours we switch to layers). The overalls take a bit of time to put the dogs in, but there’s many adjustment points and they fit the dogs well.

    Vizsla Tea

    This is the only brand I haven’t tried but I would recommend if you’re in Europe. I’ve heard good things and they’re made specifically for the Vizsla breed.

    K9topcoat

    I’ve more recently been using K9Top Coat in the winters. Because of our wet and cold climate, we’ve been using the Weatherproof Bodysuit that has the most water-repellency. I haven’t tried the other suits they make, but there are lots of options for dogs that have allergies, injuries, etc. The weatherproof suits have fitted my Vizslas very well (cut the legs off higher or they will snowball). They’re perfect for layering underneath jackets and for camping.

    Bravehound/Redbarkshop

    If style is what you’re looking for, look no further than Bravehound. These are custom made with Vizslas in mind. I sell them in my shop with the measurements taken from 100s of Vizslas in 5 sizes. The sweaters are hand-knit and stretch perfectly as the dog breathes and runs.

    I’ve never been able to find a sweater that actually fit the length of a Vizsla and stretched nicely over their chests so I started bringing these in for sale. There’s a hole for a collar, and my oldest sweater is still lasting nicely, although these aren’t for rough play or running through the bush (They’ve survived all that, but I try not to!). Also machine washable (all the jackets on this list are!), and finally 100% wool.

    There’s also a more fitted vest for sports in the winter and keep the dogs warm. The Bravehound wool gilet is zippered and allows for easy sprinting while keeping the dogs warm (perfect for Cross Country Skiing).

    Bravehound Technical Gilet Vest

    Threadzntails

    You cannot find better fitting onesies (and other shapes) as these are made custom to your dog’s size. They even have matching human hoodies if that’s your thing! Everything is custom to exactly what you want, including collar style, legs, stomach paneling (girls and boys), and fabric type and color or design. For the customization I think the pricing is extremely fair. Since there are no zippers or Velcro, these are very easy to wear, but take a bit of time to slip on. I have friends that are addicted to getting these as they’re so fun to design yourself.

    Puppies

    I think I found this jacket for $8 in the clearance bin and it was just fine for puppy Whiskey

    For puppies I always suggest getting something second-hand to last for the first half-year. The jackets I recommend are not cheap, and unless you want to splurge (or have an ongoing amount of puppies in your household) it may not be money well spent. Puppies also have shark-teeth and are pretty unforgiving in their playing and tumbling so it can be best to wait until after they stop shredding everything in sight. Whiskey had a cheap $8 jacket that was torn and handed down to someone else after she outgrew it.

    Price and Longevity

    As with most things, you tend to get what you pay for. I’ve tried the cheaper mass-produced clothing out there and as well as being poorly fitted, they do not last very long. Whiskey isn’t a hard playing dog, but we’ve ripped several jackets and worn out the Velcro in others. Other times the jackets with tiny stomach panels (many just have a strap) cause the jacket to fall to one side and just get trampled or torn. I love jackets that last, fit perfectly, and look great!

    Rain and Waterproofness

    Voyagers k9 has the most waterproof jacket in the market

    I find most jackets that are “waterproof” or “weatherpoof” will not actually keep a dog dry for 3 hours in a downpour, or wet snowfall. Now, I’m assuming most people do not take their dogs in drenching conditions hiking, but it’s a really good way to test waterproofness in dog jackets. The most waterproof Dog Jacket we’ve found is the Voyagers K9 Apparel. They’re the only ones that have stood up to pouring conditions and are still fully waterproof years later.

    Since I take out multiple dogs at a time, I will use all the jackets I have, and Voyagers consistently keeps the dog dry compared to others. However, nothing will keep Bourbon warm and dry when she jumps in and swims after ducks in the winter… I also highly suggest keeping your jackets (no matter the brand) clean and using a proper “tech” wash to clean the jackets and keep them as waterproof as possible

    Snow and ice

    Whiskey “swimming” in powder

    You make think any jacket that is warm should be fine in the snow, however I’ve found some are much better than others. If snow is going to touch the jacket, it can collect inside (especially those with dogs that like to swim in snow) and it can also cling to certain fabrics, and with body warmth, melt, then turn into ice. There are certain pieces that can freeze up and ice over rubbing the dogs as they run.

    Anything with a stomach panel, especially one that covers the front of the stomach will collect snow with a swimming dog. An example is the Hurtta Expedition Parka. As much as I love this jacket, if Bourbon runs through deep snow, the snow will collect and stay in the chest, and then melt and hold iceballs next to her stomach. The Chillydogs winter jacket is similar in this way. This isn’t a problem for running around in packed snow, leashed walks, and dogs that don’t enjoy swimming.

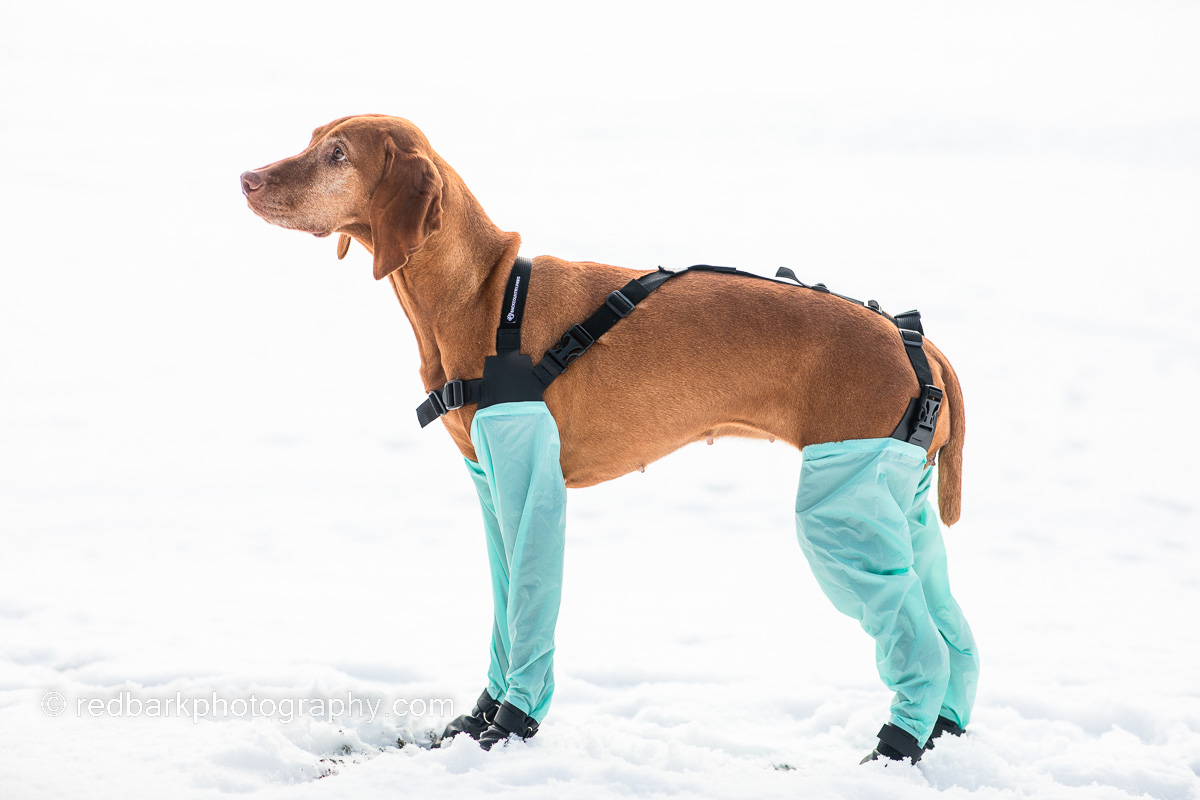
    I’ve also noticed the Hurtta Overalls legs get icy, as well as the k9topcoat weatherproof bottom legs get iced up. The best option I’ve found for cold legs that need coverage is using the backcountry gaiters.

    Citywear and Loungewear

    It can look ridiculous but these dogs do get cold and sweaters or onesies are really amazing! They’re wonderful underlayers, and great if you keep your dogs in a cold car for competitions or roadtrips, for car camping in the winter, cold cabin days, or just an on-leash walk in the city. Perhaps you have a calmer senior dog that chills quickly with arthritis, have a dog recovering from injury, or a dog that refuses to potty when it’s cold outside? A warm sweater or jacket can be wonderful!

    Lifejackets for Dogs

    There are not too many companies that make dog lifejackets, but here’s a couple to check out.

    Ruffwear – Our favorite that we’re currently using, easy adjustments, hidden straps. The biggest selling point is the front strap, where most jackets are thin and can come out of place, Ruffwear has a thicker front band and the strap doesn’t chafe

    Hurtta – I have not tried but I trust this company

    Outward Hound – A lower price point, I just don’t love the strap system, but works great

    Kurgo – I haven’t tried this one, but Kurgo is a well trusted brand

    Dog Life Jackets are really area dependent (where you can buy them) but I would advise for less straps flapping around and more coverage, You want to be able to lift your dog in any position from the handle and not have your dog fall out or chafe. It’s also really helpful to have a leash attachment point. Since your dog’s life may depend on the life jacket working, I wouldn’t get something cheap off Amazon.

    I’m not sure this brand as I borrowed this lifejacket but it kept Bourbon safe!

    Hunting/protective

    I don’t have much information on protective wear for hunting but guess who does… Accidental BirdDog! Her blog posts have loads of information on hunting and this one covers some protective clothing for hunting dogs.

    Layering- protective and cold

    Whiskey has k9topcoat tights underneath and Bourbon has Backcountry Gaiters as well as Expedition Parka

    We are masters at layering! Hiking in the mountains, and backcountry camping involves adjusting and changing to the weather. I normally carry a couple pieces of clothing for the dogs when we are backcountry camping and layer as needed. Sometimes in the winter, we will start on a warm day and the clouds and snow and wind will come in on the peak and I’ll have to redress the girls right on the trail in order for them to survive.

    Do not be shy from layering, even if it looks ridiculous. I typically like a onesie/tights underneath a warm jacket, and some sort of boots if needed. Dog Googles are great if the wind really picks up and starts shooting snow at your face. If you can barely open your eyes in the wind, your dog will appreciate googles (but these do take training to wear).

  • Dog Boots Guaranteed to stay on: Backcountry Paws Gaiters review

    Dog Boots Guaranteed to stay on: Backcountry Paws Gaiters review

    One of the most interesting pieces of winter dog gear that we’ve used are the Backcountry Paws dog gaiters. Does your dog need, but lose boots all winter long? This might be for you!

    Dog gaiters might look like the weirdest dog contraption but they really are quite functional and solve a couple issues I’ve found no other answers to.

    Whiskey with her Backcountry Paws Dog Gaiters

    The problem:

    Dog booties can be necessary if your dog’s paws are too cold (say -15 degrees), or if your dog’s paws develop snowballs, or if your dog’s paws might need protection for other issues. Fast running energetic dogs lose dog booties all the time and these can be expensive! We tend to use dog booties for hikes less than 2 hours, especially if the trail is wide and easy to find missing booties.

    But what do you do if you are sick and tired of losing dog boots? For those longer hikes, or when I don’t want to spend my time finding lost booties, I use these gaiters. Because the gaiters have boots attached, this makes it impossible to lose boots and voila your issue is fixed! Read on for the caveats!

    Our experience:

    The first time I tried Backcountry Paws gaiters, I was a bit intimidated by the straps but it was fairly straightforward and logical to put on. Whiskey is a really patient dog so she helped us both get used to the gaiters and find out together how to use them. My dogs are right between the sizing. Whiskey has a large size gaiter and Bourbon a Medium. I can fit either in either size but the medium is pretty tight on Whiskey and Bourbon swims in the Large.

    The best uses of these gaiters are on packed trails or loose fresh snow no higher than the knee of the dog. They’re great for active crazy dogs that lose boots, and those that collect snowballs on their paws and lower legs. The gaiters are also good for windy days when you want the entire length of the dog’s legs to be covered. I’ve not found a long-legged bootie that my dogs actually accept and enjoy, that stays on for 4+ hours, outside of this solution.

    How to put on:

    Step 1: Separate the front and back
    Adjust and fit the front paws first

    First you need to separate the front and back of the gaiters. I noramlly start with the front legs (undo the buckles to help). Place the boots atop the dog so you know where the front and back of each leg is before you start. You want to avoid putting the boot on front to back (you cannot tell outside of the top straps) so first get your placement otherwise the boot will be twisted.

    Add the back section and then snap together

    Once the front boots are on, you can place the back boots on and then buckle the back strap to the front section. Make sure the velcro on the boots is on very well because once you hit the snow and the velcro starts icing over, it’s much harder to redo well.

    Suggestions:

    For short haired dogs, I really do suggest tights on underneath. If it’s cold enough to need gaiters, you’re most likely needing a jacket for a short-haired dog and tights will help prevent rubbing. For even colder weather I put a jacket on top of the tights and gaiters (see the photo below). This is a pretty good combo for very long cold days!

    Try putting the contraption on at home first. Gaiters are not the easiest to put on a very excitable dog at the trailhead, in a dark car, without help. With that said, my girls are very patient with all kinds of clothing so I’ve actually not had issues myself, but Whiskey and Bourbon are not the type of dogs to bark or run around a car excitedly at a trailhead.

    Make sure the velcro is done up tight

    Lastly, take the time to really look and do up the straps around the ankles well. Make sure they’re firm and tight, that the paw is entirely the way inside, and that the least amount of strap is hanging loose.

    New version:

    Version one of the gaiters

    Backcountry paws have released version 2 of their gaiters. The first flagship product was very well made. Whiskey still uses it without issues but it’s been really nice to see the improvements. There are less hotspots to rub on the dog with the new version (I normally have the dogs in k9topcoat tights underneath so it hasn’t been an issue for us). The second big improvement are the boots. The inside doesn’t have a seam to rub, and are looking much more comfortable. If your dog has issues with hotspots, get version 2!

    Downsides/Caveats

    There’s been a couple downsides I’ve found with dog gaiters. First, they take a longer time and a more patient dog to put on. You need to familiarize yourself with the system and you’ll have to adjust the straps for your dog the first time, so try to do this at home.

    Second, the gaiters can fill up in deep snow. If you’re snowshoeing and the snow is higher than the knee of the dog, the dog can kick up powered snow into the gaiters and then the snow goes inside and collects. Or if your dog goes swimming in powder, the tops of the legs are not sealed (there is no sealing on any dog jacket). There’s no way for the snow to come out so you’ll have to make sure that your dog isn’t walking around with a bag of snow. I have this issue more with the back legs because of the shape, and sometimes I might take off the back legs but leave the front ones for this reason.

    Snowshoeing in powder led to the back legs being filled up

    Third, the gaiter fit needs to be correct and I find that the paw size needs to match the leg size. For example, you buy the gaiters sized to the leg height, the bootie size may not fit perfectly (especially if your dog is shorter but has gigantic paws). So just check fit before you buy!

    Have you tried these? Do you have comments? What was your experience like?

  • How to: the Unbelievable Moraine Lake with Dogs

    How to: the Unbelievable Moraine Lake with Dogs

    Moraine Lake

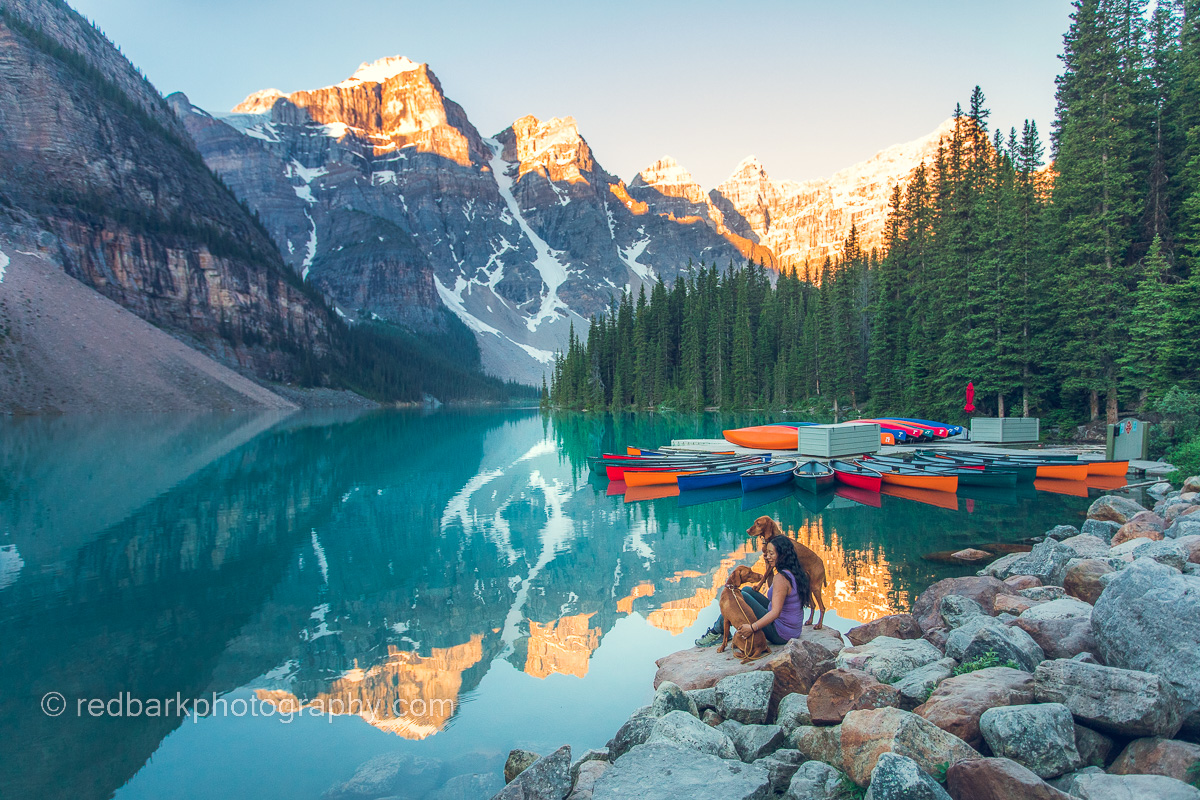
    One of the most famous and busy lakes in the world, Moraine lake is iconic and was featured on our older $20 bill. I’ve taken my Vizsla Whiskey loads of times for day trips and hikes and when I got Bourbon, my new Vizsla puppy, I took her on the 11 hour drive as soon as I got her.

    10 week old Bourbon could hike up the 350m to the Rockpile for photos

    Banff National Park

    Moraine Lake with dogs? Yes! Dogs are allowed in Banff National Park! Unlike the American National Parks, dogs are allowed on most trails and in the backcountry however there are expectations including times of the year for specific areas and trails.

    We love all seasons at Moraine Lake!

    Dogs must be on leash for many reasons including your safety, their own safety, and wildlife safety. There are loads of Grizzlies, Black Bears, Moose, Elk, and Porcupine to name a few. I’ve seen all of these animals within the park and I’m not a local! It goes without saying, please pick up after your pet, and keep your dog on a tight leash, under control around other dogs and all the chipmunks that beg for treats everywhere (I’ve never seen fatter chipmunks around).

    Elk, Moose, Bear, and Porcupine can all be dangerous

    There are lots of garbage cans and toilets at the parking and the National Park is pristine so please help keep it dog friendly for all of us!

    Getting there

    Moraine Lake is located in Banff National Park right on the edge between Alberta and British Columbia (on the Alberta side). You can see mountains in British Columbia right at the lake. The road to Moraine Lake branches off the road to Lake Louise, the closest gas station and town.

    A long drive with the dogs but worth it!

    It’s about 2 hours 20 minutes from Calgary and 9 hours 30 mins from Vancouver (I’m 10 hours 30 mins away in Squamish, BC). Banff National Park and Moraine Lake is one of the most accessible locations for Canadian beauty. So many of the most famous lake are less than 400m walking distance from parking lots and the roads around the area top the most scenic of the world.

    Moraine Lake Road and Parking

    Getting to Moraine Lake with a dog is most of the battle. The easiest way to guarantee getting there without a dog, is using the shuttle or booking a tour. However, the buses don’t allow dogs so the only way to get to Moraine lake with a dog is driving or hiking. Assuming you aren’t hiking in (13km or so, one way, from Lake Louise), you’re going to want to drive in.

    Coming towards the end of the season is less busy

    Moraine Lake Road opens seasonally so first see if the roads are open for the year. You can ski or bike up the road off-season but it may be too long to go with your dog back and forth.

    Dogs must be on leash

    When it is open, Moraine Lake parking lot tends to fill up in the mornings around 530am on weekdays and 5am on weekends although people do leave and the attendants will slowly let people in throughout the day. The parking lot is very small for the demand so if you’re set on making it, get there early! During high season such a Canadian long weekends or larch season, the parking can fill before 430 am! Please also note that you must enter Moraine Lake Rd from Lake Louise (no left turn from Lake Louise Drive).

    We usually only stay an hour for photos if we are not hiking here

    Normally you cannot “line up” with your car on the road to get in, so it’s luck while you drive by the road entrance if they’re allowing cars in or not. Somehow we’ve always had luck getting in with some persistence. If the road is closed, you can loop back through the village and through Lake Louise Lake but the loop can take up to 30mins and the road may still be closed so be prepared or just come early. You cannot sleep overnight in the parking lot, and you do need a Parks Pass in order to park. I’ve also had luck coming at the end of the day around sunset after the hikers and families have left.

    Bourbon and Thierry at the beach

    Photo Ops at Moraine Lake Rockpile Trail

    Most of the photos you’ll see of Moraine Lake are all taken from the Rockpile Trail. It’s about 300m from parking and one of the best views you’ll see with so little effort. Even so, the trail is not wheelchair friendly and has stone and log steps. There are lots of chipmunks and pikas teasing the dogs and begging for crumbs so watch your dogs on leash!

    Lots of places to take photos at the Rockpile
    Tourists lining up to take photos with Whiskey (2018)

    We took Bourbon here at 10 weeks old and she found someone’s leftover chicken wing in the bushes. The scream she let out when we took it away frightened a couple tourists! Whiskey normally has a line up of Asian tourists waiting to take photos with her here. I usually place her on the wall and we’ll get at least 10 people taking photos with her. She absolutely loves the attention while Bourbon’s trying to track chipmunks.

    Bourbon’s first adventure

    Paddling Moraine Lake with Dogs

    The Canoe Rentals at Moraine Lake are run by the Moraine Lake Lodge. The lodge and the canoes are not dog friendly so you must bring your own boat to paddle with. For reference the canoes are only rented from around mid-June to mid-September and are around $130 Cad an hour (!!).

    Finally a calm day for a paddle!

    The lake is actually quite windy I’ve found and we’ve had to come repeatedly in order to find a day to paddle with low winds. We launched some Oru Kayaks from the beach and paddled down the lake at sunrise with both girls on my lap. It was one of the best and most peaceful memories I’ve had at the Rockies. This was in October when no one else was out on the water.

    Sunrise with two pups on an Oru kayak

    There’s also been another trip in October where we bundled up and launched a packraft when I just had Whiskey. It’s more stable with winds but also a bit colder to sit in. I really suggest coming out with a paddleboard or kayak if you have the chance!

    Alpacka Rafts are amazing and pack down light

    Day hikes

    Moraine Lake is known for the Larch Season in September when the larches turn golden and crowds from all over come to see the autumn colors. Larch Valley on the way to Sentinel Pass is one of the easiest Larch hikes, around 535 m gain and 4.3 kms one way on a non-technical trail.

    Larch Valley in the autumn
    Sentinel Pass

    There are also several other hikes that I haven’t yet had time to try. I’m pretty sure my girls would be able to do the Tower of Babel scramble, as well as Panorama Ridge passing by Consolation Lakes. I’m not sure if Eiffel Peak or Mount Temple or Wastach Mountain is dog-doable but one day we might see!

    Lake Annette from Paradise Valley

    Another hike that starts on the Moraine Lake Road, but not the lake is Lake Annette and the Giant Steps. If you hike far enough into Paradise Valley, you come out the other side of Sentinel pass and end up in Moraine Lake but I think most people take that as a multi-day trip. You would need to hike down the road or catch a lift with someone if you wanted to do that road-trip but it might be worth it! We’ve done up to Giant Steps but because of a heat-wave and Covid, did not want to chance the road mid-day.

    Where to stay

    Since the Moraine Lake Lodge is not dog-friendly you’ll have to stay off the lake for your visit! The nearby famous Fairmount Chateau Lake Louise is dog-friendly but extremely luxurious and expensive. I tend to camp at the Lake Louise campgrounds or stay at a hotel in nearby Canmore. The campgrounds are utilitarian but a great location, clean, and dog-friendly.

    Lake Louise campground
  • Amazing Adventure Camping at Floe Lake (Rockwall Trail) with Dogs

    Amazing Adventure Camping at Floe Lake (Rockwall Trail) with Dogs

    The Draw

    Just google Floe Lake and Rockwall trail and you’ll know why it’s one of the most popular trails and locations. In fact, that’s probably how you got to this blogpost. It’s accessible, and possible as a day hike or run. The entire 55km Rockwall trail can be done in 3-5 days but the highlight is definitely Floe Lake and Numa Pass. Usually most people hike from Paint Pots to Floe Lake and we wanted to do the same, but booking the trail because our biggest issue.

    The view from camp

    Dogs are allowed on Rockwall trail but must be on leash, and there is wildlife (more about that later) that you must be prepared for (even on leash!).

    Floe Lake in the morning with overhead clouds

    Booking

    The Rockwall trail is a classic of the Canadian Rockies and difficult to book campsites in! I waited in line online when the booking opened and was 7000s on cue. By the time I got to book, most everything was taken. Floe Lake campsites is one of the most popular backcountry sites in the Rockies so of course it was taken. I booked some random days in Tumbling creek campground and Numa creek campground and hoped for cancellations. You can hike into each campground from the road and I just really wanted to see Floe lake with the dogs.

    The weather was mixed, some rain and some sun!

    Eventually, we checked daily and were able to secure cancellations at Floe Lake during our vacation time. We booked every cancellation we could and joined up the dates (and cancelled the ones we were not going to use). Unfortunately the way the booking system works is that your reservation fee is separate than a booking fee and you do not get the booking fee back. In the end there’s no benefit to cancelling an unused reservation (you will not get your money back) other than to let someone else use the campsite. I strongly encourage everyone to cancel unused campsites though, because it’s so limited and for all the evenings we were at Floe, there were usually unused tent pads.

    One of our day treks took us to a quiet pass

    Our Plan

    Because we were not able to book campgrounds in order for the Rockwall trail, we just aimed to book whatever we could at Floe Lake and do day hikes from the campground. Since Numa Pass and Floe were the highlights of Rockwall, we figured we would explore Numa Pass and check out other areas we could hike to within a day. Everything would be limited to what the dogs could do (Bodhi gets heat stroke and isn’t the most agile of dogs) and what we felt like!

    Above Floe Lake looking onto Numa Pass

    The Hike In: Floe Lake Trailhead to Floe Lake

    The hike in is not technically difficult, and about 10.5km from the Floe lake Trailhead. Most of the trail is narrow with a slight incline across a forest that is bare from a recent forest fire. When we hiked in, the trail was very overgrown to the point your couldn’t see your own feet and made for difficult footing with a dog on leash in front and a huge pack with awkward balancing. The trail is mostly exposed so if you’re heading out in the summer with dogs that are sensitive to heat, head out as early as possible.

    Hiking into Floe from Floe Lake Trailhead

    At some point near the end of the trail (at 8km) the trail climbs up dramatically and then you’re at the lake. There is a couple water sources that may or may not be running in the summer but we had access to water before the climb. This was my first hike with a pack in the year so I really struggled in the heat! Erica was kind enough to wait for me in the bug-infested breaks I had to take. I also lost a water filter I had not secured well enough to the front of the pack. All and all, not my best hike, but we did get there eventually!

    A rest log on the way into Floe Lake

    Wildlife

    Normally most people are worried about the Grizzlies and Black bears but we found porcupines and squirrels to be the most dangerous. Squirrels and chipmunks are awful because they run across your path without warning and then your dog instantaneously jumps at them pulling you and your 40lb bag down. Porcupines were a bit of a surprise! We encountered one on the hike up to Floe (halfway up the incline, so about kilometer 9 going in). It was right off the trail hidden, so Bodhi almost got quilled, on leash, on the trail before Erica saw what it was.

    Numa Pass, the porcupine was between this spot and the lake

    The second porcupine was between Floe Lake heading up Numa Pass, about 1km in. We never actually saw it, but Bourbon somehow got quilled by stepping on a quill on the ground after the dogs seemed VERY interested in sniffing around the area. Needless to say, keep an eye out for the creatures!

    Camping at Floe Lake

    Camping with a view

    The tent pads at Floe are all over a wide area, and not organized in any way we could understand. The best site with a view over the lake is the first ones you see as you hike in from the Floe trailhead. We chose one further away from others with dogs and settled in just as it started raining.

    There were 4 tables at the food area and a couple beaches

    There is a wonderful eating area with bear lockers right by the lake that has the best views. We loved starting and ending our day there, watching the light move across the mountains and lake and were always able to find a place to sit at a table or on the beach. The first couple days there were still ice floes moving across the lake but eventually they melted by the time we left.

    We fit 2 humans and 3 dogs into a decade old 3 person tent

    We met a couple dogs each day we were at the campsite but were able to steer clear of them without issues. Every evening we moved our tent closer and closer to the “best” spot and the last evening we snagged a photo-worthy tentpad!

    Day treks and scrambles from Floe Lake

    Looking down on Numa Pass

    In the end we stayed at Floe for 4 days, 3 evenings leaving us 2 days to explore. The first day took us to Numa Pass, up to a couple viewpoints, and a look at Numa Mountain. From the viewpoint, we then spotted some lakes in the far distance so we aimed for those (no trails, just wandering). We scrambled over a boulder field and scree and as the weather changed we decided to stop, take some photos and head back.

    Going for a walk!

    I had seen some treks to Numa Peak before we hiked out but there was very limited information on if the peak was doable with dogs or not. The next day we decided to aim for Numa and head back if it ended up being too difficult. It’s always hard to know how tough something is until you actually try the scree and test the angle. We made it to just below the notch of the peak before we stopped for lunch and called it. It would have been sketchy to get Bodhi past the point with exposure and the views would not have been better. We were just meters from the peak and were further along than we had been expecting!

    Looking at Numa Peak
    Numa Peak, we made it just before the notch

    Numa Peak was such a highlight, but I would not recommend it for people and dogs that are not comfortable hiking and scrambling. You can walk right up to the scree and see for yourself but there is no rescue or rangers here so you must be self sufficient and be extra careful if your dog is not full capable and under control. I also recommend a harness made for lifting, and paw care if your dog’s paws are not weathered for scree.

    The best views

    Would I hike the Rockwall trail again?

    Oh yes!! This was such a lovely location, very peaceful for how popular it is. Definitely be aware that you are in the backcountry and take extra precautions but Floe Lake was such a highlight of my year. I’m so thankful I have a friend to do this with, one that understands my dog limitations and is willing to camp, hike, explore and scramble with me!

  • The Best Dog Boots for Snow

    The Best Dog Boots for Snow

    Dog Winter Boots Overview (highly detailed)

    One of the questions I get the most is what dog boots I recommend for the winter. The answer is complicated. It depends on the snow you’re on, the temperature, the length of time you are outside, how deep or packed the snow is, and what type of dog you have (dewclaws? energetic? insane? eats boots?). Here’s a highly detailed answer that seeks to lay everything out to help you choose a boot.

    Should Dogs Wear Boots in the Snow?

    I do not put boots on my dogs unless they need it. Dogs do not need boots in all conditions and I do not pre-emptively put boots on unless I know they will need them. Dogs need to feel the ground underneath their paws in order to navigate their surroundings and boots will make them slip as well as impede on things like climbing stairs, and walking up rocks. Imagine trying to open a can with thick gloves on your hands and not being able to see them as you work. In general, I advise not to put on boots unless your dog shows you they need them, but to carry them with you in case they do. However, there are obvious situations you should put on boots.

    1. They are injured or healing from injury
    2. They have a history needing boots in certain situation

    How do you know your dog needs boots? Mine will stop running, will lift up their paws, and will be obviously happier with the boots on zooming again once I put them on. Over time, I know that my dogs need them at -10 or lower, and I will bring them in my pack if I think we might reach those conditions (I tend to hike up mountains, so it gets colder as we ascend). Don’t forget the windchill!

    Bodhi is more sensitive to the cold than my Vizslas

    Dewclaws/ Small paws

    One of the biggest hurdles to booties are dewclaws or if your dog has small paws (in relation to ankles) and the boots slip off easily. Even though my girls do not have these issues, this is the advice I’ve seen works. Dewclaws rub on straps, edges of boots and over time they can bleed and make boots very painful. Some boots have straps in better locations (you need to try them) but even without a strap, the inward pressure on the dewclaw and material rubbing can be painful.

    If you notice this happening, use Vet Wrap (any brand will do, same used for humans) which is a self adhesive wrap under and then over the dewclaw. Do not wrap too tightly so it cuts off circulation or too loosely that it will move. It’s to prevent the dewclaw from moving too much. Then either put the boot over it, or use a sock on top.

    Socks are another layer of protection for dewclaws, or dogs with paws that are too slim so boots slip off. Either with or without the vet wrap, slide the boot on, and secure with vet wrap or medical tape. Then slip the boots on top. You will need to experiment to see what works best for each circumstance.

    Rubber Boots

    Balloon and rubber boots have their uses but not in the backcountry. Balloons actually work well and stay on well but will not survive long on abrasive surfaces like rock. They’re better on small dogs, short works, and when salt is a problem with leashed walks around the block. They’ve been used by my friends’ Chihuahuas and Pugs, dogs that need to be carried after a certain amount of time out. The wellies are thicker and some come lined, but some dogs will not do well with the thicker sole, and the boot will not stay on an off leash dog.

    Wonton is happy with his balloons to a point, then demands to be carried.

    Sock boots

    I do not recommend these boots for any long distance off leash running or walking. They’re best for indoors (if your dog is slipping on the floors), for smaller dogs, and those that are just going outside around the block for a potty. They will slip off with movement and are not ideal for snow.

    Classic Style

    I’m just going to call this type of boot the Classic style. They tend to have a soft material on the top, and a rubber sole on the bottom with a strap around the ankle. No matter what anyone says, they are not waterproof, but they’re ok with packed snow. The ankle strap can be very difficult with dewclaws and if you don’t use a sock, they can have a hard time staying on if your dog runs around off leash. A trick is to twist the boot both ways a little bit (clockwise and anticlockwse about a quarter twist) before tightening the strap.

    The Classic style will wear longer than rubber or sock boots. You definitely see your money with the construction of the boot. Cheaper styles will have stitching that rubs against the dog’s paw making blisters. We’ve experienced blisters on the top of the boot, and the sides where the sole meets, as well as the ankle. You also see the pricing difference with the quality of the Velcro.

    The downsides to this boot is many. No matter the brand we’ve tried, my dogs will take these off if we go for hours on a backcountry hike. The snow gathers around the opening and warms up with the temperature of the dog. The snow then turns to ice and starts rubbing at the ankles. My own dogs are hairless and the boots we have tried seem to have been made for dogs with thicker ankles so the boots don’t stay on as well. The versions with thicker soles have been the most disliked because with no feeling at the paw, they cannot scramble or climb obstacles. Last, with time our boots have worn down and the materials have peeled away.

    Overall, these have their uses and I’ve used them for years. I would recommend duct taping them closed, and to a jacket if it’s possible to keep them on. They’re better for dogs that aren’t running around like crazy and I would select boots with thinner soles and a warranty.

    Ruffwear Polar Trex -Thick soles with gaiters. Good idea but Whiskey didn’t like these. She couldn’t feel the ground and the gaiters took up and kept snow inside.

    Canine Equipment Ultimate Trail Boots -4 different boots, L/R back sized smaller than front. Discontinued, longer review here. I liked these boots for the thinner soles, easy to put on straps and warranty that my friends had tried. Unfortunately some of the older boots I had purchased had started wearing on the top and the material split disintegrating to pieces. I’m still using whatever is left however.

    Hurtta Dog boots – We used these until they broke. The fabric on the middle/center of the heel wore through and made holes. Whiskey didn’t mind these and they stayed on if you pulled the strap tightly and then wove it back through the strap in the front. Otherwise they would come off. A new version is supposed to be coming soon.

    Old pair of Hurtta boots. The weak point was the velcro and where the boot joined the sole

    Musher’s

    This type of boot is what we used on mushing dogs while dogsledding in the Yukon. They’re very cheap, easy to put on and off, and are thin so the dogs can feel the ground. You won’t be too frustrated if you loose a couple of these but they won’t last as the fabric does wear out. These boots are good for packed snow on trails, nothing wet (or they will freeze), when you just want to keep the ice out. They’re also a very easy beginner boot if your dog is fussy about the thick soled ones with thick straps. I’ve been using these more with Bourbon because I can’t trust she won’t lose them but so far, I’ve been able to find the ones she’s “lost”.

    I’ve been really liking the Nonstop booties these days. The price is reasonable and they use a higher quality velcro with a bungee that makes putting the boots on easier and tighter. The boots however do let in snow over time with deep powder and then they fill up with snow and fall off. This is normally after several hours running around. The edges also do ice over like the other boots we’ve tried, and you cannot get the boot wet or it will freeze (no running through creeks).

    I’ve used the nonstop Protector Bootie as an injury bootie and I love it but it’s also not good with cold weather as it will freeze as well. It’s more protective in damper and warm conditions but I wouldn’t recommend it in the snow. With all these boots, if you can, duct tape them on!

    after 2.5 hours in the snow, you can see the ice building

    Soft Boots

    There are all higher up the leg than some of the short Classic boots. This can be better or worse for dogs with dewclaws depending on the location of the straps. It’s better for trails where the dogs need just a bit more length so snow doesn’t fill in, but can be worse if the snow does fill in and collects to make ice balls. Like all the other styles, the quality (and usually price point) does make a difference for sewing and materials used.

    The downsides to these boots are they slip down my dogs’ legs. The velcro is never going to hold through all the movement and I haven’t found one with higher quality velcro and many straps. The seams are an edge around the sides of the paw and also rub the paws over time. The snow collects around the rim and will fill into the boot and then freeze when the dog’s body warms the snow into ice. Duct tape can solve most of these issues!

    Muttluks– I like Muttluks as an emergency bootie but the straps aren’t great so I duct tape them to Bourbon’s paws. They’re also all the same size so looser fit in general.

    Voyager K9 Apparel– the highest boot and better for shorter walks, not major hiking because the fabric is not waterproof.

    Neoprene Options

    Great because snow does not stick to Neoprene and even when wet, Neoprene will hold in heat (it’s what wetsuits are made out of to keep people warm in the water). Not great because it’s very thick material and if your dog needs the feel the ground or any kind of technical surface they will probably not like it (Whiskey struggled). With dogs that do not mind a thick sole, these might be a good option.

    Neopaws – a huge variety of sizes and orthopedic options, but very thick sole

    GF Pet Elasto-fit Boots

    Gaiters

    For snow that’s a bit higher but NOT very deep snow. Gaiters will fill with deep snow if there isn’t a seal on the boots and snow will just fill in and collect with no way out (we’ve experienced this and took them off in deep snow). Otherwise it’s great because you can’t lose the boots. They’re complicated to put on, but I used them on both dogs without issues or complaints. Backcountry Paws seems to be constantly out of stock, but I would recommend them if they were possible to order. Contrary to what you might think, I would recommend them for more packed trails so snow won’t get in, or for dogs that won’t go swimming in deep snow.

    Backcountry Paws Gaiters

    Walkee Paws Leggings

    Wax

    If your dog is gathering snowballs or is picking ice off his paws, Wax is a great solution that does not involve losing boots. Trim the hair as much as you can around and under their paws, and apply Musher’s wax (in the car right before you head out). It’s easier to apply the wax when it’s not frozen, and you do not want to get wax on your car, or let your dog lick it off on the ride so just before you run is best. I apply it to my dogs just as a protective layer if I think we are close to their comfortable exposure temperature -5 to -10 in order to increase their ability to run without boots. My girls don’t ball up or collect ice with their silky hair but the wax does help protect their paws slightly.

    paw Pup Wax – use after out for a long time or exposure to salt

    Musher’s wax -works if your dog isn’t cold but gets ice balls around the long hairs between their paws (first would be to cut them shorter). They also do protect for a couple degrees difference (say if your dog needs boots at -5 degrees this might help make a 4 degree difference) and against salt but it does wear off. It it on right before you get out of the car when it’s slightly warmer as I’ve had a harder time when the wax is frozen.

  • Solutions to cold dog paws in the Winter

    Solutions to cold dog paws in the Winter

    Dog Winter Boots Reviews and options(updated)

    I’ve been using and trying boots on our girls for years and wanted to share an updated revision of my last review here. Many of the older boots are no longer in production but you can still get them used and there are very similar copies out there with the same benefits and issues. I’ve grouped the boots into categories that I’ve made notes on. Please let me know what you think! These are based soley on my opinion and nothing more. My girls do not have dewclaws, and are short-haired Vizslas.

    Dewclaws/ Small paws

    One of the biggest hurdles to booties are dewclaws or if your dog has small paws (in relation to ankles) and the boots slip off easily. Even though my girls do not have these issues, this is the advice I’ve seen works. Dewclaws rub on straps, edges of boots and over time they can bleed and make boots very painful. Some boots have straps in better locations (you need to try them) but even without a strap, the inward pressure on the dewclaw and material rubbing can be painful.

    If you notice this happening, use Vet Wrap (any brand will do, same used for humans) which is a self adhesive wrap under and then over the dewclaw. Do not wrap too tightly so it cuts off circulation or too loosely that it will move. It’s to prevent the dewclaw from moving too much. Then either put the boot over it, or use a sock on top.

    Socks are another layer of protection for dewclaws, or dogs with paws that are too slim so boots slip off. Either with or without the vet wrap, slide the boot on, and secure with vet wrap or medical tape. Then slip the boots on top. You will need to experiment to see what works best for each circumstance.

    Classic

    These boots are the classic ones I see. They tend to have a soft material on the top, and a rubber sole on the bottom with a strap around the ankle. No matter what anyone says, they are not waterproof, but they’re ok with packed wetter snow. The ankle strap can be very difficult with dewclaws and if you don’t use a sock, they can have a hard time staying on if your dog runs around off leash. A trick is to twist the boot both ways a little bit (clockwise and anticlockwse about a quarter twist) before tightening the strap.

    Ruffwear Polar Trex -Thick soles with gaiters. Good idea but Whiskey didn’t like these. She couldn’t feel the ground and the gaiters took up and kept snow inside.

    Canine Equipment Ultimate Trail Boots -4 different boots, L/R back sized smaller than front. Discontinued, longer review here. I liked these boots for the thinner soles, easy to put on straps and warranty that my friends had tried. Unfortunately some of the older boots I had purchased had started wearing on the top and the material split disintegrating to pieces. I’m still using whatever is left however.

    Hurtta Dog boots – We used these until they broke. The fabric on the middle/center of the heel wore through and made holes. Whiskey didn’t mind these and they stayed on if you pulled the strap tightly and then wove it back through the strap in the front. Otherwise they would come off. A new version is supposed to be coming soon.

    Expawlorer Amazon dog boots -All these Amazon boots look like they’re made in the same factory with different names. They seem decent for the low price, ok for dogs without dewclaws walking on leash in packed snow or the city. Depending on your dog’s paws they may stay on for play, or they may not!

    EXY&G Amazon Dog Boots

    QUMY Amazon Dog Boots

    XSY&G Dog Boots

    Old pair of Hurtta boots. The weak point was the velcro and where the boot joined the sole

    Musher’s

    This type of boot is what we used on mushing dogs while dogsledding in the Yukon a decade ago. They’re very cheap, easy to put on and off, and are thin so the dogs can feel the ground. You won’t be too frustrated if you loose a couple of these but they won’t last as the fabric does wear out. These boots are good for packed snow on trails, nothing wet (or they will freeze), when you just want to keep the ice out. They’re also a very easy beginner boot if your dog is fussy about the thick soled ones with thick straps

    Dog Booties -the simpliest version.

    after 2.5 hours in the snow, you can see the ice building

    Non-stop Dog Wear -my current favorite for cross country skiing. Even in -20 degrees on a packed trail my girls have not complained and are happy to run. They will not protect as much from direct cold as a thicker sole and does collect ice around the ankles after a couple hours.

    Higher boots

    There are all higher up the leg than some of the short boots. This can be better or worse for dogs with dewclaws depending on the location of the straps. It’s better for trails where the dogs need just a bit more length so snow doesn’t fill in, but can be worse if the snow does fill in and collects to make ice balls.

    Muttluks– I like Muttluks as an emergency bootie but the straps aren’t great so I duct tape them to Bourbon’s paws. They’re also all the same size so looser fit.

    Voyager K9 Apparel– the highest boot and better for shorter walks, not major hiking

    Canada Pooch

    Neoprene Options

    Great because snow does not stick to Neoprene and even when wet, Neoprene will hold in heat (it’s what wetsuits are made out of to keep people warm in the water). Not great because it’s very thick material and if your dog needs the feel the ground or any kind of technical surface they will probably not like it (Whiskey struggled).

    Neopaws – a huge variety of sizes and orthopedic options, but very thick sole

    GF Pet Elasto-fit Boots

    Gaiters

    For snow that’s a bit higher but NOT deep snow. Gaiters will fill with deep snow if there isn’t a seal on the boots and snow will just fill in and collect with no way out (we’ve experienced this and took them off in deep snow). Otherwise it’s great because you can’t lose the boots. They’re complicated to put on, but I used them on both dogs without issues or complaints. Backcountry Paws seems to be constantly out of stock, but I would recommend them if they were possible to order. Contrary to what you might think, I would recommend them for more packed trails so snow won’t get in, or for dogs that won’t go swimming in deep snow.

    Backcountry Paws Gaiters

    Walkee Paws Leggings

    Others

    Here’s some other options.

    Dog Mocs

    paw Pup Wax – use after out for a long time or exposure to salt

    Musher’s wax -works if your dog isn’t cold but gets ice balls around the long hairs between their paws (first would be to cut them shorter). They also do protect for a couple degrees difference (say if your dog needs boots at -5 degrees this might help make a 4 degree difference) and against salt but it does wear off. It it on right before you get out of the car when it’s slightly warmer as I’ve had a harder time when the wax is frozen.

  • Ultimate list of Dog-Friendly hikes in the North Shore

    Ultimate list of Dog-Friendly hikes in the North Shore

    Vancouver’s North Shore has been our go-to for short and long walks ever since we got Whiskey. As the years have gone by, it’s gotten busier and sharing the trail with other hikers, runners, dogs, bikers, and bears becomes a little more difficult.

    Here’s a mix of Instagrammable dog friendly hikes mixed with peaceful ones typically only visited by locals. If you have dogs, I would suggest to go very early, go late, go on weekdays, and rainy days, especially for busy trails. Generally, I would avoid busy trails on sunny weekends with dogs to respect other trail users. Bike trails tend to be less busy but are shared with bikers so keep an ear open for wheels coming down! Know how to deal with bears, and keep a wide berth and respect for all wildlife, as it’s their home we are entering and don’t forget the cougars and coyotes too!

    Norvan Falls in North Vancouver
    Although the 14km Norvan Falls is relatively flat, lots of people do get lost and need rescue on this trail. It leads to many tougher backcountry hikes and some people are still missing.

    Finally, trails do close over the winters and always remember the 10 essentials. If you get lost, call 911 for help as soon as you can, and if you are out of reception, take a satellite device such as an Inreach Mini. I’m linking to a variety of sources, so please check them online before you go out!

    *** busy ** well used * less busy
    ๐ŸŒŠwaterfall ๐ŸŒฒ forest ๐Ÿ‘€views ๐Ÿ’ฆlake/river/ocean

    Ngaio at Lighthouse Park
    Lighthouse Park has wide easy access trails and wilder ones to explore

    Flat/Easy

    Lighthouse Park ***๐ŸŒฒ๐Ÿ’ฆ๐Ÿ‘€- One of my favorite places to go with friends with kids, or someone that’s not able to hike anything strenuous. There’s lots of variety in terrain and views, as well as bathrooms and is very dog friendly.

    Whytecliff Park ***๐Ÿ‘€๐Ÿ’ฆ- Go when low tide, read the tide charts and don’t get stuck on the island! More of a fun walk then a hike with beautiful views of Vancouver, to Vancouver island. We’ve even seen a gray whale here!

    Inter River Park ***๐ŸŒฒ๐Ÿ’ฆ- Connects to the Lynn Valley system and up to Lynn Headwaters, great for trail running, and has a couple beautiful watering holes to swim in. Continue up all the way to Lynn Headwaters for a very long hike or jog.

    Deep Cove Park and Wickenden Park ***๐ŸŒฒ๐Ÿ‘€๐Ÿ’ฆ- A lovely flat and easy place to walk your dog. The Deep Cove community is also lovely to discover but very busy for parking on the weekends.

    Spirit Trail * -City Trail that runs 6.5km on the North Shore’s waterfront. Do a portion and see the city in a different way. I especially like the less busy West portion that becomes more green.

    Mosquito Creek Park **๐ŸŒฒ๐Ÿ’ฆ- 4.2km of a meandering path along a salmon habitat.

    Whiskey in winter wonderland
    Dog Mountain in the snow is a wonderland
    Ngaio overlooking Cypress Falls with her pug Wonton in matching yellow rainjackets
    Cypress Falls is very dog friendly
    Whiskey the Vizsla looking through a fence in Vancouver
    Whyte Lake is a fairytale trail with lots of moss

    Moderate/Easy

    Whyte Lake **๐ŸŒฒ๐Ÿ’ฆ- One of my favorite trails on a rainy day. There’s something special about this one, with really nice sections and big cedars and firs. There’s a walkway around a small section of the lake that’s very beautiful too.

    Old Buck Trail/Seymour Bike trails *๐ŸŒฒ- There’s a load of bike trails on lower Seymour that are great to wander around with your pup, just keep your ears open for bikes

    Fromme Bike Trails *๐ŸŒฒ- Similar to the Seymour trails there’s loads of bike trails to walk or run when it’s rainy or you just want a change of scenery. Keep your dogs off the bike trail, or close to you so you can quickly jump out of the path if you hear bikes coming down. There’s lots of amazing sections through the forest. Watch out for bears!

    Bowen Lookout **๐Ÿ‘€- short hike with a wonderful sunset view, keep going to St Marks but only if safe in winter

    Dog Mountain ***๐ŸŒฒ๐Ÿ‘€- Amazing for sunrise, I only go on weekdays or it’s too busy. During the winter the road is closed so check opening times. Great views of the city and a lovely walk.

    Quarry Rock ***๐ŸŒฒ๐Ÿ‘€๐Ÿ’ฆ- There are many ways to get to this famous rock, look at maps, the main path goes through the end of the Baden Powell trail in Deep Cove with a lovely walk through a beautiful forest. Can be so busy on weekends they are trying to limit the amount of people. Don’t forest to pick up a doughnut at Honey’s afterwards!

    Cypress Falls Park **๐ŸŒฒ๐ŸŒŠ- A friendly neighborhood park that leads to some nice falls. The falls are viewed from above and at a distance but it’s still lovely. Don’t go too close to the cliffs as it’s unstable. The trails around are also beautiful.

    St Mary’s Trail *๐ŸŒฒ- Connects to Baden Powell and other bike trails, I normally start on St. Mary’s Ave and connect to the Grouse Mountain Highway on one trail or another and make a loop back.

    Goldie Lake Loop *๐ŸŒฒ๐Ÿ’ฆ -ski hill in winter, quiet in summer. Sometimes I just bring some lunch to eat on the slopes and do a little walk.

    Mackay Creek *๐ŸŒฒ๐Ÿ’ฆ – Another loop that ties into the Baden Powell. There’s loads of these you can make up and do depending on the time and workout you want. Great for a quieter option. This one has the F-86 Jet Crash Memorial

    Hollyburn is a quick hike with views of the Lions
    Brothers Creek goes through a beautiful forest
    Eagle Bluffs in West Vancouver
    The view up at Eagle Bluffs in the winter

    Moderate

    Seymour Peak***๐ŸŒฒ๐Ÿ‘€ my favorite! With 3 pumps or peaks, each with amazing views, there’s so much to love about this varied hike. I would stick to first pump while there’s snow on the trail and avoid the full peak until summer as there’s avalanche risk and exposure between 2nd and 3rd. Very busy and I run into black bears frequently here.

    Eagle Bluffs ***๐ŸŒฒ๐Ÿ‘€ – The popular route starts you at Cypress Mountain through Black Mountain, the less popular starts you at Horseshoe Bay. Either route has incline (the Baden Powell more so) but I would avoid the BP route in the winter due to avalanche issues.

    Norvan Falls **๐ŸŒฒ๐ŸŒŠ- A lovely 14km trail run to a beautiful waterfall. Take care on this route and make sure you’re very familiar or you have lots of daylight left as many people need rescue getting lost here. Trails starting off Norvan Falls are for advanced hikers only so please don’t attempt unless you’re fully prepared.

    Baden Powell *๐ŸŒฒ๐Ÿ’ฆ- 45.5kms of trail connecting Horseshoe bay to Deep Cove. Choose a section or do it all! If you’re attempting it all, please push this trail to the “Difficult” section! For most sections, I would say it’s moderate.

    Brother’s Creek **๐ŸŒฒ๐ŸŒŠ๐Ÿ’ฆ- nice loop options in a beautiful forest with some gigantic trees, bridge was taken out but still possible to cross creek if adventurous. Try sidetrips to other lakes like Blue Gentian and Lost Lake if you want to extend.

    Hollyburn Mountain **๐ŸŒฒ๐Ÿ‘€-busier in winter, less in summer, steep inclines with an amazing view.

    Big cedar and Kennedy falls *๐ŸŒฒ๐ŸŒŠ- People get lost here, I’m not really sure why but make sure you have a map you can read and are comfortable in the wilderness because it can get wild fast. The parking is mainly for bikers and can get busy in the summer.

    Mt Fromme *๐ŸŒฒ๐Ÿ‘€- An easy to access peak and relatively rarely hiked mountain. The base starts at the bike parking and you can have lots of bikers heading up on the wide FSR. Criss-crossed by loads of bike trails, just keep an eye on your map to not get lost!

    Twin Falls-Lynn Valley-Suspension Bridge ***๐ŸŒฒ๐ŸŒŠ๐Ÿ’ฆ- busy but lovely trail that goes through two bridges along a river and some super gorgeous forest. Avoid the crowds on weekdays and the rainy season. The cliffs can be very dangerous and the river can sweep an unsuspecting pup quickly down so keep away from any edges or fast moving water.

    Elsay Lake trail is a long downhill climb to a wild lake
    Crown Mountain is a huge hike through Hanes

    Difficult

    Most of these trails are VERY technical and NOT ok for most dogs. Leashing while scrambling can be extremely dangerous and I do not recommend you bring any dogs that are not fully in control. Please do not attempt these trails alone and without your 10 essentials and letting someone know your eta. Start early and bring water for your dog!

    Elsay Lake *๐ŸŒฒ๐Ÿ‘€๐Ÿ’ฆ- A rare hike that goes down, not up! The trail is easy to lose if the visibility isn’t far and goes by many rock falls that can be avalanche zones in snow. It’s harder than it looks on the map. Very few tenting spots, please do not use the Emergency shelter unless it’s an emergency.

    Coliseum *๐ŸŒฒ๐ŸŒŠ๐Ÿ‘€- Start this one earlier than you think, especially if you’re parking at the Lynn Headwaters that locks for the evening. Very muddy for most of the year, and possible to continue further if you’re a crazy trail runner to Mount Burwell.

    Crown via Hanes **๐ŸŒฒ๐ŸŒŠ๐Ÿ‘€- Only accessible through Lynn Valley, heading up through Hanes Valley and back down. This makes for a VERY full day. Dogs are no longer welcome on the BCMC but other trails like Fromme can make this a loop. High elevation gain, long distance, and a route notorious for needing rescues. The last section is technical and a scramble. If you’re parking at Lynn Headwaters, be aware of closing times or you may initiate a rescue if you’re not back at your car by the time they close the gates. Hanes is very dangerous if there’s low visibility and many people get lost here. There’s very little sources of water along the route past Norvan, and this is a no-go zone during avalanche season. Those without dogs can do a much shorter hike from Grouse Gondola (dogs not allowed on Grouse, BCMC)

    South Needle *๐ŸŒฒ๐Ÿ‘€- The trail can be busy until Lynn Peak, then empties out and gets more strenuous. A less visited peak that’s easy to access for lovely views. Please note that you cannot access with dogs on the Seymour side (that I know of).

    Howe Sound Crest Trail ***๐ŸŒฒ๐Ÿ‘€- One of the best hikes (or multiday hikes) you can do in the region. This hike is normally done over several days and is a hike-through so you need to have a plan to get back to your car. It’s on rugged terrain and is much harder than you might expect if you just look at the distance and gain. The trail does go through some watershed areas so please note where you’re allowed to camp. The rocks and terrain can be really rough for dogs (I’ve seen a dog tear through all 4 pads attempting this one) so ensure you’ve got all your safety gear. There are spots that are very exposed and steep, making this a no-go for most during wet or snow conditions. You can always do a section of the trail as a day-hike. There are loads of side peaks that you can do to add on but keep an eye on your water. There are not too many watering holes especially during the top of summer.

    From Mt Unnecessary looking at the Lions on the Howe Sound Crest Trail

    [wps_products product_id=”7342189740231″]

  • 10 Unusual and Practical Pieces of Dog Gear

    10 Unusual and Practical Pieces of Dog Gear

    Do you love getting out and adventuring with your dog but you just wish there was that one piece of gear to make it all easier? Perhaps your dog is slightly injured, has allergies, or keeps building up ice on their boots? Here’s a list of specialized dog gear that you might find useful!

    dog paw wax

    Musher’s Secret: Use paw wax in place of winter booties. Originally designed for sledding dogs, this wax can help prevent snowballing, salt, ice build-up, hot sand and pavement. I do find the wax wears off during a walk or hike so you’ll need several applications over the day but it’s a great option to booties.

    Downpour Hurtta suit jacket with integrated bug repellant in it worn by Bodhi the Ridgeback in Assiniboine Park
    Bodhi wearing the downpour suit with integrated bug repellant

    Sun and Bug Blocker Hurtta: A bodysuit with UPF 40 and bug repellent built in! Great if your dog loves to camp but is severely allergic to mosquitoes, ticks or horseflies. Or perhaps your dog has recent surgery and needs to stay out of the sun! There are also vests and a Downpour suit that has permethrin imbedded in it should you need a warmer or other option.

    Whyld river sleeping bag made for dogs, super flexible and warm for winter
    Whiskey in her Whyld River sleeping bag

    Whyld River Sleeping Bag: A sleeping bag designed to separate, clip in, or permanently toggle each section for maximum flexibility. The snaps will pop off if your dog wants out, but if you want to keep it closed even if your dog moves, use the toggles. We helped design this bag and love and use it! Discount code: WHISKEY10

    Neopaws boots come in orthopedic options for dogs made out of neoprene
    Neopaws Boots with loads of sizes made of neoprene

    Neopaws Orthopedic Boots: orthopedic winter boots with support that are made out of Neoprene, good even for water use! You can even buy insoles to adjust the height of each boot so you can take your older pup out for walks without pain.

    Neopaws Gaiters: Dog gaiters/boot covers to prevent snow/ice buildup on dog boots.

    Dog gaiters from backcountry paws with boots attached
    Dog gaiters with boots attached

    Backcountry Paws Gaiters: Dog gaiters with boots attached.
    We love these and use them all the time under a jacket because there’s no more chances of losing a boot! A little complicated to put on but well worth not having to worry about and search for a lost bootie.

    Ruffwear Doubleback Harness: a Belay specialized harness for climbing and repelling.
    This full body dog lifting harness is for crag dogs that love to follow their owners everywhere. It’s the only harness I’ve seen that has the back leg loops and specifically made for climbing.

    Ear Pro: Dog hearing ear protection
    Designed for working military dogs, these are great for noise sensitive pups, or dogs living in and working in loud environments to help prevent hearing loss.

    Whiskey Vizsla wearing Rex specs goggles or doggles in the snowy mountains
    Rex Specs googles

    Rex Specs: Dog eye protection
    We love these goggles to protect eyes from high winds (on a motorcycle), extreme cold, hunting in bush, eye injuries, sun glare, and other medical needs. With 5 sizes the goggles cover most sizes and look awesome.

    No Flap Ear Wrap: Dog ear injury protection
    Dog ear injuries take forever to heal and can bloody your walls quickly. Keep your dog’s ear protected and dry with this Ear Wrap.


    Click here for the Winter dog gear blogpost

    Click here for the Winter Dog Boot post