Tag: beach

  • Oru Beach Kayak: The Best Portable Kayak for Dogs

    Oru Beach Kayak: The Best Portable Kayak for Dogs

    Support me and Save $75 off with code WHISKEY

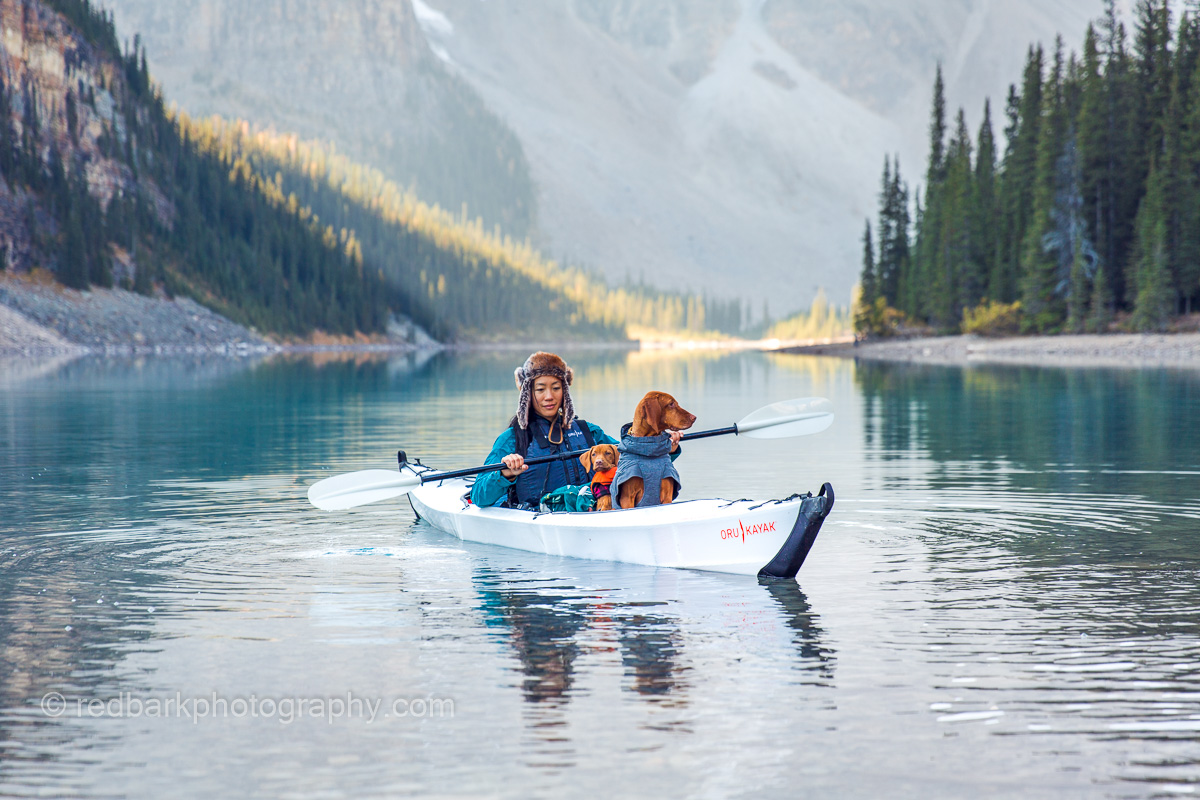
    When Oru kayaks first came out they were gamechangers. At only 30lbs you could fold them up and walk or hike them into previously unkayak-able places. They were easier to store in apartments and possible to transport in cars without a rack. And…they are beautiful! I’ve owned my Beach kayak for over 2 years and have really tested its limits. Recently we added the Bay kayak which is a quicker boat, a bit better for all those ocean trips as well snappy maneuvering for photography.

    The most peaceful morning
    1. Oru Basics
    2. Beach vs Bay models
    3. Adding Dogs
    4. Comparing Oru to other options on the market
    5. How to Introduce Dogs to a Kayak
    6. Accessories
    7. Testing the Beach Oru
    8. Pros and Cons

    The Oru Basics

    There are now 5 different models from their tiny Inlet 20lb model easily brought on a bus, to a tandem model capable of carrying a 500lb load. The kayaks are all origami-style foldable made out of a corrugated plastic rated for 20,000 folds and tough enough to easily survive rocks to dog nails. Reportedly smaller things like the neoprene caps, buckles, and rods will wear down before the polypropylene has issues and I feel really confident on the toughness of these boats. They’re made in the USA and range from $899-$2199 and can be used from rugged expeditions to your neighbourhood lake.

    Beach Oru Kayak Assembly

    I own two versions, the original, the Bay, and the most popular, the Beach. Both are around 28lbs, something I can easily carry with their backpacks (additional accessory) on a flat walk. I’ll concentrate on these two models and my thoughts and experience with them here.

    The Bay Kayak

    Beach vs Bay Oru

    The Bay is 28lbs vs 26lbs for the Beach, not really a significant difference, however keep in mind the Bay is also $300USD more. Packed up they’re around the same size. Construction of the Beach is quicker, the website says 5 vs 10mins which I find to be pretty accurate if you’re not very familiar with the boat.

    Two foldable Oru Kayaks with dogs in the Canadian Rockies Emerald Lake
    Whiskey in the Beach and Bourbon in the Bay Oru Kayaks
    Thierry putting the Bay Kayak together

    I’ve got the Beach down to about 3 mins if I don’t have a dog on my back but either way, it’s quick and easy once you practice a couple times. The hardest part of putting the Beach together is the tension rod (tip: put the boat on it’s side) and I do find it a bit more difficult to line up the zipper channels on the Bay. As the boat is used over several trips, the folds become less stiff and it actually does get easier to put the boat together. Disassembly is much more intuitive and quicker (about half the time of set-up). I’d really suggest that you dry the boat and break down away from sand to keep your car clean!

    Oru Beach Kayak has so much space on board
    Whiskey showing how much space there is in the Beach Oru
    Bourbon and I are sharing the Bay Oru

    In the water, the Beach is much more wider and open. This means it’s more stable, holds more things and dogs easily accessible, and wetter. In contrast the Bay is much tighter to get in and out, faster on the water, quicker to turn and more nimble, and much better in waves or wind with a dryer experience. Make sure you put together and take apart you kayak at home before you head to the beach. The videos online are very helpful and it can seem complex and the folds very stiff so it was really helpful to at least try once at home with no pressure.

    Man putting an oru foldable kayak together

    What About Adding Dogs into the Equation?

    For dog use, the Bay would not be able to fit a dog with a larger 6 foot person. I was able to fit a puppy Bourbon with me in the Bay so a small dog would be fine with a smaller person, but I would not suggest the Bay as the most dog friendly option. On the other hand, the Beach Oru model can fit about 2 Vizslas and maybe 2 smaller dogs in total with a smaller person (300lbs max) but make sure everyone’s friends! With two Vizslas (50lbs each) I can still fit more as well as my camera and a bag.

    Comparing Oru with other options on the market

    These boats are called sit-in kayaks vs sit-on kayaks. There is usually only the sit-on versions that can you easily load up dogs with enough space so the Beach Kayak is amazing for staying relatively dry and staying a bit more out of the elements than a sit-on kayak (almost like a paddleboard). I believe the two kayaks are lighter than any blow up options I’m aware of, and you don’t need to inflate them making for less packing and unpacking trouble. I find blow up options also have much less space for gear and dogs, and the sit-on kayaks I just don’t feel safe except on very calm water and there’s nowhere to protect my camera if the wind picks up. The sit-in kayaks also encourage dogs to stay “inside” the boat vs dangling a body part out and slipping off and on. In short, with all the boats I’ve seen around, I’ve not seen a better dog option for kayaks.

    The top section is strong enough for a dog to stand on

    How to Introduce a Dog to the Kayak

    When introducing your dog to the kayak, try it on land first! First, and very importantly, make sure your dog is exercised and tired. Do whatever it takes to make sure your dog is calm, perhaps wait a couple days if this is the first time he’s at the beach and he’s just going crazy. If you can find a sandy area just sit yourself and your pup in the kayak and see how they do. Ask them to load up, ideally with a command they already understand. Whiskey understands “wait” and “up up” and “stay”. The wait is necessary as she now understands boats are her taxis and she will jump on before I’m ready.

    Know what you dog needs and responds to and bring anything that might help. Treats and a chew are really helpful, and my own dogs LOVE blankets so I bring 3! Get into the kayak somewhere calm (edge of the beach or a dock) and ask a friend to hold the boat while you dog loads up. Keep it calm and controlled, ask your dog to load and sit and stay. Reward with treats and get yourself comfortable before you ask your dog to lie down. At this point present a chew if necessary and slowly push off.

    Treat periodically (more at first and then space it out longed and longer) or let your dog lie down with a chew and just float around paddling gently. Keep the first sessions short and sweet and keep your mood calm (even when rewarding your dog, keep everything calm). Slowly increase your paddling time and see what you can do to make your own dog more comfortable. Try one dog at a time before added multiple!

    Accessories

    Vizsla dog on a oru kayak at sunset

    The Oru Kayaks fold up into a box and can be carried with a strap that it comes with. You can also purchase an additional backpack that makes travel much easier (I highly suggest this!). It helps keep sand from your car, and is so much easier to carry around on your back. You can also put the paddle and life jacket and extras in the pockets and walk a very long distance with the kayak. As I mentioned earlier, a foam or extra seat padding makes the kayak much more comfortable. You can use any paddles but I do suggest one that breaks down into 4 sections if you are carrying and storing your kayak in small locations (like a car).

    Viszla and woman high five in lake with Oru Kayak backpack
    My kayak on my back with the lifejacket and paddles in the attachments

    The seat pads are very thin so I would highly suggest a bum pad (like the seat pads for camping or any waterproof foam). For both models, if you are in open water with waves a dry bag is really helpful. If you’re out at night, it’s also really fun to add lights inside the boat (integrate them while you’re building them).

    Putting the Beach to the test

    So the Beach kayak is suggested calm water, for easy trips, and casual day fun. Well, I took it out in waves (I got pretty wet!) and it was super stable and easy to handle, but not as quick to turn as the Bay. I also took it out on an overnight trip and found it was easy to load on bags and luggage (there’s space behind as well as in front of the seat and very easy to access) and it was pretty decent at tracking straight and dealing with wind and tides. It’s not a fast boat (the Bay is much faster and easy to maneuver on these kinds of trips) but it’s easier to load up than the Bay.

    Dog swimming next to woman on alpine lake in British Columbia
    Whiskey swimming with Kaitlyn on an alpine lake

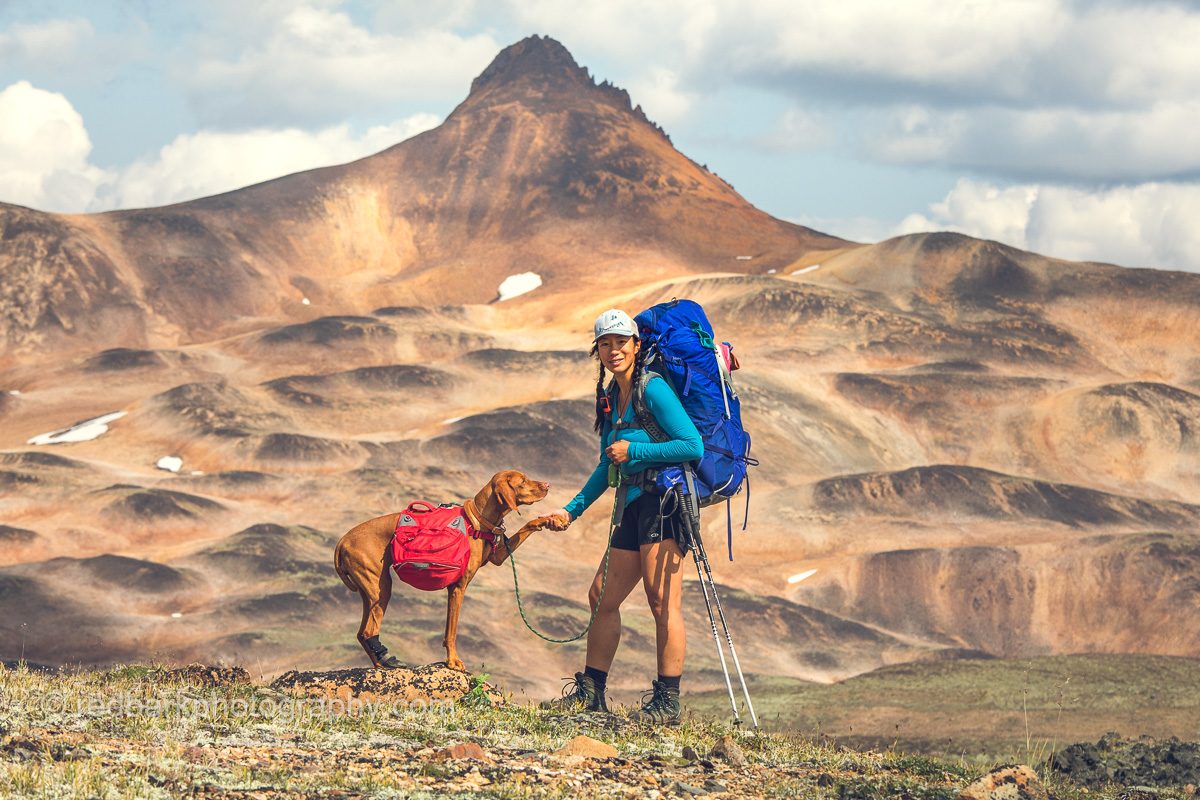
    I’ve also landed and taken off from very rocky beaches and beaches covered in barnacles and the hull has been fine (scratched like any plastic but fine). I’ve also found my own limits to carrying up the kayak on a very rugged trail up in the alpine wilderness. Because there was no way to carry both my overnight pack and my kayak, I had to make 3 trips per every one (instead of going from car to site, I had to go from car to site with my pack, then back to car, then back to site with my kayak). The kayak is very bulky and not easy on single track trails that are super steep. It’s also hard to balance jumping from log to log and hard to deal with slippery trails. In short, stick to easy trails that are 1m wide unless you love to struggle!

    Woman Hiking backcountry up to campsite
    Hiking this boat up to this alpine location was not easy

    Last, this kayak looks different. It’s beautiful and everyone loves watching it put together and used. You can light it up at night and it’s the most lovely thing.

    Glowing kayak oru paddle at night
    Evening paddles with a glowing boat

    Pros and Cons of the Beach Oru Kayak

    Pros: Fits in small places, easy to pack up and down, easy for beginners, stable, fits so many dogs, accepts a heavy load, strong, good looks, lighter than blow up kayaks, tracks well, one year warranty, good resale value, beautiful

    Downsides: Price, Rudderless, need to learn how to set up at first, Wet deck, Seat needs extra cushion, seat back can come off sometimes.

    Please don’t forget to use our discount and support us! WHISKEY with any Oru purchase

    Oru Kayak assembly
    Turquoise lake with dogs
    Dogs that paddle
  • Berg Lake 43kms in one day with dogs

    Berg Lake 43kms in one day with dogs

    Kinney Lake at sunrise

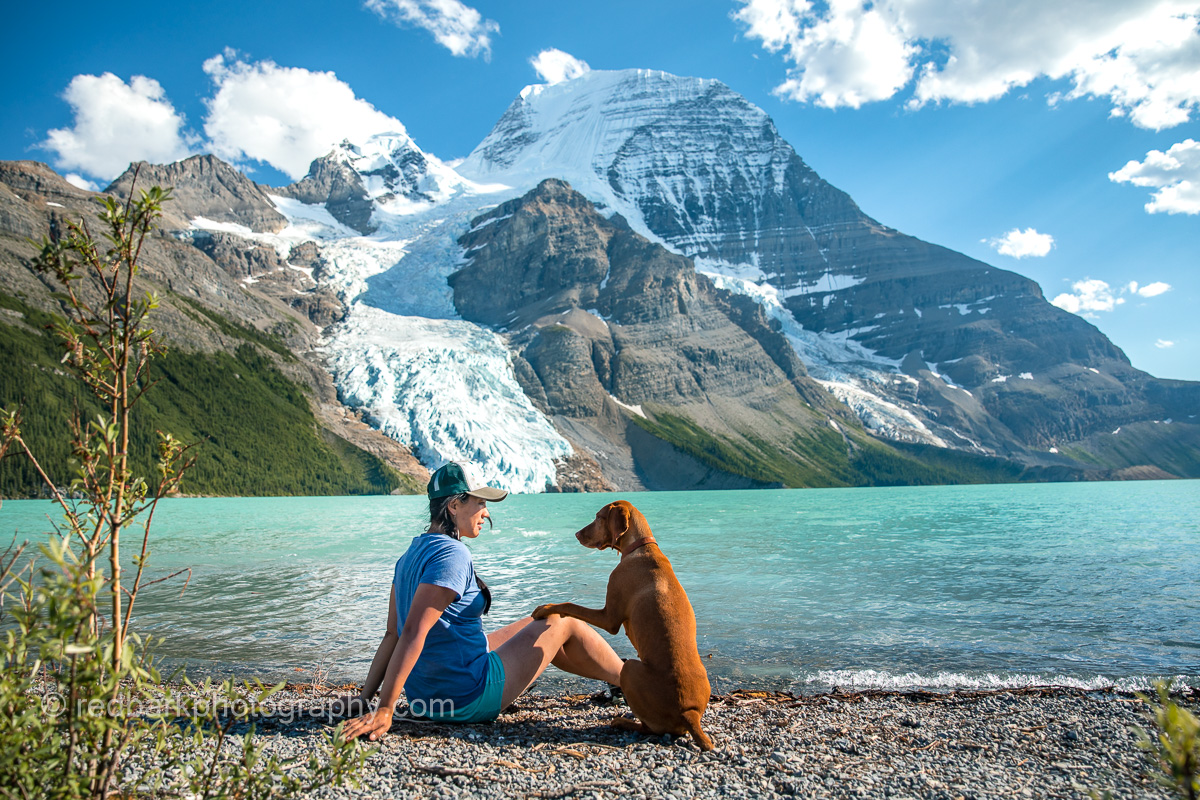
    Berg Lake is one of the world’s most beautiful lakes situated in Mount Robson Provincial Park, British Columbia, Canada. The trail takes you past Kinney Lake, Emperor Falls and is heavily trafficked with an elevation gain of 1509m. There are several campsites along the way to Berg Lake as well as 2 campsites at Berg Lake itself, however dogs are not allowed overnight at any campsite on the route. I have since found that you can hike yourself out of Mt Robson Park and into Jasper National Park and camp at Adolphus Lake with your dog but it would be a good 28km+ day with your pack and the lake is nothing special compared to Berg. Either option is NOT for the unexperienced and involve long distances with incline and you must be able to exit the park yourself with your dog without assistance. Both you AND your dog need to be conditioned to hiking exceptionally long distances, work as a team, and be on leash throughout. The trail is mostly narrow and graded as well as busy, mostly follows a clean water source, and would be extremely hard to get lost on.

    Erica with Bodhi the ridgeback at Berg Lake

    My good friend Erica has always wanted to do this hike with her ridgeback Bodhi and I happily agreed to the 40+km day. We have been hiking together for a couple years and have a similar pace and goals (of taking photos, completing the hike, and dealing with dogs). The trail is long but not technically hard at all with only one section of major incline. We packed as light as possible, and with many water sources along the way were not concerned about carrying much water. We used harnesses on the dogs because even though they’re trained not to pull, it’s an extremely long day and it’s best to reduce the tension on their necks. Leashes were attached to our daypacks around our waist (except for photo breaks) so we were hands free for hiking poles (another helpful piece of gear!).

    Approaching Kinney Lake

    Getting the earliest start possible is key in order have some wiggle room should anything unforeseen happen so we hit the trail at sunrise and got to Kinney Lake easily and quickly (about 7km). You can also bike this section but you must lock up your bike at the campground and hike the rest of the trail (we didn’t have space in our car for two bikes and the speed difference for us wasn’t’ worth it). We spent at least an hour trying to find a place to take photos of the lake before moving on. There seemed to be tent pads set up at the south end of Kinney Lake but they were all flooded and not in use.

    Kinney Lake from the campground
    Bodhi really cautiously crossing the Whitehorn Suspension Bridge

    After Kinney Lake Campground at the North area of Kinney Lake, there’s an option on our map to take the Kinney Flats Trail or the Forest trail, although during our hike we found the Kinney Flat trail wasn’t an option as the water was too high and the area was flooded. After that there’s a couple small bridges and flat sections that connect to the large suspension bridge over Robson River. This suspension bridge was the only obstacle that could have derailed the day if Bodhi refused to cross. Whiskey pranced across before I could even take photo but Bodhi took quite a bit of convincing and cheering to cross. To safely cross we let the dogs off leash so that there was only one person or dog on the bridge at a time to reduce swaying and to reduce any tangles. For Bodhi I was on one side while Erica was on the other so we could cheer him on from either side (Whiskey had already crossed to show him). Bodhi crawled his was across to safety and had a little prance to celebrate!

    White Falls
    Incline from White Falls to Emperor Falls

    After the bridge we passed Whitehorn Campground and continued onto White Falls. Stupidly we didn’t rewater before the incline (about 500m) and being a hot day, we both ran out of water pretty fast. We knew (and could see on our maps) that the waterfall was coming up quickly so we just kept going towards Emperor falls instead of heading back down to refill. Once we got to Emperor Falls, it provided the perfect air conditioning mist so all thoughts of needing water disappeared. We took photos for another 45mins before heading on to refill water at Emperor Falls Camp and onto our first glimpse of Berg Lake.

    Emperor Falls
    Nature’s air-con
    Approaching Berg Lake

    We approached Berg from the SW corner with gigantic glaciers framing the lake. At Marmot Campground, we debated if we should finish the hike a bit further on the NW side (Berg Lake Campground) or just call it done but we finally decided another 2kms (4 km total) wasn’t going to add much anyways so we went for it! I’m thankful we did because the beach at Berg Lake Campground was so much nicer and we threw off our shoes and took a little summer nap on the beach overlooking a turquoise lake with glaciers. We had a lovely section of the beach all to ourselves and the dogs promptly took a well deserved nap. I think we took a 1.5 hour break there with photos, food, and a dip.

    Having a really well deserved rest

    Keeping a close eye on the time, it was soon getting late and we had to put our shoes back on and head back. This time we stopped only for bathroom breaks and water refills and a long break at the bridge convincing Bodhi to cross again. It’s amazing how much faster the way back can seem without photo breaks and inclines.

    Whiskey having a roll in the sun
    the last stretch to and from Berg Lake

    Something interesting on the return, we noticed that the trail didn’t look familiar on the section as we got back to Kinney Lake. It was dark at that point so we just assumed we had remembered wrong but we would find out later there had been an avalanche during the day which had erased part of the trail and flooded other sections. Since we had maps and knew where we were aiming, we didn’t have any navigational issues but were confused at the time about the status of the trail (some sections were fully flooded!). The last 7kms were the longest of the day as they normally are, but we were soon back to the car, feeling good, and ready to sleep and get ready for our next adventure!

    Whiskey patiently waiting for Bodhi to cross the bridge again

    With this distance being non-technical, I found both dogs were tired (Bodhi especially) but no one had any impact aches and pains. Erica had some worsening foot injuries from unrelated events but overall I really did find the 40km+ hike wasn’t anywhere near as hard on our bodies as some 10km days in serious backcountry mountains or a 25km day carrying weight. I’d love to be back in the future with Bourbon and maybe even with a pack on my back!

  • Best PNW Human Gear for Hiking with Dogs

    Best PNW Human Gear for Hiking with Dogs

    I’ve been hiking for a couple decades, try a ton of different gear, in all weathers and am REALLY TOUGH with my gear. With dogs, little balance, bad knees, and a good amount of tolerance to rain and snow, I can safely say this is gear I use and trust my life on. I’ll write another post on my camping gear, so this is aimed at day hikes in all weathers, mostly in rainy or potentially rainy weather where conditions change quickly.

    I’ve been hiking for awhile and have gone through so much gear (including updating this backpack here)

    Tough Gear > Lightweight Gear
    With dog nails, my own clumsiness, and the tendency here to always be climbing hard rock, lightweight gear just does not last.

    Layers > Heavy single solution
    Because my hikes can take me through sunshine, to pouring rain, to hail, then snow, then sun again, perhaps with a couple mountains, layers are all important. I can go from shorts and tshirt to jacket weather really quickly passing by an exposed section of alpine, or a lunch stop while the rain rolls in. Merino wool is key with a waterproof shell can be key for not only your chest, but legs, feet, and head.

    Expensive Brands with reliable Warranty > Cheaper No Name Brands
    Over the years I’ve worn down or bought expensive clothing that hasn’t stood up to what I expected. As I’m getting more conscious of environmental impact of cheap clothing, I find that the price per clothing PER USE is what I try to keep in mind. A cheaper jacket may only last a year but an expensive one can last 5 (that’s a miracle for hiking gear for me) and when that jacket stops working after 5 years sometimes a good brand may fix it for you. It may not the an option for everyone but please keep in mind the cost PER USE of an item vs the upfront cost and if you can, support brands that try and fix their clothing.

    Clothing

    Arc’teryx Jacket with Keb Pants (one vent opened) with Salomon Quest 4D GTX Hiking Boots
    • Fjallraven Keb Pants
      • I love these pants. I live in them most of the year when it’s not super cold or super warm. They have two air vents on either side that I use nearly every hike, as well as gigantic pockets for treats and lens caps. There’s so many pockets I lose my car keys! I use the clips at the bottom as gaiters (not for crazy hikes but good enough) and they’re both comfortable and long-lasting. I cannot recommend them enough.
    • Merino Wool base layers! This is key no matter what brand you go with, make sure that the percentage of wool is high or I do find that the clothing picks up scent a bit more. My favorites are Mia Short sleeves Brooke 1/4 zip (base layers) and Avery leggings as a base layer
    • Icebreaker Quantum Hoodie
      • I’ve owned 6 of these over time. It’s the perfect hoodie for me- thinner, zip up pockets, hood that zips to chin, hand sleeves that convert to semi-mittens
    • Fingerless convertible glove/mittens
      • They don’t look great but I haven’t found any other better option than these Amazon gloves (please let me know if you know some!) They’re stretchy, sized for females, and aren’t horrible in wet.
    • Merino wool socks (any good brand, majority must be merino)
      • The first thing to get when you start hiking are merino socks. Wet feet or damp feet lead to blisters and a miserable day! Make sure you have a backup on longer hikes or wet hikes with river crossings
    • Arc’teryx Alpha/Beta Rain SV Jacket
      • SV is for Severe weather. I live in rain for most of the year and my dog walks in 2 hour daily walks+ rainy hikes +all day rainy camp trips+ bushwhacking +river paddle trips counts as Severe! Yes these jackets are jaw droppingly expensive but I’ve tested and used their warranty several times. They actually stand by their gear and replace them if they leak. Since Gore-Tex really doesn’t last forever, it’s worth it for me to know my jacket will be replaced if I get a leaky one (I have unsuccessfully tried to replace Helly Hanson and North Face Gore Tex and only had a smooth replacement with Arc’teryx so now I’ll stick to this local brand).
    • Fjallraven Bergtagen Eco-shell
      • Because Gore-tex is so bad for the environment (look it up!) This is a nice Eco-friendly option. I have yet to test their fix/return policy!

    Shoes

    WoolX top, Keb Pants, Salomon Quest 4D GTX Hiking Boots
    • Salomon Quest 4D GTX Hiking Boots
      • For snowy, rainy, muddy, and overnight hikes with weight on my back
      • Waterproof, no break-in period, super comfortable, most of my friends use these
      • I tend to go through 1-2 pairs a year, but I probably hike more than most, I’ve been wearing these for at least 5 years
    • Salomon Quest XA Pro 3D GTX Hiking Shoes
      • For those summer hikes without snow or deep mud
      • great grip on rocks, even in the rain, very solid and stable
      • the laceless system is amazing
      • a bit less comfortable around my ankles than the boots I have
    • Asolo TPS 520 Goretex Hiking boots
      • These are my winter boots when I need something rigid or for any activities in the backcountry that doesn’t involve long days of hiking (they’re heavier than the Salomon boots)
    • Native Chamonix Basecamp
      • Great car shoes or hut shoes. It means so much to come back to a car after a long 12 hour hiking day or multi-day and change into clouds on your feet.
      • I’ve tried different kinds of car shoes but since I’m usually hiking back to a forest road, with potential 4wding and puddles, I don’t like open shoes anymore if I need to jump in and out of my car (it’s so stupid to get a toe injury AFTER the hike!). Slip on shoes rule!

    Bags

    Osprey Ariel 65 with a WoolX top and leggings, Hillsound Trail Crampon Ultras and gaiters, photo by Ngaio Hotte
    • Osprey Women’s Verve 9 (Closest to now Raven 10)
      • I love this bag so much for shorter summer hikes. The backstraps are sufficient to carry weight, it fits my DSLR, has extra compartments to fit a scary amount of items, and water compartment as well as waist strap. With my camera clip, I can carry my camera on the front strap and 2 extra lenses with bear spray, clothing layers, water, and food. It doesn’t look pretty but it works.
    • Osprey Mira 34 (now 32)
      • I carry this less now because I can fit so much in the Verve bag. I use the 34L for day hikes that need a bunch of extra layers, safety gear, camera gear, etc. It’s also better if I’m scrambling and don’t want many things hanging off my bag, or if I’m taking significant weight.
    • Fjallraven Absiko Hike 15
      • Great for smaller local walks, the bag looks so much nicer than the Osprey ones and fits my DSLR with extras.
    • Osprey Ariel 65 (I tried the Aura but switched) **new version only 70L** now seems to have a convertible lid to backpack
      • A big reason I switched from Aura was that top compartment convertible lid to backpack that I use very very often. The pack is super comfortable and I’ve loaded it to the max, using all the extra straps.

    Safety

    Helmet, Woolx top, Knee brace and Salomon Quest 4D GTX Hiking Boots with the Osprey Verve 9
    • Bear Spray
      • We live in bear country, I’ve never used one on a bear, but it’s about the only protection we can carry for a charging bear (guns are not allowed)
    • First Aid kit
      • self made- different sizes for different types of adventures
      • don’t forget pills! Anti allergy and pain/swelling relief pills especially
      • Most things are shared for humans and animals
      • For dogs, an emergency bootie, duct tape, activated charcoal,
    • Garmin InReach Mini
      • For communication outside of cell reception
      • For GPS tracking on trailess hikes
      • For emergency services for yourself or others
      • To check the weather out of service per hour
    • Salt sticks
      • for dehydration and loss of electrolytes
      • I’m not a fan of adding things to my water so I prefer edibles
      • easy to share with others!
    • Knee Brace Bauerfeind Genutrain (not the Sports knee)
      • I have a meniscus tear from 5 years ago and my knee can swell up without this. The price is worth it, it makes an enormous difference over cheaper ones you get at a drugstore. The Sports version is not the same, so get the Genutrain
    • Battery Pack
      • Battery pack with usb for at least 1 charge on the phone (also charges my headlamp and my InReach device)
    • Katadyn Befree Water filter
      • really quick filtering but not long-lasting
      • super lightweight and easy to use
      • Get the 3L bag if you have a choice, especially on camping trips
      • I’ve tried MSR handpump (takes too long, too many parts that can break), the sawyer squeeze (takes too long, bags are frustrating, but lasts longer and easier to clean than Befree), and tablets (doesn’t get rid of sediment and you need a certain size bag of water). Overall, if I have the Befree the entire group will use it because it’s faster and easier but I will have a backup on bigger trips. I’ve still yet to find the perfect filter…
    • Helmet
      • For scrambles where rocks can tumble onto someone else’s head
    • AllTrails App (or similar GPS device or App)
      • The pro version allows you to download offline maps. I’ve used these maps countless times over my hikes to assist in understanding where a trail was, where FSRs are, how to get back onto trails, and where best in rugged terrain to aim for.
      • no APP or device will help if you don’t know how to use them and how to navigate with them. They can also fail and not be accurate in mountains or valleys where there is interception of reception from satellites. Having a trip plan ahead of time, backup paper maps, batteries, and knowledge of terrain is extremely important and lifesaving.

    Winter Extras

    Hillsound Gaiters and Crampon Pro
    • Hillsound Crampons
      • I use the Hillsound Trail Crampon Ultra for most hikes that have varried terrain, or when I need to carry crampons “just in case”. I used to buy cheaper Amazon ones but after breaking 4 pairs I switched to these that are better made and support their products. Size up if you are wearing winter boots!
      • I use Hillsound Trail Crampon Pro when the entire hike is in the snow with little exposed rock. They provide more stability and will not ball up snow, and are easier to wear as they are rigid.
    • Hillsound Gaiters
      • These are a good balance of tough and light. I tend to prefer slightly heavier gear that’s a bit tougher than super lightweight because I bushwack, have dogs, and ruin anything lightweight.
    • Hydroflask
      • A warm sip of tea is worth so much on top of a mountain! These stay so warm you’ll be waiting to cool them off before sipping.
      • Also super important they do not leak and are tough enough to withstand a ton of wacking against rocks
    • Fenix HL60R Headlamp
      • The same story as most of my gear! After trying out a bunch of cheaper headlamps I bought the Fenix HL60R. It’s rechargeable with usb (I carry an extra battery pack that covers this), is super bright, waterproof, doesn’t accidentally turn on in my bag, and I’ve never had an issue with it.
    • Ice Axe
      • I’ve never had to use it to self arrest but there have been enough situations where we’ve walked past an avalanche zone, or been hiking up a steep enough snow slope that I wished I had this.
    • Backcountry Access Shovel
      • Who knew a shovel would be so useful? When not out on avalanche terrain, I try and keep this in my car. We’ve helped dig out enough cars including my own that this has been a super worthy investment.
    • Probe
      • Part of my avalanche gear, you need a probe over 3m in our terrain here. AST1 course is needed before you venture out into our backcountry
    • Barryvox Transceiver
      • I have an older version for avalanche areas. I now feel stupid for hiking in areas with even a small bit of exposure without this.
    All my avi gear, WoolX top, Garmin Inreach Mini, photo by Ngaio Hotte

    Hiking Poles

    • Leki MCT 12 Vario Carbon WS
      • I used a Black Diamond Shock pole for 6 years without issues and then switched to the FLZ treking poles because of the lightness and quick breakdown which I DO NOT RECOMEND as I broke two pairs (I also had to hack it for winter baskets). Then I switched to the Leki which so far has been wonderful but these poles do not allow winter baskets so now I use a cheap telescoping Black Diamond set for the winter.

    Boats

    • Oru Kayak
      • I have the Beach and Bay model. With dogs the Beach is by far the best! You can fit so many dogs in as well as camera gear and the boat is quick (5mins) to set up and down (3mins) as well as stable and easy to use, best of all, packs up into a backpack.
      • code WHISKEY10
    • Alpaka Packraft
      • At 10lbs the Explorer 42 boat can carry 2 people, 3 dogs (uncomfortably) or any amount of gear (weight up to 800lbs). I’ve carried this model up mountains and been the only one on the water. It’s wonderful for river crossings, hunting, bike trips, etc. Super stable and totally fine with dog nails, it blows up quickly with a big in under 5mins. However because it’s a raft it will go with the wind/waterflow and will spin if you stop paddling (ie it’s hard to take photos from in large water)
    • Novacraft Canoe
      • Their TuffStuff models are TOUGH! We have dragged these boats up and down rocky cliffs, dropped them from heights, and they’re very impressive. They’re also light enough I can portage easily and our 16ft fits a large amount of dogs without issue (we’ve fit 4 in, it was an adventure).

    Personal Extras

    • Peak Design Capture camera clip
      • Peak design camera clip to hold up my camera while hiking on my backpack. I get asked about this all the time. I now have two clips so I don’t have to keep moving it from bag to bag and I really love this option!
    • SunRype fruit snacks
      • Seems silly but I normally have a couple of these in my bag. They’re great if you need an energy boost, not dry so it’s easy to eat and digest if you are dehydrated, and doesn’t freeze easily so it’s great all year round (freezing food is an issue!).
    • Zazubean chocolate
      • Chocolate bars that are local, ethical, healthy, what more could you ask?
    • Open Farm Freeze Dried Raw
      • Not for humans, but if I want my dogs to stick around, and also for emergency food/snacks, these are lightweight, healthy (who wants runny poops outside?), and every single dog I petsit likes it.
      • code WHISKEY10

  • Paddling with Dogs 101

    Paddling with Dogs 101

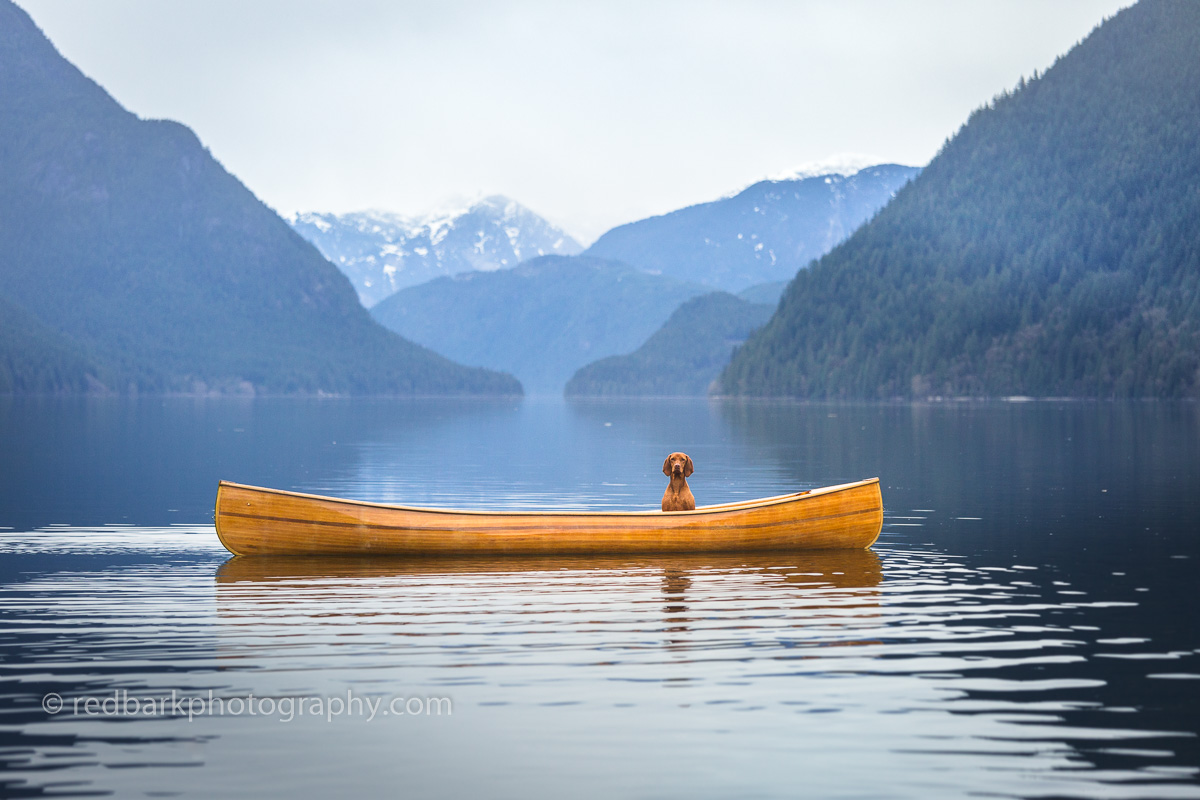
    We have always loved different ways of exploring the great outdoors and paddling has always been a wonderful option and complement to all the hiking and camping we do. Over her life, Whiskey has been on paddleboards, canoes of all types, kayaks, and rafts, as well as motorized boats and if you’re wanting to introduce your own pup to watercraft, I hope this gives you a couple tricks and tips we’ve learned!

    One of our first longer canoe rides

    Choose a Location and Watercraft

    Although normally the goal is to stay dry, it’s a good idea to start in an area where the consequences of falling in are not going to be traumatizing or dangerous. If possible find a smaller lake or pool where the water isn’t too cold, on a day without much wind. Beach access is normally easier than docks for getting in and out (especially while holding a dog) and of course it helps if the location is dog-friendly! It also helps if you choose an area with very little distractions (no people, noises, wildlife) so your dog is already calm before adding in a boat.

    packrafts are really stable and can be taken to shallow areas (this is our Alpacka raft)

    Paddleboards and rafts are the most stable, and hardest to flip while also being easier to lift a swimming dog back in and load up. If you’re using a canoe or kayak, try to aim for one that’s as large and wide as possible for stability.

    Whiskey likes to point at things and put her paws up on the

    Because Whiskey loves her comforts, it helps our princess to always have plenty of soft blankets for her to lie on. Start on land, just asking your pup to sit in the watercraft and lie down with treats on hand and lots of praise. I always bring treats when we try something new, and I don’t skimp on them at all! It also really helps to have a calm tired dog, like after a long walk.

    Loading Up

    Start with small sessions and with each success, take a break, enjoy the sun, and then try for a longer one if all is going well (and there is no stress). If you feel like it was a bit of a challenge, then call it a day and end with a success.

    Paddling gets us away from the crowds

    Keep everyone involved calm, even bored acting when you launch. It can also help if you have a friend hold your pup until you’re settled before bringing the dog with you on the watercraft.

    sitting on a paddleboard is a good way to start

    If you’re using a paddleboard, sit or kneel so you’re closest to your dog. If your watercraft is large enough and you can fit two people, see if one person can have 100% of their attention on the dog.

    Once your dog is doing well, move away from the shore or dock to discourage them trying to jump back out (Whiskey sometimes jumps onto shore if we are too close, and then will hop back in at her leisure which makes everything wet and tippy for the humans!).

    we now have our own Oru kayak!

    Be aware that if your family is spread between different boats, your dog might try to get to the other people, so keep the boats further apart until everyone is comfortable. Whiskey is much calmer when I’m the only one out, but if dad is on shore, or in another boat, she constantly wants to say hi and will stand up and wander around.

    little Ginger is a bit easier to train in a canoe as she can’t jump out as easily or tip the boat

    With puppies you will have less control so it’s really essential that they are tired! It’s really great to introduce your puppy before they’ve developed fears so just watch your puppy and go at their comfort level and pace. Treats and commands aren’t usually as effective with puppies, so make sure they can be comfortable and keep everything positive and happy, even if you end up in the water!

    Dog Training commands that help in boats

    Sit/Stay prevent premature exits
    Lie down/Stay during distractions and to make life easy
    Leave it for distractions on the water including birds, seals, other boaters
    In/Out (release command) so you can get into the boat first comfortably

    Safety gear

    We use the Outward Hound jacket

    For calm water, smaller lakes, and paddles close to shore we don’t normally use a life jacket (I’m a long distance swimmer, and Whiskey has no problem swimming distances). However, we do have a lifejacket for ocean paddles, or trickier situations. We use an Outward Hound Standley Sport Life Jacket with Whiskey but other brands should also work well (we see alot people happy with the Ruffwear version). The main thing to look for is that the jacket has a handle so you can easily lift your dog back into the watercraft (or keep your dog from jumping out), a place to clip on a leash, sufficient padding, and a good fit. If you have a dog that might take off swimming after a duck, keep a long leash on them just in case!

  • Dog Winter Boots: a Detailed Review and Comparison

    Dog Winter Boots: a Detailed Review and Comparison

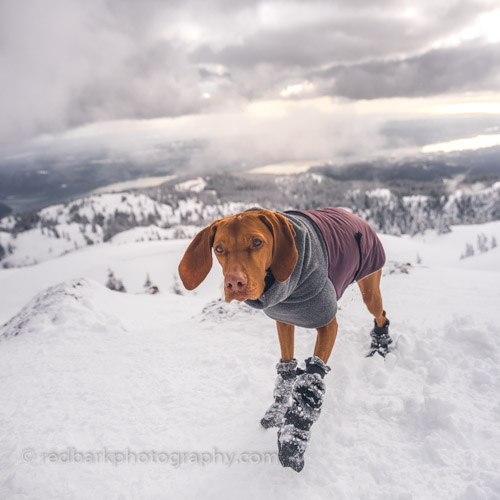
    We’ve been getting so many questions about dog boots that we finally decided to put together a bunch, test them, and review them in real trail conditions. Please let us know your experience in winter boots! Whiskey has no dewclaws so it was only because of personal messages we were able to record what has and hasn’t’ worked for others. There are alot of other brands we didn’t get to try and we concentrated on some of the higher-end boots. Remember, a rectangle pocket with a velcro at the top is what most sled dogs use (although loads go missing) in the arctic and it’s a real option too!

     SizesCost (4)DescriptionPhoto

    Voyagers k9 Apparel
    Breed Specific
    4 sizes per breed
    mid-large breeds
    Buy 4
    48-50 USDPolartec fleece with mega grip bottom soles, two straps of velcro, specific to snow and ice.

    Canine Equipment
    Ultimate Trail Boots
    1.75-3.25 (back paw smaller)
    5 sizes total
    buy 4
    70 CADAnkle boots with flexible rubber soles and soft upper. One velcro strap over the ankle.

    Ruffwear
    Polar Trex
    1.5-3.25 inches
    8 sizes total
    buy 2 or 4
    100 USDSpecialized winter boots designed for warmth, softshell fabric, Vibram outsole, velcro strap and pullover stretch gaiters. Ankle high but height extended with gaiters

    Neo-Paws
    Neoprene Regular
    Performance Boots
    1.25-5 inches
    12 sizes total
    buy sets of 2
    44-68 CADNeoprene boots that are higher up the ankle, super long wrap around velcro strap, thick sole
    Hurtta
    Outback Boots
    1.25-3 inches
    5 sizes total
    buy sets of 2

    60 USDShort ankle boots with light softshell material, flexible rubber soles
    Muttluks
    All Weather
    Leather Sole
    .5-5 inches
    8 sizes total
    buy sets of 4
    57 CADSlip on boots with flexible leather sole, one strap at ankle

    Backcountry.Paws
    Gaiters
    20-85lbs
    measure at the shoulder
    4 sizes
    80 USDSpecialized gaiters for dogs. Ripstop fabric that combines a boot with legging that goes up to the thighs.
     Our testUpsidesDownsidesBest use

    Voyagers k9 Apparel
    We’ve had these for several seasons and taken them on numerous occasions in hip deep dry snow to, packed snowy trails, on longer and shorter hikes. Our friends have also used these.-The only boots made of fleece, good for dry days, or dry (cold) snow, packed snowy trails, or a thin layer of snow. -Simple to put on and off (each boot is the same), boots are much higher than other in the market.
    -Boots are easy to wash and dry
    -Are also good for indoor use
    -Specialized for snow, not mixed terrain (also good for indoors). Snow collects on the fleece when it’s wet (packing snowball) snow, and the top of the boots are not lined, so once they are wet, they will freeze. They will slowly slip down the leg if the velcro is not tight enough, but due to the length that’s alot easier to catch than short boots which will disappear easier. Missing a cinch to tighten the straps so harder to do up
    -not dewclaw friendly
    -dry snow
    -packed snow
    -up to 6inches fresh powder

    Canine Equipment
    Ultimate Trail Boots
    We tried these on a packed 8km snowy packed hike with 350 incline. Our friends have used these as well.-These are the one of the lightest boots with very thin soles so Whiskey can easily feel the ground with her paws.
    -She seemed really happy in these and when we tightended the top of the boots we didn’t see much snow entering on a packed trail
    -Canine Equipment is the only brand that I know of here that will repair or replace a boot without limitations on their guarantee
    -Great customer service
     
    The soft shell material is not waterproof and will get wet if it’s not cold enough to keep the snow from melting on the booties. The soles can be a bit slippery on ice
    -needs more sizes
    -are sold in 4s with assumption that back paw is summer than front (so out of luck if your paws don’t fit their measurements, luckily we did!)
    -dry snow
    -packed snow
    -summer season/rocks
    -good all-rounder

    Ruffwear
    Polar Trex
    We tried these on a packed 5km trail, about 200m incline-These boots are specifically made for winter hiking and have the thickest soles of the ankle high boots that we’ve tried (I’m thinking the soles would last the longest)
    -They are the only ones that come with gaiters included.
    -Great customer service
    -Whiskey’s ankles are so thin that the top of the gaiters were not tight on her and instead of keeping snow out, they let and kept snow inside leading her paws to be really cold and wet.
    -She did not seem overly comfortable in these, I’m not sure if it’s the inflexible sole or the shape of the boot
    -and we’ve heard of other dogs having blisters on the top of their paws from these boots. We’ve also heard these can be uncomfortable with dewclaws
    -packed snow
    -dry snow

    Neo-Paws
    Neoprene Regular
    Performance Boots
    We tried these on a local walk as well as a 4km 150m incline on packed and loose snow-The only boots made of Neoprene which is a material that keeps it’s warmth even when wet
    -These are also the only boots that are recommended for watersports (we have not tried)
    -The brand also makes attachable ice cleats and gaiters.
    -The velcro strap is super long and lets you adjust the tightness up the leg easily
    -Made with dewclaws in mind
    -The largest amount of different sizes available that I could find
    -comes in regular and orthopedic options
    -The boot is overall pretty heavy and thick and might keep a dog too warm in the summer (they have summer options though)
    -because the boot is thicker and inflexible, it takes longer for Whiskey to become accustomed to wearing them
    -The website is a pain to navigate and badly needs an update
    -There is a longer learning curve to putting on these boots than others and takes more due diligence
    -Customer service can be a problem
    -In terms of the boot covers, there isn’t measurable sizing and the M was too big for Whiskey, the ice cleats made the entire boot too chunky

    -all snow, wet and dry
    -packed and powder snow
    -all terrain in all seasons outside where your dog may be too warm
    -good for water use
    Hurtta
    Outback Boots
    We’ve had these for several years and have used these on loads of trails in both snowy and rocky conditions-With modification on how you deal with the strap, these can be great boots
    -flexible sole, Whiskey feels comfortable in these and feeling the ground

    -top concern is the velcro strap does not stay on unless you tuck it up and underneath itself
    -the loop part of the velcro at the back of the boot sewing is coming undone over time and the bottom of the boot where it meets the sole also is having holes
    -needs more sizes
    -dry snow
    -packed snow
    -all terrain in summer but will wear out near edges

    Muttluks
    All Weather
    Leather Sole
    We’ve had these boots the longest since Whiskey was 1 years old and have tried these in the city as well as snowy trails. Our friends also have the same.-if you modify the strap, the can be great boots
    -easy to fit, all paws are the same
    -the leather sole has more grip than most boots we found
    -can be modified to be waterproof with was
    -very multi purpose (we use with an injured paw on sidewalks and great to slip one in your first aid kit for hiking because one bootie will cover any injured paw)
    -not waterproof unless you modify
    -straps are assuming an ankle that is alot bigger than Whiskeys’
    -tends to slide off (we have to be careful not to lose one)
    -velcro tends to get undone and boot can flip around with an energetic running dog
    -snow goes inside the top of the boot and collects there, so not recommended with deeper snow
    -not dewclaw friendly
    -dry/wet snow
    -packed snow (powder to 4 inches, wet snow packed only)
    -all terrain in summer

    Backcountry.Paws
    Gaiters
    We’ve tried these on two longer hikes in both packed and very deep and loose snow (Whiskey deep snow).Losing a boot is not a problem anymore! On packed snow basically guranteed paws will not get wet or cold. Works really well paired with a jacket for a full winter suit. Whiskey seemed really happy in these. The boots didn’t restrict at all and are thin enough she can fee the ground well.  
    -In very deep snow, we had snow piling into the back legs and no way to get the snow out, outside of taking off the gaiters (we finished the hike with just front gaiters on)
    -Difficult to put on, legs would be alot looser on skinny dogs
    -Very specialized, only good for snowy trails
    -dry and wet snow up to 6 inches
     Ease of useTerrainRecommendations

    Voyagers k9 Apparel
    These can be tough to estimate size and can be a bit difficult to get the paw all the way inside (especially if your front paws are larger). We’ve had readers tell us dewclaws can be an issue. The velcro straps do not have cinch closure.Good for packed trails and cold snowy conditions. Also good for indoors. Would not recomend for rocks or summer use. I would use these on shorter packed snowy trails and inside the house 

    Canine Equipment
    Ultimate Trail Boots
    These are one of the easiest to put on and tighten. Very wide opening for paws to slip into.
    Cinch closure is quick to tighten.
    Good for most uses including packed snowy trails, rocky terrain, summer trails, but not mud/swimming. I would use these in most outdoorconditions 

    Ruffwear
    Polar Trex
    These are harder to get into, the gusset isn’t as large as others and can be more difficult with a gaiter in the way. Cinch closure is quick to tighten. Reported problems with dewclaws. Good for cold conditions, snow conditions, but could be too warm for summer I would use these in packed snowy trails, or mix of snow/rocky trails. 

    Neo-Paws
    Neoprene Regular
    Performance Boots
    These took us a couple tries to learn how to put on properly. Neoprene is a more difficult material to hold down and tighten a strap over. Flip the boot inside out to help place the paw and gather the strap tightly over itself around the ankle before working your way up. You must layer the boot properly and takes some practice. -good for most conditions including swimming, but not hot conditions when a dog can overheat-I would use these in colder conditions on trails that were not technical 
    Hurtta
    Outback Boots
    These boots are easy to slip on but are difficult to wrap the strap in a way that doesn’t detach itself over time. We’ve learned that we need to wrap the strap very tightly over itself and tuck the end into the strap as far as we can in order for the boot to stay put. If you wrap like in the photo, it will come off. -good for most conditions and terrain I would use these in most outdoor conditions 

    Muttluks
    All Weather
    Leather Sole
    These are really easy to put on, but the strap is hard to tighten enough to keep the boot on over time. -Good for shorter walks while not playing or running too hard.
    I would use these on shorter trails, on pavement and inside the house 

    Backcountry.Paws
    Gaiters
    These are pretty involved to put on and involve several straps on top of the dog. You’ll need to size properly at home first before attempting to put on in a car while your dog has decided it really wants to run out the door onto the trail! Make sure you strap those ankles tightly and get all straps tight enough to keep on but loose enough that they don’t rub. At least you’re almost guaranteed never to loose a boot! -good for snowy conditions (but not super deep snow) I would use these in all snowy conditions except for super deep snow 

    So in conclusion if you asked me which I would recommend I would say it really depends on what your lifestyle is like, and what dog you have. Firstly, what boots actually fit your dog? What is your budget? Then, I would highly recommend you see if you can go try on boots at any local dog store and see what your dog tolerates. My suggestion to get a dog used to boots is to bring lots of treats and keep them moving and doing tricks, running and basically forgetting about the boots. Try them over short periods of time with lots of praise, fun, treats, and in an exciting location. Most of these boots are fine for packed trails, but when you get to deeper snow, then pay attention to the top of the boots and see if you think snow could get in and collect. Each dog’s ankles fit differently, check to see the top of the boot, if you think rubbing might be an issue, and of course keep an eye on dewclaws if you have them. See if you need a boot for all occasions, or can pick a specialized boot. We are going to keep updating this chart as we work with all these boots for the next winters coming, please help us!

  • Our favorite Whiskey gear

    Our favorite Whiskey gear

    Just a list of gear that we’ve loved over the years!
    • Ruffwear Approach Pack –link
    Whiskey is between a size medium and small so we went with the Medium (she most likely will gain not lose weight over time). The straps are great and adjust in so many ways and the pack fits really well. It’s nice that she can help me carry her own food on overnighters and the pack is really well built. They don’t make the blue color anymore, ours is so old! We are also looking at trying a fancier model and will report back!
    • Kong K9 water bottle –link
    The easiest way we found to carry water on a long hike. The lid doubles as a bowl and I’ve always much preferred stainless steel over plastic to carry water. A super simple solution to bringing an extra bowl. If you’re weird like me, you can share the water with your dog too!
    One of our favorite jackets! Whiskey has an amazing nose that we have trained even further with sniff training but unfortunately that means she finds poop or smelly things to roll in much more than the regular dog. That means her jackets must stand countless washes while also fitting perfectly and looking great for photos. The fleece is extra thick in the brand and the shape is just wonderful. The Trail Blazer is warm and water proof and the Great White North has been through the deepest snow and trails where Whiskey is practically swimming. The price is high, but it’s worth it!
    This breed-specific brand is great for those long and skinny dogs where nothing “regular” fits! The winter jacket is similar to the chillydogs brand (if you are in Canada, order the chillydogs, if you’re in the US order Voyagers for cheaper shipping) but the rainjacket is unique and super cute!
    This Finnish line is sort of like the “North Face” of dog clothing. They use reflective materials to trap in bodyheat in their Extreme Warmer and their leash is our favorite for hiking with woven reflectivity. Because their jackets are on the larger side, we can layer in a fleece if we are winter camping and everything has gone through the wash numerous times and have come out great. However, they don’t make breed specific clothes so if your V is extra lean or long I would go with one of the other brands. If you have a long-haired dog, I would check out the rest of their line, there’s so many amazing options!
    The best dog beds we have tried. When we got a new puppy, we were told to buy a cheap bed until she grew older but I couldn’t help it. Our doughnut bed has been washed countless times, been peed on, dug in, vomited in, ever since she was a puppy and most of it looks brand new. We have gone through several other cheaper dog beds but she’s made it abundantly clear this one is the best one. We’ve since gotten another for travel and love it just the same! Again, the beds are really expensive, but I found it’s totally worth it.
    Whiskey loves cuddling in this during the winter. It’s not as useful for warm climates but it’s a must-have for short haired dogs and doesn’t last as long as the Bowser beds but Whiskey loves hers. She uses a Large size, if you have 2 Vs then get an XL! The link goes to the company site but we buy on Amazon as shipping is free for Prime. The plastic tube that keeps the shape has problems staying in place and the stuffing isn’t’ as plump but it still the favorite spot on a cold day. Whiskey normally spends a good 6 months “digging” inside this bed to defluff it though so it’s been “worked in” before she’s happy. We are currently in the “breaking in” stage on a new one.
     
    We’ve had many collars and these are the ones we keep going back to. I hate tags jingling for a long hike (imagine how much they must annoy the dogs with their hearing!) and any cloth/strap/rope collar has not stood the test of rolling in bbq grease and poop. This one has the extra loop at the back for another place to connect a leash and the reflector is great in the rain and the short winter days. We did try a really expensive rope collar for a bit but after standing at the sink for ages scrubbing poop off, we decided to keep this one on for any long trips. The fancy collars are wonderful but if we are going on a long backcountry trip, we’re most likely going to bring one of these.
    We love this Shampoo! It works triple duty as it repels fleas and it also smells amazing. We only ever need to give Whiskey a shower when she rolls in something extra foul so its’ great that it’s very gentle and she comes out smelling wonderful for a couple days. Since Whiskey is self-cleaning, we are still working on our first bottle.
    Whiskey’s chew treats. Antlers are always avaliable and she still has the one from when she was a puppy. Since our little girl isn’t much of a chewer compared to other dogs, she takes a very long time to wear these down and we can afford to buy Himalayan Chews. The extra large pieces will last her a month, whereas it can last other Vizslas an hour or so. Bullysticks are only used when we absolutely need her to leave us alone for 20-30mins and we only let her work through a couple inches each time. We buy Bullysticks in packs of 25 or 50 extra extra large ones.
    A really great alternative to a chuck-it ball. It’s large so you won’t lose it as easy and it floats. The string lets you throw it extra far and the texture is softer yet durable. I tend to bring several toys to the dog park in case one of her toys gets “stolen”, I can switch to a different shape while someone tracks down the “culprit”.
    A staple! I don’t use tennis balls as the material can wear down a dog’s teeth. I don’t like to play fetch too much as the back and forth isnt’ good for a dog’s joints over time but Whiskey will become obsessed with another dog’s ball so I do bring them sometimes. In the winter when it’s dark and rainy, I resort to playing fetch as the only way to get her to run instead of shivering miserably and hating me. We use a glow in the dark ball that I “charge up” at an outdoor light (hold it right next to the light for 30 seconds) and it lasts about 20 mins.
    This thing is magical. There’s something about the way it bounces, or the texture but this is Whiskey’s ultimate prize. The squeaky and the bottom section is long gone but it’s still amazing. It’s the first thing she’s ever consistently fetched with intense focus and it only comes out on special occasions or as a reward for a good search-and-find. All the dogs want it at the park. It comes in small or large (we need large).
  • Vancouver Nov 2017 Vizsla Meetup

    Vancouver Nov 2017 Vizsla Meetup

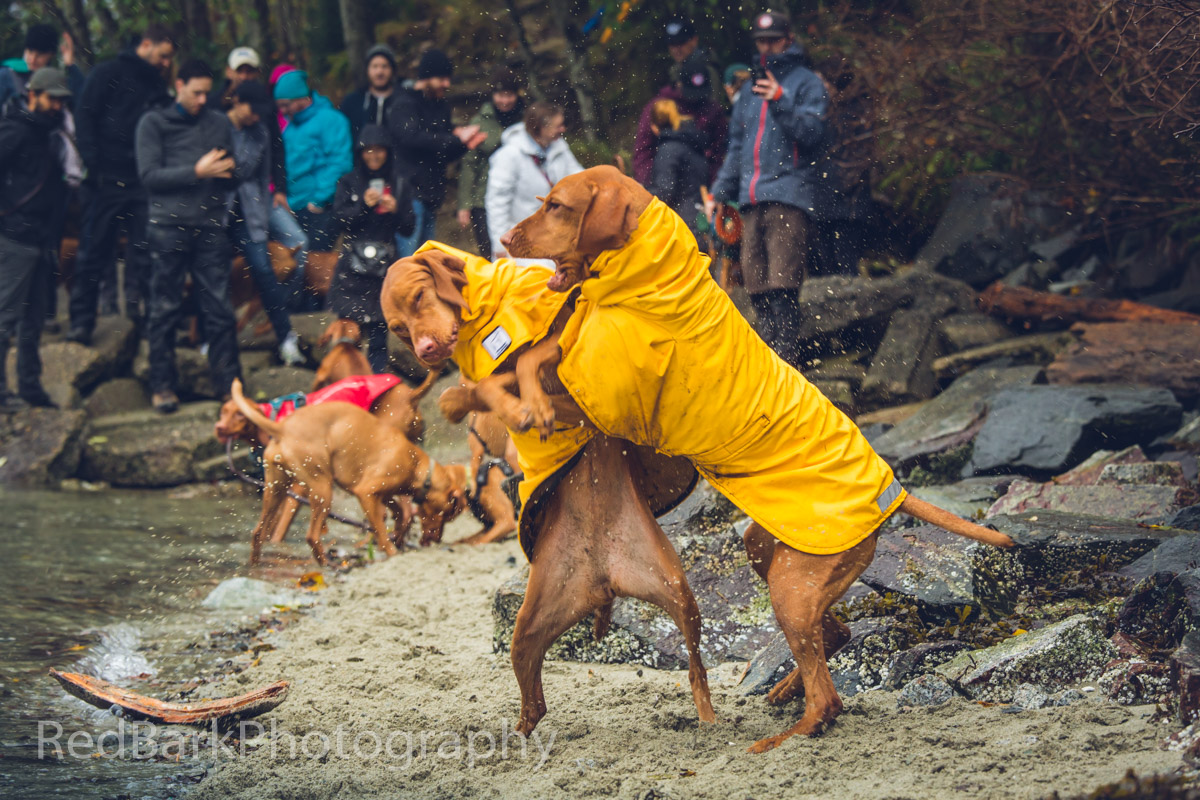
    I’ve been pretty busy launching my Parawild company so it’s been a stretch to keep up with everything but I decided I needed to get my Vizsla fix and lo and behold, it was time for another Vizsla meetup! Of course November tends to be extremely rainy so I was really worried no one would show up on a rainy Sunday long weekend but of course, Vizsla people are not the norm. I’m not even sure how many ended up joining us as people came and went but I believe we were around 15+. The rain wasn’t too bad, and with puppies to a couple sugarfaces, it was so amazing to see the community out and taking over Barnett Marine Park. Taking photos of insanely fast dogs, in the rain, on a dark day, with wide aperture, covered with mud, and sand is….not easy! It’s really lots of luck, praying some autofocus will work, and setting the ISO very high and of course putting the camera down to give butt rubs when asked 🙂

    [envira-gallery id=”1535″]

  • Fountain Lake Camping

    Fountain Lake Camping

    Fountain Lake

    This is our 3rd yearly trip to camp at Fountain Lake as well as the first time I’m doing it without my better half sharing the driving and the tent. Fountain Lake is beyond Lillooet which is a long drive with our many stops (for food and pictures). We left at 3pm and arrived after 7pm just in time to set up our tents, start a fire and watch the light dying down in front of us. There was a little bit of drizzle as we drove in but the weather the rest of the weekend was just fantastic with passing clouds and a really warm days.

    Cloudy coming in, stopping for a break at Duffey Lake
    Stopping at Lillooet for a view

    We’ve recently bought a car-camping kit with a gigantic tent you can stand in, foam sleeping pads that take up half the car space and the much-needed ice box and water jugs to go with our bbq. With a group of 10, we took over our normal camp-site next to the lake and spent the days floating on the lake, eating really really well and sitting in front of the campfire singing, laughing and just having the best of times.

    gathering firewood
    setting up the camp chairs
    Around the campfire, taking my seat
    Relaxing in the tent
    Elly popped in for the second day!
    Marshmellows and fire

    On Saturday we even fit in a new hike- the Fountain Ridge Hike. As there was only a tiny description, we chanced it and once we found our way, the views were fantastic. We did get our friends’ van stuck and had a bit of an adventure but found our way back to camp for a quick swim before dinner.

    summer days!
    the view from our ridgewalk
    lunchspot…may I have your sandwich?
    views of the Fraser
    heading back!
    relaxing on the water
    toast them up!
    come play with me!
    warming up at the fire

    The next day we took it easy walking around the lake and floating a bit before heading back to town.

    Happy days!
    Walking around the lake
    sharing the paddleboard and Ginger’s first try out!
    floaties are for sharing right?
    just hanging!
    Ginger exploring the weeds
    stopping at viewpoints on the way back again!

  • Ovary Sparing Spay

    Ovary Sparing Spay

    Whiskey hours before her spay

    We’ve just gotten back from a trip to Kelowna for Whiskey’s spay. When we first got a dog, I didn’t realize there were several different options for spays (and for neuters), each with pros and cons. As I’m typing this, Whiskey is next to me sleeping and recovering.

    fetching and swimming in Kelowna

    Just looking at a health perspective (let’s assume you aren’t leaving your dog in heat running around with intact males), there is up to a 25% chance of uterine infection with older intact females (pyometra) so if you aren’t breeding, getting a spay in North America is probably going to be considered. Here are the types of spay I was looking at:

    Ovariohysterectomy
    -traditional spay removing both the uterus and the ovaries
    -removes chance of pyometra
    -available anywhere
    increase chance of joint disease and cancers since hormones are absent

    Ovariectomy
    -removing only the ovaries
    -removes chance of pyometra
    -typically a key hole surgery requiring a smaller incision
    -quicker surgery and potentially safer
    -less painful with a smaller cut
    -quicker recovery time
    -less vets can do this
    increase chance of joint disease and cancers since hormones are absent

    Ovary sparing spay
    -removing only the uterus and cervix, leaving at least one ovary
    -removes chance of pyometra
    -still small chance of ovarian cancer
    -increased chance of mammary tumors over other spays
    -keeps heats but no bleeding
    -keeps all the hormones
    -difficult to find an experienced vet that does this

    one last sunset picture

    For larger breeds, because it’s healthier to keep the hormones, spays are usually delayed until the dog is “fully grown” although with an OSS, you could even do it earlier. I only really researched about spaying later because of this, and honestly I wanted to delay any kind of optional surgery as late as possible. Once I did look into it, I found the only vets near where we lived that offer this special spay were at least a 4-5 hour drive away. Poor Whiskey had no idea where we were going when we headed out on a roadtrip to Kelowna. She was so happy, hiking, exploring, and modelling the whole day before her spay.

    she’s old enough to understand the vet is no fun place!
    Whiskey’s suspicious face
    a small pre-surgery checkup
    waiting for her surgery time
    Freaking out a bit once we got her on the surgery table

    Because Whiskey had such little fat, she was more difficult to put under and struggled more than usual. Outside of that her spay went normal and we were there when she went to sleep and woke up. It was so heart-breaking to watch her struggling against the anesthesia as well as flailing around when she woke up (apparently certain breeds flail more than others). We didn’t leave her side until we drove home that evening.

    right after she finished with heating pads
    we made sure she could smell us before opening her eyes
    forcing her to lay down and not run out!
    stubbornly not laying down to recover at the office
    That evening Whiskey was feeling so poorly it was very difficult to get her to pee and poop and she was walking like a very very elderly dog with her head hanging low. It was so sad to see! The next day however she was still walking slow but she had perked up and was already giving kisses. By lunch time she would let me spoon feed her (yes, she’s a princess when she feels sad) and by the evening she was 80% back to normal. Currently I walk her on leash only with a long line and work on new tricks, training, and lots of patience!
    2 days after and healing

  • Jones Lake Camping

    Jones Lake Camping

    We’ve been wanting to go camping for awhile now, but it seems that each time the weather has plagued us until last weekend. In another bout of good luck, we were asked to petsit Whiskey’s sister (different, younger litter) Sophie over the same weekend. It was the perfect opportunity to take them out of the city so they could be off leash the whole time, and we wouldn’t need to worry about the house being torn to pieces (they had already begun before we left). At first Whiskey was pretty protective of her humans and home, but soon the two became best friends taking turns to initiate play and games.

    two dogs and two humans with one queen bed
    playing non-stop
    Sometimes they can stop for treats
    I have no idea what happened
    I hear we are going places…

    Meeting up with a couple friends, we braved the rough forest road to Jones Lake and secured a really nice spot next to the mud flats covered with stumps and roots. The road was pretty busy with 4x4s and atvs and the muddy/sandy flats proved irresistible to those who liked to go “vroom vroom”. This ended up as free entertainment, for each day a truck got stuck and we would watch as they tried really hard to get stuck even further before a nice local would then help them out (he did 3 this week).

    Jones Lake
    Hmmm not too bad!
    First look at their playground
    Not so clean dog
    Is this really sleeping in my tent tonight?
    Sisters having fun
    Truck #2 stuck

    As hard going as it was for trucks and humans (many times we sank pretty deep), the dogs were just in heaven and ran their little butts off. Whiskey demanded sticks thrown, even swam a little, and Sophie basked in the sun on the sand. We were lucky enough to have access to a blow up paddle board that Whiskey rode (not too happily), and of course we brought out the drone for a couple shots. Both dogs got super muddy but thanks to their fur, it magically disappeared before nighttime.

    Sophie gets her model moment
    dino attack!
    zoom zoom!
    Beautiful when free

    Sophie running away with the stick
    paddleboard with swimming Whiskey
    Kisses on the water
    Take me back to land!

    Dinner was shared (the dogs preferred each other’s food of course) and with lots of leftovers, the pups were more than happy to be the clean-up crew.  I couldn’t believe how much energy they had as they played until it got dark and then fell asleep in front of the fire, only to wake up and bark at anyone passing by to go to the toilets (Whiskey is more protective). Of course since they are softies we brought loads of blankets and the pita bed so they were extra comfy.

    Warming up by the fire
    Feed me your dinner
    Beggars! 
    Clean up crew

    Sleeping was a bit difficult with a 3 person backpack tent (larger tent is on the wish list) but we managed. Sophie slept in the pita bed and Whiskey alternated who’s sleeping bag she would crawl into.

    Sunrise and Whiskey wants out
    Lets go Lets go!

    The next door, the dogs ran and played until afternoon when we packed everything up. At some point, I threw the dogs into the car for a time-out just so they could be forced to rest for 20 mins.

    I have no idea why humans are so slow!
    sharing
    Checking out her domain

    Sophie loves it here
    Play play play
    Sophie rests on the sand while Whiskey keeps going

    The drive back into the city was quiet with two very sleepy puppies although as soon as we got back home, play started all over again!

    Sisters
    Loving these two!