Tag: hike

  • My Camera and Lenses

    My Camera and Lenses

    Canon 5d (this one was a Mark 3 but I have a Mark 4 now)
    This is my most asked question online. If you only want the answer, it’s currently a Canon 5D mark 4 but if you really want to know how to take great photos, the answer is much more complex and buying the same camera may not be your answer.

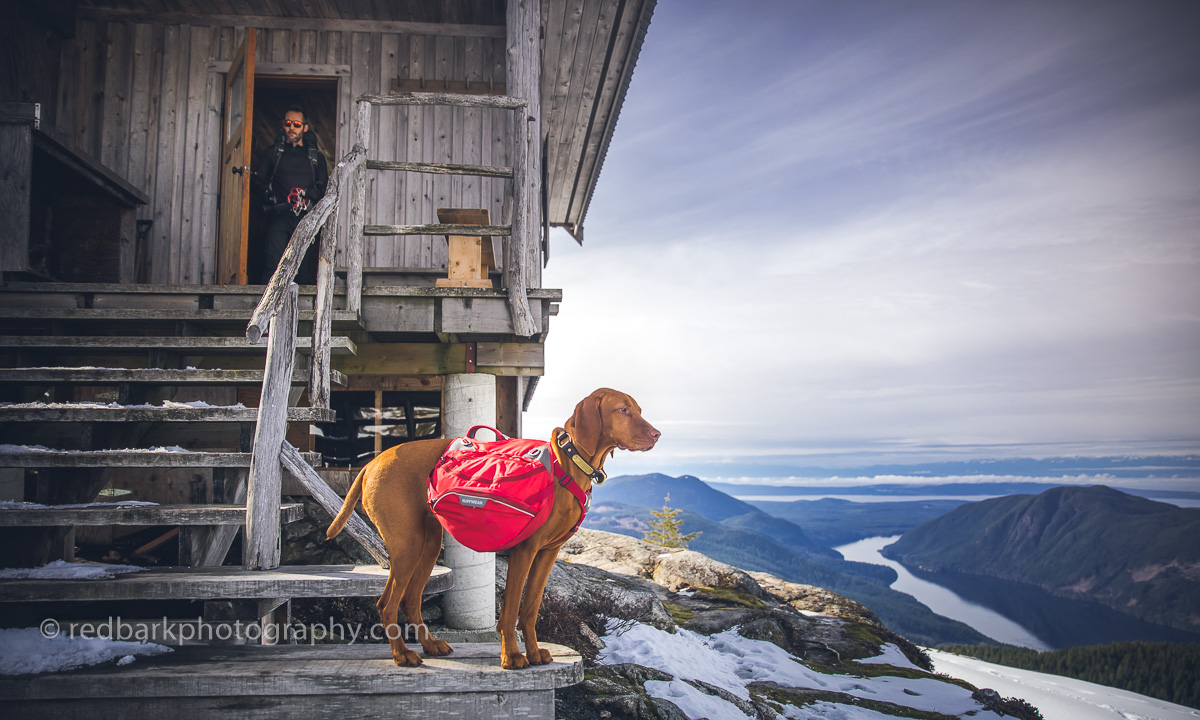
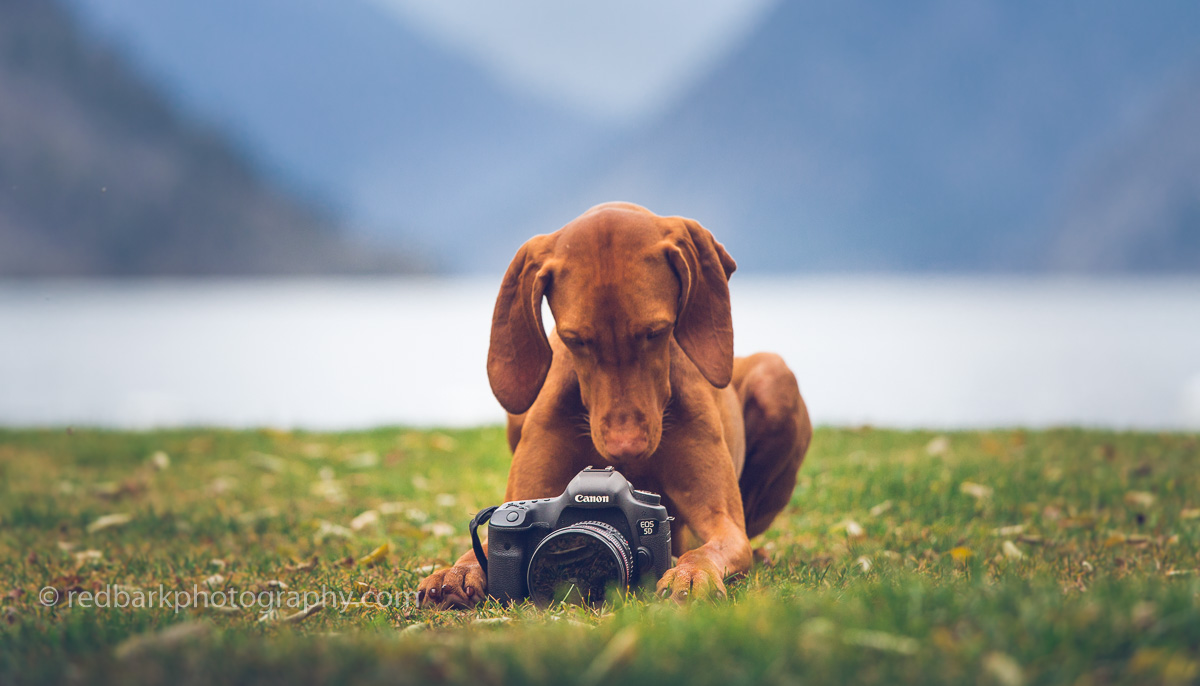
    My current arsenal of lenses include the 17-40mm f4, 24-70mm mark 2 f2.8, 70-200mm f4, 50mm f1.2, 85mm f1.8, 135mm f2. When I hike, my current favorite is normally the 24-70mm. With the camera body, this is serious weight (2lbs for the body and 2lbs for the 24-70mm). It’s also pretty darn big hanging off your body as you scramble up rocks and it’s almost too big to hide under a spacious rain jacket if the rain starts pouring down unexpectedly. I have this camera for several reasons- I would like the option to print large and to seriously crop my images. For me, the full frame camera is great but I don’t think most pet owners want to carry such a large weight for those reasons. I’m also working in photography so have an “excuse” for a camera in this price range, and the willingness to carry the kit up and down the mountains. If you already own a dslr and the size/weight becomes an excuse to leave it behind, then I would not suggest anything larger.

    135mm f2 gives a really creamy bokeh

    I really believe the picture you take is always better than the picture you don’t take and a wonderful option are the mirrorless options that are out there now. I just LOVED the Fuji XT1 that we had. It was tiny, pretty tough in the rain, light, perfect for female hands, and the lenses were amazing quality. I much prefered the Fuji body but technically it didn’t stand up to the 5D. I’m also considering moving to the Sony A7 III, and may do soon enough, just for the potential of a better autofocus system (they have dog specific focusing that I’ve not yet tested). Mirrorless cameras include the Canon M100, Canon RP, Nikon Z6, the Sonys (thinking about moving to) and Fujis (I really love the Fuji body).

    50mm f1.2 at it’s widest

    Another option is a cropped frame DSLR sporty camera that has great auto-focusing abilities but is smaller and cheaper than the full frame options. We used to own two cropped-frame Nikon D-90s that were wonderful and lasted 5+ years of photos. Cropped frame cameras include the Nikon D3500, D7200, D500, Canon 80D, Canon 760D, Canon Rebel (my first!), and so many others.

    Lenses

    24-70mm f2.4 that I carry on most of my trips
    70-200mm f4 at the longest, you need two people for this one for dogs

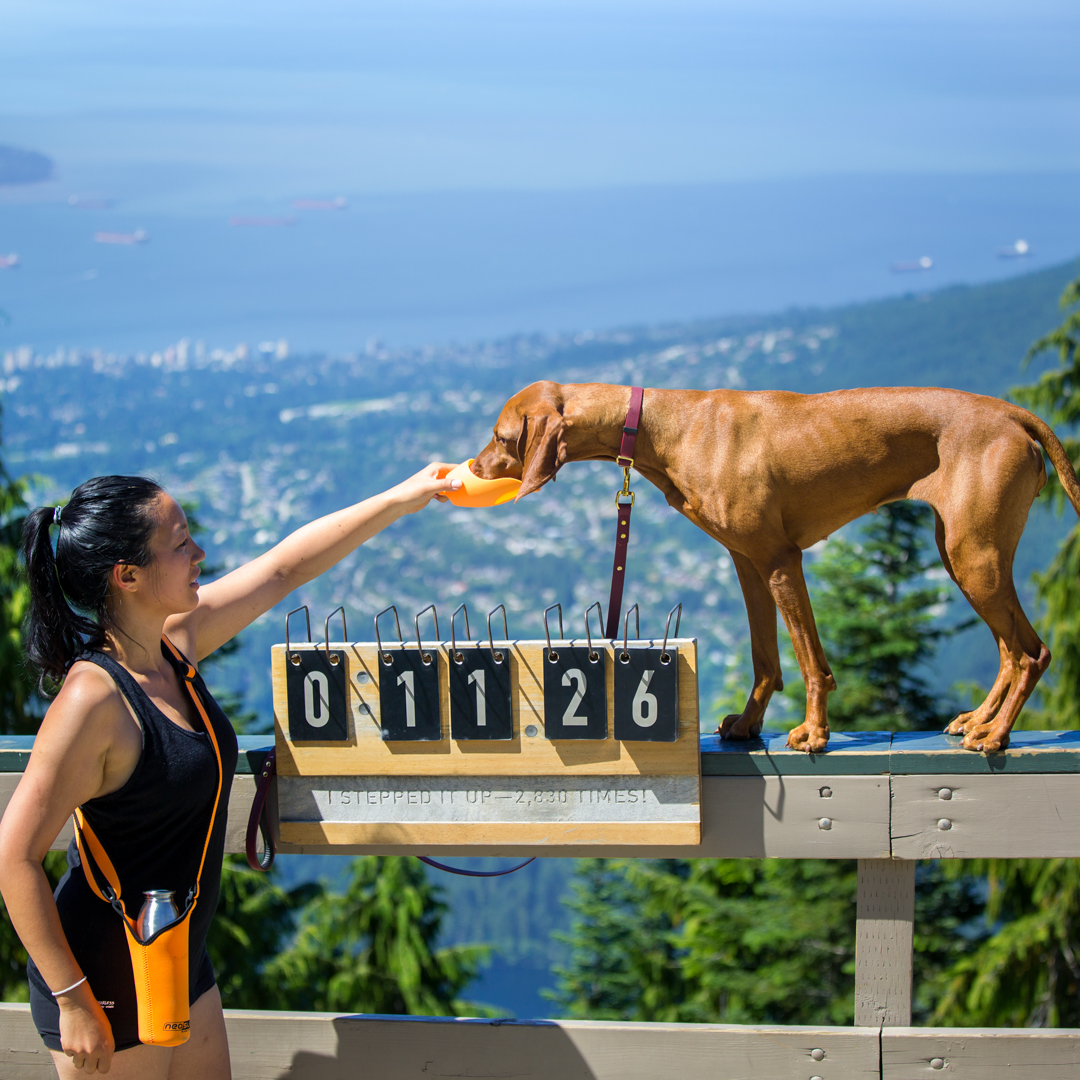
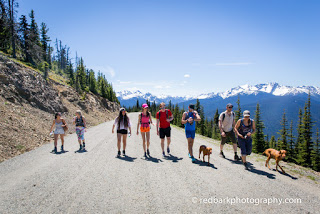
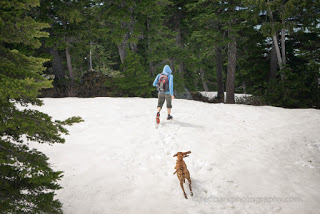
    Lens choices are personal. They depend on the type of photos you like to take, your ability to carry them, and the environment and situation you shoot in. I prefer zoom lenses in most places because as Whiskey moves, I can quickly adapt and get shots that are not just her posing in a certain location. I’m also usually in very restricted spaces where backing up is not an option (like a cliff) so zoom lenses really help with flexibility. In so many cases something amazing is happening and I wouldn’t have much time to switch lenses and I don’t want to be stuck on a prime without knowing what type of photo I’m taking before I start a hike. Also, Whiskey is trained to stay really close to me on trails, and unless my husband is with me, she’s not usually far away enough for me to control (pose) from a great length, so I don’t usually bring a long lens. Overall my go-to is the 24-70mm f2.8 mark 2 which is a big lens but covers most of the range and just captures wonderfully sharp images in difficult situations (ie flares, backlighting, little distortion). Of course, my ability to carry lenses up mountains and hikes severely restrict my options.

    50mm f1.2 I struggle for the lens to pick her eye

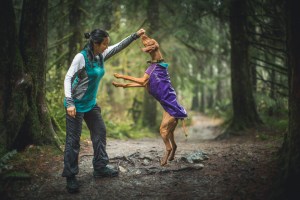
    Primes are better if you are not hiking for hours with a pack on, or if you are aiming for a particular look with short depth of field. If we are going out for a photoshoot, I do love my 135mm. It’s a very specialized lens but has the creamiest bokeh and makes anything look great.

    135mm f2 is beautiful but I was backing up in snowshoes in hip deep snow!

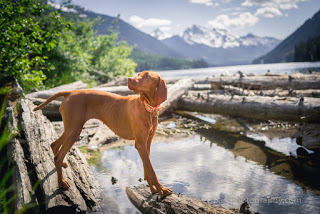
    Remember, I shoot dogs which are shorter and smaller than humans so the same lens might not look the same for humans. I’m constantly trying to learn how to use and work with my lenses, and sometimes will just go out with one I haven’t tried in ages. The 50mm 1.2 is the hardest for Whiskey, the short depth of field with a camouflage dog seems like an autofocus challenge, especially in the forest or busy environment. I don’t have as much trouble with a person, but once I start adding foreground elements, it seems like everything including the ground, the trees, and the leaves have more contrast and interest for the autofocus to grab onto than Whiskey’s soft monochrome fur.

    17-40mm f4 for super wide images

  • Sunshine Coast Trail

    Sunshine Coast Trail

    Tinhat Hut-> Elk Hut-> Walt Hill Hut// Fiddlehead Landing -> Dixon Road

    The Sunshine Coast trail has been on my “must do” list for a couple of years now, and it was only recently I finally put aside all excuses and found a crew who were keen to try. We were all photographers who had weekdays free, and since I don’t go without Whiskey, I wanted to ensure that it would be the least busy on the trail. Scroll to the end of the article for map links and other resources!

    The Sunshine Coast Trail

    The Sunshine Coast trail is located on the northern Sunshine Coast which involves 2 ferries from mainland Vancouver. With the timing of the ferries and the drive across the Southern Sunshine Coast, parking at the end of the trail, and shuttling to the beginning being so time-consuming, we decided to sleep over at Egmont, near Earls Cove. This way we could pick up an early ferry and have a fresh start at the trail the next day, freshly showered and with a good nights rest. There is also so much to do on the drive to Egmont, so we checked out one of my favorite spots, Smuggler Cove, and reached our cabin at the BackEddy well before sunset.

    Smugglers Cove Sunshine Coast

    In the morning, we took off early and headed to meet Jesse of the Sunshine Coast Shuttle Services so he could help drop us off at the beginning of the hike (this way we could do a one-way hike to reach our car). We parked around the 137 km mark of the trail and he shuttled us to Fiddlehead Landing with his truck (dog friendly, yey!). We hit the trail in the rain, knowing that our first day was over 1100m incline with full packs.

    Ask Jessie to shuttle you to the start of your hike!

    Pretty soon we were seeing views between trees and with a couple sketchy log crossings and some very muddy patches. Eventually we made our way to a huge junction at km 88 where the trail meets a rugged forest road. Going straight would keep us on the SCT and turning right would take us a couple kilometers to the Tin Hat hut and some pretty epic views. The snow started around this point and we kept climbing until we finally broke through the trees when Brice, who was (usually) in the lead saw the first glimpses of the cabin. I was sooo happy to drop my pack at the hut and magically the sun came out and lit up the best views on the entire trail. We had slammed this section, of around 9km in only 3 hours 45mins (including breaks) so we had tons of daylight left. A benefit of off-season camping is that the snow meant we didn’t need to go off in search of water (there is no water source at the cabin normally). Also, sharing a tight space with a dog (even a short haired, well behaved and non-smelling one) can understandably be difficult for non-dog lovers, and so I also go out of my way to go to huts off-season.

    The cabin is small, but well built and would be cramped with about 8 people in the loft. It sits on the best views of the trail and has a compositing outhouse in really good condition. There is a wood pellet stove to keep warm and even in the spring, there was more than enough pellets for a couple months more. We even had reception! After a really well deserved dinner we grabbed our cameras and headed out to the view point for sunset. Crampons really helped as we were making fresh tracks and we were rewarded with one of the best sunsets yet this year!

    Sunset at Tinhat peak

    After a really warm night’s sleep in the winterized cabin loft, we took our time eating breakfast, making lunch, and headed out. The weather was calling for rain in the evening so we tried to keep moving. There are two options to head to the next part of the trail, the quicker South trail, or the longer trail that loops around Lewis Lake. The Lewis lake trail was unbroken snow and is a scramble in sections, and also adds about 5kms but is more scenic and avoids some of the logging roads. We chose the south route because of the snow and the weather. About the halfway point, we had a quick lunch break at Coyote lake where the sun popped through he clouds for a couple minutes, and then kept going, arriving at Elk Hut just before the downpour started in earnest.

    The crew

    Elk hut is an open hut, with 3 sides walled in, and one open. The loft is also open to air, so it was going to be a chilly night. On a dry summer day, I can imagine this would be a lovely place with a firepit outside (that was totally soaked), places to hang out, and a log dock. We even saw a canoe underneath the cabin but as it was pouring rain our whole time there, we didn’t get to enjoy it much! To warm up, we quickly changed into dry(ish) clothing, boiled up some water for tea, cooked up some dinner and crawled into our sleeping bags really early hoping for an early head start the next day.

    Not happy it was raining

    13 hours later, we crawled out of our bags back into rain. I suppose we had been pretty tired from a cold day’s trek so we all slept really well. After breakfast and packing up again, we started to our last hut of the trip- Walt Hill. It looked like this would be our easiest day so far, and most of the hike was lovely but as soon as we hit the snowline, everything changed. Although this section is lower in elevation than Tinhat, the snow was deeper and softer so we spent what seemed like an eternity taking turns breaking trail and post-holing up a path that no one had visited recently. The views are really nice on this section, and I can imagine without snow this would be one of the best parts of the trail to hike. When we finally saw glimpses of the hut, we were absolutely elated to have 4 walls and a fire to warm up and dry out for the evening. We had about an hour after reaching the Walt Hill hut before the rain really came down again. We still had lots of snow so we didn’t have to worry about a water source once again and huddled inside drying out the shoes, socks, and clothes for the evening.

    All the snow
    all the shoes and socks drying

    Our last day on the trail was calling for the a downpour, so I threw on all the rain gear, packed up my camera deep into my bag, and raced down the mountain thinking only of that dry car! Thankfully it was a quick section on a very well marked trail with only a couple water crossings (which probably aren’t anything on a dry day). We cheered at every kilometer marking (or at least I did!) until we reached the road where I parked and all scrambled into the car making really good time (2 hours 50 mins 12 kilometers).

    View from Tinhat

    Overall I would love to do this trail again! I really recommend it for those that aren’t as comfortable tenting in bear country, or would prefer to shed the weight of a tent and have a roof and space to sprawl out in the evenings. I can imagine the huts would be pretty busy in the summer and could be quite tight in space if there were too many people (it has been full on weekends in the summer). There isn’t a way to book the hut, so plan accordingly by bringing a backup tent or aim for a weekday (or day when the weather isn’t great). Definitely take advantage of Jesse’s shuttle service and ask him questions when you are in the car about the conditions and trail reports he’s heard about. Also please consider donating to PR PAWS who maintain the trail and huts if you are using the trail.

    Until next time

    Resources:

  • Dog Winter Boots: a Detailed Review and Comparison

    Dog Winter Boots: a Detailed Review and Comparison

    We’ve been getting so many questions about dog boots that we finally decided to put together a bunch, test them, and review them in real trail conditions. Please let us know your experience in winter boots! Whiskey has no dewclaws so it was only because of personal messages we were able to record what has and hasn’t’ worked for others. There are alot of other brands we didn’t get to try and we concentrated on some of the higher-end boots. Remember, a rectangle pocket with a velcro at the top is what most sled dogs use (although loads go missing) in the arctic and it’s a real option too!

     SizesCost (4)DescriptionPhoto

    Voyagers k9 Apparel
    Breed Specific
    4 sizes per breed
    mid-large breeds
    Buy 4
    48-50 USDPolartec fleece with mega grip bottom soles, two straps of velcro, specific to snow and ice.

    Canine Equipment
    Ultimate Trail Boots
    1.75-3.25 (back paw smaller)
    5 sizes total
    buy 4
    70 CADAnkle boots with flexible rubber soles and soft upper. One velcro strap over the ankle.

    Ruffwear
    Polar Trex
    1.5-3.25 inches
    8 sizes total
    buy 2 or 4
    100 USDSpecialized winter boots designed for warmth, softshell fabric, Vibram outsole, velcro strap and pullover stretch gaiters. Ankle high but height extended with gaiters

    Neo-Paws
    Neoprene Regular
    Performance Boots
    1.25-5 inches
    12 sizes total
    buy sets of 2
    44-68 CADNeoprene boots that are higher up the ankle, super long wrap around velcro strap, thick sole
    Hurtta
    Outback Boots
    1.25-3 inches
    5 sizes total
    buy sets of 2

    60 USDShort ankle boots with light softshell material, flexible rubber soles
    Muttluks
    All Weather
    Leather Sole
    .5-5 inches
    8 sizes total
    buy sets of 4
    57 CADSlip on boots with flexible leather sole, one strap at ankle

    Backcountry.Paws
    Gaiters
    20-85lbs
    measure at the shoulder
    4 sizes
    80 USDSpecialized gaiters for dogs. Ripstop fabric that combines a boot with legging that goes up to the thighs.
     Our testUpsidesDownsidesBest use

    Voyagers k9 Apparel
    We’ve had these for several seasons and taken them on numerous occasions in hip deep dry snow to, packed snowy trails, on longer and shorter hikes. Our friends have also used these.-The only boots made of fleece, good for dry days, or dry (cold) snow, packed snowy trails, or a thin layer of snow. -Simple to put on and off (each boot is the same), boots are much higher than other in the market.
    -Boots are easy to wash and dry
    -Are also good for indoor use
    -Specialized for snow, not mixed terrain (also good for indoors). Snow collects on the fleece when it’s wet (packing snowball) snow, and the top of the boots are not lined, so once they are wet, they will freeze. They will slowly slip down the leg if the velcro is not tight enough, but due to the length that’s alot easier to catch than short boots which will disappear easier. Missing a cinch to tighten the straps so harder to do up
    -not dewclaw friendly
    -dry snow
    -packed snow
    -up to 6inches fresh powder

    Canine Equipment
    Ultimate Trail Boots
    We tried these on a packed 8km snowy packed hike with 350 incline. Our friends have used these as well.-These are the one of the lightest boots with very thin soles so Whiskey can easily feel the ground with her paws.
    -She seemed really happy in these and when we tightended the top of the boots we didn’t see much snow entering on a packed trail
    -Canine Equipment is the only brand that I know of here that will repair or replace a boot without limitations on their guarantee
    -Great customer service
     
    The soft shell material is not waterproof and will get wet if it’s not cold enough to keep the snow from melting on the booties. The soles can be a bit slippery on ice
    -needs more sizes
    -are sold in 4s with assumption that back paw is summer than front (so out of luck if your paws don’t fit their measurements, luckily we did!)
    -dry snow
    -packed snow
    -summer season/rocks
    -good all-rounder

    Ruffwear
    Polar Trex
    We tried these on a packed 5km trail, about 200m incline-These boots are specifically made for winter hiking and have the thickest soles of the ankle high boots that we’ve tried (I’m thinking the soles would last the longest)
    -They are the only ones that come with gaiters included.
    -Great customer service
    -Whiskey’s ankles are so thin that the top of the gaiters were not tight on her and instead of keeping snow out, they let and kept snow inside leading her paws to be really cold and wet.
    -She did not seem overly comfortable in these, I’m not sure if it’s the inflexible sole or the shape of the boot
    -and we’ve heard of other dogs having blisters on the top of their paws from these boots. We’ve also heard these can be uncomfortable with dewclaws
    -packed snow
    -dry snow

    Neo-Paws
    Neoprene Regular
    Performance Boots
    We tried these on a local walk as well as a 4km 150m incline on packed and loose snow-The only boots made of Neoprene which is a material that keeps it’s warmth even when wet
    -These are also the only boots that are recommended for watersports (we have not tried)
    -The brand also makes attachable ice cleats and gaiters.
    -The velcro strap is super long and lets you adjust the tightness up the leg easily
    -Made with dewclaws in mind
    -The largest amount of different sizes available that I could find
    -comes in regular and orthopedic options
    -The boot is overall pretty heavy and thick and might keep a dog too warm in the summer (they have summer options though)
    -because the boot is thicker and inflexible, it takes longer for Whiskey to become accustomed to wearing them
    -The website is a pain to navigate and badly needs an update
    -There is a longer learning curve to putting on these boots than others and takes more due diligence
    -Customer service can be a problem
    -In terms of the boot covers, there isn’t measurable sizing and the M was too big for Whiskey, the ice cleats made the entire boot too chunky

    -all snow, wet and dry
    -packed and powder snow
    -all terrain in all seasons outside where your dog may be too warm
    -good for water use
    Hurtta
    Outback Boots
    We’ve had these for several years and have used these on loads of trails in both snowy and rocky conditions-With modification on how you deal with the strap, these can be great boots
    -flexible sole, Whiskey feels comfortable in these and feeling the ground

    -top concern is the velcro strap does not stay on unless you tuck it up and underneath itself
    -the loop part of the velcro at the back of the boot sewing is coming undone over time and the bottom of the boot where it meets the sole also is having holes
    -needs more sizes
    -dry snow
    -packed snow
    -all terrain in summer but will wear out near edges

    Muttluks
    All Weather
    Leather Sole
    We’ve had these boots the longest since Whiskey was 1 years old and have tried these in the city as well as snowy trails. Our friends also have the same.-if you modify the strap, the can be great boots
    -easy to fit, all paws are the same
    -the leather sole has more grip than most boots we found
    -can be modified to be waterproof with was
    -very multi purpose (we use with an injured paw on sidewalks and great to slip one in your first aid kit for hiking because one bootie will cover any injured paw)
    -not waterproof unless you modify
    -straps are assuming an ankle that is alot bigger than Whiskeys’
    -tends to slide off (we have to be careful not to lose one)
    -velcro tends to get undone and boot can flip around with an energetic running dog
    -snow goes inside the top of the boot and collects there, so not recommended with deeper snow
    -not dewclaw friendly
    -dry/wet snow
    -packed snow (powder to 4 inches, wet snow packed only)
    -all terrain in summer

    Backcountry.Paws
    Gaiters
    We’ve tried these on two longer hikes in both packed and very deep and loose snow (Whiskey deep snow).Losing a boot is not a problem anymore! On packed snow basically guranteed paws will not get wet or cold. Works really well paired with a jacket for a full winter suit. Whiskey seemed really happy in these. The boots didn’t restrict at all and are thin enough she can fee the ground well.  
    -In very deep snow, we had snow piling into the back legs and no way to get the snow out, outside of taking off the gaiters (we finished the hike with just front gaiters on)
    -Difficult to put on, legs would be alot looser on skinny dogs
    -Very specialized, only good for snowy trails
    -dry and wet snow up to 6 inches
     Ease of useTerrainRecommendations

    Voyagers k9 Apparel
    These can be tough to estimate size and can be a bit difficult to get the paw all the way inside (especially if your front paws are larger). We’ve had readers tell us dewclaws can be an issue. The velcro straps do not have cinch closure.Good for packed trails and cold snowy conditions. Also good for indoors. Would not recomend for rocks or summer use. I would use these on shorter packed snowy trails and inside the house 

    Canine Equipment
    Ultimate Trail Boots
    These are one of the easiest to put on and tighten. Very wide opening for paws to slip into.
    Cinch closure is quick to tighten.
    Good for most uses including packed snowy trails, rocky terrain, summer trails, but not mud/swimming. I would use these in most outdoorconditions 

    Ruffwear
    Polar Trex
    These are harder to get into, the gusset isn’t as large as others and can be more difficult with a gaiter in the way. Cinch closure is quick to tighten. Reported problems with dewclaws. Good for cold conditions, snow conditions, but could be too warm for summer I would use these in packed snowy trails, or mix of snow/rocky trails. 

    Neo-Paws
    Neoprene Regular
    Performance Boots
    These took us a couple tries to learn how to put on properly. Neoprene is a more difficult material to hold down and tighten a strap over. Flip the boot inside out to help place the paw and gather the strap tightly over itself around the ankle before working your way up. You must layer the boot properly and takes some practice. -good for most conditions including swimming, but not hot conditions when a dog can overheat-I would use these in colder conditions on trails that were not technical 
    Hurtta
    Outback Boots
    These boots are easy to slip on but are difficult to wrap the strap in a way that doesn’t detach itself over time. We’ve learned that we need to wrap the strap very tightly over itself and tuck the end into the strap as far as we can in order for the boot to stay put. If you wrap like in the photo, it will come off. -good for most conditions and terrain I would use these in most outdoor conditions 

    Muttluks
    All Weather
    Leather Sole
    These are really easy to put on, but the strap is hard to tighten enough to keep the boot on over time. -Good for shorter walks while not playing or running too hard.
    I would use these on shorter trails, on pavement and inside the house 

    Backcountry.Paws
    Gaiters
    These are pretty involved to put on and involve several straps on top of the dog. You’ll need to size properly at home first before attempting to put on in a car while your dog has decided it really wants to run out the door onto the trail! Make sure you strap those ankles tightly and get all straps tight enough to keep on but loose enough that they don’t rub. At least you’re almost guaranteed never to loose a boot! -good for snowy conditions (but not super deep snow) I would use these in all snowy conditions except for super deep snow 

    So in conclusion if you asked me which I would recommend I would say it really depends on what your lifestyle is like, and what dog you have. Firstly, what boots actually fit your dog? What is your budget? Then, I would highly recommend you see if you can go try on boots at any local dog store and see what your dog tolerates. My suggestion to get a dog used to boots is to bring lots of treats and keep them moving and doing tricks, running and basically forgetting about the boots. Try them over short periods of time with lots of praise, fun, treats, and in an exciting location. Most of these boots are fine for packed trails, but when you get to deeper snow, then pay attention to the top of the boots and see if you think snow could get in and collect. Each dog’s ankles fit differently, check to see the top of the boot, if you think rubbing might be an issue, and of course keep an eye on dewclaws if you have them. See if you need a boot for all occasions, or can pick a specialized boot. We are going to keep updating this chart as we work with all these boots for the next winters coming, please help us!

  • Our favorite Whiskey gear

    Our favorite Whiskey gear

    Just a list of gear that we’ve loved over the years!
    • Ruffwear Approach Pack –link
    Whiskey is between a size medium and small so we went with the Medium (she most likely will gain not lose weight over time). The straps are great and adjust in so many ways and the pack fits really well. It’s nice that she can help me carry her own food on overnighters and the pack is really well built. They don’t make the blue color anymore, ours is so old! We are also looking at trying a fancier model and will report back!
    • Kong K9 water bottle –link
    The easiest way we found to carry water on a long hike. The lid doubles as a bowl and I’ve always much preferred stainless steel over plastic to carry water. A super simple solution to bringing an extra bowl. If you’re weird like me, you can share the water with your dog too!
    One of our favorite jackets! Whiskey has an amazing nose that we have trained even further with sniff training but unfortunately that means she finds poop or smelly things to roll in much more than the regular dog. That means her jackets must stand countless washes while also fitting perfectly and looking great for photos. The fleece is extra thick in the brand and the shape is just wonderful. The Trail Blazer is warm and water proof and the Great White North has been through the deepest snow and trails where Whiskey is practically swimming. The price is high, but it’s worth it!
    This breed-specific brand is great for those long and skinny dogs where nothing “regular” fits! The winter jacket is similar to the chillydogs brand (if you are in Canada, order the chillydogs, if you’re in the US order Voyagers for cheaper shipping) but the rainjacket is unique and super cute!
    This Finnish line is sort of like the “North Face” of dog clothing. They use reflective materials to trap in bodyheat in their Extreme Warmer and their leash is our favorite for hiking with woven reflectivity. Because their jackets are on the larger side, we can layer in a fleece if we are winter camping and everything has gone through the wash numerous times and have come out great. However, they don’t make breed specific clothes so if your V is extra lean or long I would go with one of the other brands. If you have a long-haired dog, I would check out the rest of their line, there’s so many amazing options!
    The best dog beds we have tried. When we got a new puppy, we were told to buy a cheap bed until she grew older but I couldn’t help it. Our doughnut bed has been washed countless times, been peed on, dug in, vomited in, ever since she was a puppy and most of it looks brand new. We have gone through several other cheaper dog beds but she’s made it abundantly clear this one is the best one. We’ve since gotten another for travel and love it just the same! Again, the beds are really expensive, but I found it’s totally worth it.
    Whiskey loves cuddling in this during the winter. It’s not as useful for warm climates but it’s a must-have for short haired dogs and doesn’t last as long as the Bowser beds but Whiskey loves hers. She uses a Large size, if you have 2 Vs then get an XL! The link goes to the company site but we buy on Amazon as shipping is free for Prime. The plastic tube that keeps the shape has problems staying in place and the stuffing isn’t’ as plump but it still the favorite spot on a cold day. Whiskey normally spends a good 6 months “digging” inside this bed to defluff it though so it’s been “worked in” before she’s happy. We are currently in the “breaking in” stage on a new one.
     
    We’ve had many collars and these are the ones we keep going back to. I hate tags jingling for a long hike (imagine how much they must annoy the dogs with their hearing!) and any cloth/strap/rope collar has not stood the test of rolling in bbq grease and poop. This one has the extra loop at the back for another place to connect a leash and the reflector is great in the rain and the short winter days. We did try a really expensive rope collar for a bit but after standing at the sink for ages scrubbing poop off, we decided to keep this one on for any long trips. The fancy collars are wonderful but if we are going on a long backcountry trip, we’re most likely going to bring one of these.
    We love this Shampoo! It works triple duty as it repels fleas and it also smells amazing. We only ever need to give Whiskey a shower when she rolls in something extra foul so its’ great that it’s very gentle and she comes out smelling wonderful for a couple days. Since Whiskey is self-cleaning, we are still working on our first bottle.
    Whiskey’s chew treats. Antlers are always avaliable and she still has the one from when she was a puppy. Since our little girl isn’t much of a chewer compared to other dogs, she takes a very long time to wear these down and we can afford to buy Himalayan Chews. The extra large pieces will last her a month, whereas it can last other Vizslas an hour or so. Bullysticks are only used when we absolutely need her to leave us alone for 20-30mins and we only let her work through a couple inches each time. We buy Bullysticks in packs of 25 or 50 extra extra large ones.
    A really great alternative to a chuck-it ball. It’s large so you won’t lose it as easy and it floats. The string lets you throw it extra far and the texture is softer yet durable. I tend to bring several toys to the dog park in case one of her toys gets “stolen”, I can switch to a different shape while someone tracks down the “culprit”.
    A staple! I don’t use tennis balls as the material can wear down a dog’s teeth. I don’t like to play fetch too much as the back and forth isnt’ good for a dog’s joints over time but Whiskey will become obsessed with another dog’s ball so I do bring them sometimes. In the winter when it’s dark and rainy, I resort to playing fetch as the only way to get her to run instead of shivering miserably and hating me. We use a glow in the dark ball that I “charge up” at an outdoor light (hold it right next to the light for 30 seconds) and it lasts about 20 mins.
    This thing is magical. There’s something about the way it bounces, or the texture but this is Whiskey’s ultimate prize. The squeaky and the bottom section is long gone but it’s still amazing. It’s the first thing she’s ever consistently fetched with intense focus and it only comes out on special occasions or as a reward for a good search-and-find. All the dogs want it at the park. It comes in small or large (we need large).
  • Grizzly Lake- Tombstone overnighter

    Grizzly Lake- Tombstone overnighter

    Camping at Yukon’s Grizzly Lake

    With the speed of our road trip, we didn’t have much time for backcountry adventures but we did want to do at least one overnight trip in a beautiful location (especially since we had brought our backpacks and gear). Tombstone Territorial Park is one of the most accessible northern parks, and not only are the mountains and tundra jaw-droppingly beautiful, it’s also home to moose, caribou, bear, Dall sheep, marmots, ground squirrels, and loads of falcons and birds. Since it is located at the base of the Dempster road, we would be passing through the park twice and were a bit more flexible on camping dates.  This was necessary because the Tombstone’s Grizzly lake site was almost booked out for a week (max 10 sites), and we were able to secure a spot a week later after on the return from the Dempster.


    a really cute marmot
    Amazing scenery on the way to the site
    The mountains surrounding the campground behind us
    some rocky bits to travel through
    Carrying her share!
    Just really beautiful!

    When you overnight at Grizzly lake, you must pick up a pass from the Interpretive Center and also a bear container. Why they don’t just keep the containers in the camp site’s bear lock-ups (as they do in BC) is a bit beyond me as they are large and hard to pack and heavy. We had a little intro to the hike with a very friendly ranger, loaded with lots of warnings and were given estimated hiking times that were really quite extreme (8-12 hours one way). Just as a reference, we asked lots of hikers along the way and campers at the campsite, and got an average one-way time of about 5-7 hours (but we didn’t meet too many older hikers). Without a backpack I would estimate one could do a return trip in about 9-12 hours with lots of breaks and rests. We finished in about 7 hours one way with about 1.5 hours of total rest and photography time.


    Starting in the subalpine
    the first section is a climb and you get views quickly
    up up and up!
    saying hi to some rangers at the top of the first incline
    having no issues with the “tough” terrain
    lots of resting and photos
    The highest point of the trail
    The terrain is varied and beautiful with lots of changes but is not technical and the path is very easy to find and follow. A hiker from Vancouver wouldn’t have a problem at all, but I can see that anyone not used to mountainous inclines might find the hike difficult with a full pack. We kept Whiskey on a leash most of the time as we passed by lots of marmot territory but did have to let her off where being attached to a leashed dog is actually quite dangerous (jumping over large boulders and areas with exposed sides). In these cases, for us it’s safer to let her find her own path since one wrong pull from a larger dog could bring you tumbling (and also we are used to off leash hiking so Whiskey is also safer as well).

    You can see the campground coming up! more than half done
    Whiskey pulling her daddy along
    You can see the lake clearly now
    A tiny bit of snow left in July, with the most amazing views
    At this point everyone is tired of me taking pictures
    rocky sections separate a couple marmot meadows

    The campsite was really muddy and had roped off trails to and from the eating shelters which was really the worst part about this entire trip, but at least the camp spots were raised off the ground (great for squirrels not to eat through your tent). Ground squirrels are famous for eating through everything since they are so salt-deprived and will even eat your shoelaces if left outside of the tent. It was not advised to use the lake water, rather the running water from the streams on the way to the campsite but we saw people using the lake water with filters. For Whiskey’s food we packed her dehydrated dog food which she of course, carried herself.


    Walking through some meadows
    ground squirrels are really chirpy!
    marmots shrill as we walk by (keep dogs on leash!)
    They blend in so well here!
    Living in paradise 
    a pointer doing her thing
    lots of breaks to look at the scenery
    mom! enough pictures!
    watching us set up camp
    at the food shelter
    waking dad up
    the hardest part is getting up when it’s cold and rainy
    Overall we were extremely lucky with the weather as we only had a sprinkling of rain on the trail, but once we set up the tent for the night and started cooking under the shelters, the rain started coming down in earnest. It rained the entire night, but in the morning it stopped just long enough for us to hike back (and started again when we got back to the car).

    a mini waterfall for collecting water
    massage stops along the way, of course
    Heading back was much faster
    I still couldn’t get enough of the scenery
    looking back down at the rest of tombstone
    We are tiny in a beautiful Earth
    Just missing the proper rain, but we had a few sprinkles
    the entire trail has views except for the first km
    The trail was easy to follow with no chance of getting lost
    Racing to the car before those pregnant clouds let loose!

    There were many options for a 3rd and 4th night, unfortunately, we didn’t have time and headed back . Quick doggy cheat: Thierry attached Whiskey’s leash to his pack, and then to his belt so she would power him up the inclines. It’s a bit trickier heading down though! On the return trip we were an hour faster (and took fewer photos) and just arrived in time to drive back to the Interpretive Center to return the bear can before they closed. I’d love to come back again!


    Until next time!


  • Fountain Lake Camping

    Fountain Lake Camping

    Fountain Lake

    This is our 3rd yearly trip to camp at Fountain Lake as well as the first time I’m doing it without my better half sharing the driving and the tent. Fountain Lake is beyond Lillooet which is a long drive with our many stops (for food and pictures). We left at 3pm and arrived after 7pm just in time to set up our tents, start a fire and watch the light dying down in front of us. There was a little bit of drizzle as we drove in but the weather the rest of the weekend was just fantastic with passing clouds and a really warm days.

    Cloudy coming in, stopping for a break at Duffey Lake
    Stopping at Lillooet for a view

    We’ve recently bought a car-camping kit with a gigantic tent you can stand in, foam sleeping pads that take up half the car space and the much-needed ice box and water jugs to go with our bbq. With a group of 10, we took over our normal camp-site next to the lake and spent the days floating on the lake, eating really really well and sitting in front of the campfire singing, laughing and just having the best of times.

    gathering firewood
    setting up the camp chairs
    Around the campfire, taking my seat
    Relaxing in the tent
    Elly popped in for the second day!
    Marshmellows and fire

    On Saturday we even fit in a new hike- the Fountain Ridge Hike. As there was only a tiny description, we chanced it and once we found our way, the views were fantastic. We did get our friends’ van stuck and had a bit of an adventure but found our way back to camp for a quick swim before dinner.

    summer days!
    the view from our ridgewalk
    lunchspot…may I have your sandwich?
    views of the Fraser
    heading back!
    relaxing on the water
    toast them up!
    come play with me!
    warming up at the fire

    The next day we took it easy walking around the lake and floating a bit before heading back to town.

    Happy days!
    Walking around the lake
    sharing the paddleboard and Ginger’s first try out!
    floaties are for sharing right?
    just hanging!
    Ginger exploring the weeds
    stopping at viewpoints on the way back again!

  • E.C. Manning Camping

    E.C. Manning Camping

    View of Manning Park

    For our next camping adventure, we stole Whiskey’s sister Sophie and headed off to E.C. Manning with a bunch of friends. I’ve heard so much about this park and was just waiting for a good weekend to go. This was the last weekend before reservations started to book the campsites so I was hopeful that if we arrived at a good time on Friday, we would be able to grab a couple good camp spots for our larger group. We picked Lightning Lake to camp at, since it was the largest and I thought the best chance at getting a couple spots and finding our friends. Campsites were surprisingly expensive ($35/night) with a max of 4 people and an extra $12 for another car. I suppose the facilities made up for the price though, with self flush toilets, hot showers, and lots of bins and water taps everywhere. The rangers even drove around delivering wood (at a high fee of 8$/bundle).

    our two guard dogs
    playing all day long

    Campsites at Lightning lake were a good size but still too close to neighbours to have off leash dogs. We brought the long line so the dogs could still run and play and got to work on drinks, bbq and setting up tents.

    morning wake up call, lining up at the “door”
    morning walk
    A very Canadian scene

    Whiskey and Sophie had to get used to their new accommodations but then happily fell asleep in a dog bed (Sophie) and my sleeping bag (Whiskey). Of course they woke me up at sunrise for a walk the next morning but I really couldn’t complain once I got up and saw the beautiful scenery.

    The view from the road leading up to Blackwall Peak

    our camping group
    dogs checking out the view
    walking up to the parking lots
    really nice views!

    checking out the views
    Sophie approves

    catching snowballs in June
    best game ever!

    not a bad weekend!

    heading back
    all clouds lead to Whiskey

    Lightning lake from a viewpoint

    Once everyone else was awaken and we finished an extravagant breakfast, we attempted the 3 Brothers hike but didn’t realize the road to the parking lot was closed. Instead, we walked the 1 hour on the road to the parking lot and took in the views of the still-snow-covered trail.

    Paddleboard with dad

    getting a taxi around with the girls
    not sure what she’s pointing at
    ground squirrels keep a watchful eye

    photoshoots with Whiskey
    Just a regular at the camera
    posing on a board isn’t easy!
    Sunset on the water

    It was a really hot day so after that we headed down to the day area of Lighting Lake and hung out in the glacier waters until sunset. Whiskey had a couple goes at the paddleboard (we took turns taxi-ing her around) and the dogs were happy just lying in the sun or pointing at the ground squirrels.

    campfire after dinner
    sleepy in front of the fire
    eating way too much food

    Back at camp we toasted marshmallows, ate way too much food, and just enjoyed the fire. The dogs were so fully exhausted from the day that they went into the tent and fell asleep on their own (success!). Again, the next morning I took them for their sunrise walk and this time walked a good distance around part of the lake.

    morning walks
    sunrise with the girls
    glacier water is gorgeous
    my little poser

    chase on the trails

    fetch is perfect when it’s this hot!
    ear massages while lying on her blankets
    This is the life of a Vizsla

    Once the group ate breakfast and made some sandwiches for lunch, we then headed again to the day area where some suntanned, some others floated on various items in the water, and a couple of us (including dogs) did the hike around the lake. We headed back home after that with a car full of tired Vs and humans.

    beautiful British Columbia
    until next time!
  • Mt Unnecessary Hike

    Mt Unnecessary Hike

    Lunch break views from Mt Unnecessary

    If the Grouse Grind is not your cup of tea… because it’s too busy, too short, too easy, and the views aren’t very good, then this one is a splendid alternative. Just a warning though, this is not a good hike for beginners or those not inclined to climb 1250m over 3kms for fun (or as the graffiti on the sign  says “hard as fucking hell and not for beginners”. Mt Unnecessary is one of those beautiful peaks on the Howe Sound trail between the Lions and St Marks. I’ve previously conquered it on the way to the Lions from St Marks years ago, but never from it’s own dedicated trail starting at Lions Bay.

    The divide to Erin Moore Trail (dedicated to a 7 year old who died on the trail in 2014)
    Happy in her element
    mini breaks on the relentless climb
    Steep! Steep!
    kisses on a fallen log
    This way!

    We weren’t able to finish the beast (about 250m higher to go) because of snow but we still got some beautiful views, a wonderful lunch spot, and the perfect workout all the while having the entire trail to ourselves.

    Views halfway up
    Looking down you can’t even see the trail
    beautiful and quiet here
    Little ginger watchdog
    Whiskey had no problems with the rocks
    watch your steps up and down
    Waiting for us slow humans

    This hike is very to-the-point and unrelenting but also has enough variation and interesting scrambly sections to keep you interested going up. Because it’s so steep, you climb altitude really fast and start seeing promising views within an hour. I’d like to think I’ve done quite a few steep hikes and this one is pretty up there on the list, for a dog-friendly one.

    More little breaks
    Lots of fun!
    A beautiful long-weekend hike
    not a bad spot to eat
    The view NorthWest of Lions Bay

    Coming down was harder and longer than expected and I was really tired of falling on my butt. The steepness, loose ground, and my knee injuries were a bad mix but we still made it down in one piece (Whiskey was wondering what the big deal was and why we were so slow). In all we finished in less than 6 hours and were happily sore the next day!

    Getting to need snowshoes/crampons
    Whiskey loves running up and down with sticks
    I slid on my bum down, while Whiskey ran her but off
    Heading back down
    We all had a couple small tumbles heading down

  • Ovary Sparing Spay

    Ovary Sparing Spay

    Whiskey hours before her spay

    We’ve just gotten back from a trip to Kelowna for Whiskey’s spay. When we first got a dog, I didn’t realize there were several different options for spays (and for neuters), each with pros and cons. As I’m typing this, Whiskey is next to me sleeping and recovering.

    fetching and swimming in Kelowna

    Just looking at a health perspective (let’s assume you aren’t leaving your dog in heat running around with intact males), there is up to a 25% chance of uterine infection with older intact females (pyometra) so if you aren’t breeding, getting a spay in North America is probably going to be considered. Here are the types of spay I was looking at:

    Ovariohysterectomy
    -traditional spay removing both the uterus and the ovaries
    -removes chance of pyometra
    -available anywhere
    increase chance of joint disease and cancers since hormones are absent

    Ovariectomy
    -removing only the ovaries
    -removes chance of pyometra
    -typically a key hole surgery requiring a smaller incision
    -quicker surgery and potentially safer
    -less painful with a smaller cut
    -quicker recovery time
    -less vets can do this
    increase chance of joint disease and cancers since hormones are absent

    Ovary sparing spay
    -removing only the uterus and cervix, leaving at least one ovary
    -removes chance of pyometra
    -still small chance of ovarian cancer
    -increased chance of mammary tumors over other spays
    -keeps heats but no bleeding
    -keeps all the hormones
    -difficult to find an experienced vet that does this

    one last sunset picture

    For larger breeds, because it’s healthier to keep the hormones, spays are usually delayed until the dog is “fully grown” although with an OSS, you could even do it earlier. I only really researched about spaying later because of this, and honestly I wanted to delay any kind of optional surgery as late as possible. Once I did look into it, I found the only vets near where we lived that offer this special spay were at least a 4-5 hour drive away. Poor Whiskey had no idea where we were going when we headed out on a roadtrip to Kelowna. She was so happy, hiking, exploring, and modelling the whole day before her spay.

    she’s old enough to understand the vet is no fun place!
    Whiskey’s suspicious face
    a small pre-surgery checkup
    waiting for her surgery time
    Freaking out a bit once we got her on the surgery table

    Because Whiskey had such little fat, she was more difficult to put under and struggled more than usual. Outside of that her spay went normal and we were there when she went to sleep and woke up. It was so heart-breaking to watch her struggling against the anesthesia as well as flailing around when she woke up (apparently certain breeds flail more than others). We didn’t leave her side until we drove home that evening.

    right after she finished with heating pads
    we made sure she could smell us before opening her eyes
    forcing her to lay down and not run out!
    stubbornly not laying down to recover at the office
    That evening Whiskey was feeling so poorly it was very difficult to get her to pee and poop and she was walking like a very very elderly dog with her head hanging low. It was so sad to see! The next day however she was still walking slow but she had perked up and was already giving kisses. By lunch time she would let me spoon feed her (yes, she’s a princess when she feels sad) and by the evening she was 80% back to normal. Currently I walk her on leash only with a long line and work on new tricks, training, and lots of patience!
    2 days after and healing

  • Pointing Field Tests

    Pointing Field Tests

    CKC junior field dog test

    The whole sport and world of pointing dogs, field trials, and bird hunting has confused me since I got a Vizsla. Growing up in the suburbs of Toronto with an immigrant family, we knew nothing of animals and hunting and were instead stereo-typically concentrated on good math scores and playing piano. Jump to a couple years ago when I was looking for what kind of dog I wanted, I kept realizing I was drawn to working bird dogs. I was attracted to their sleek and fast physique, their work ethic, velcro and gentle demeanor at home, and endurance to keep up on long hikes. We chose a show-dog line as we didn’t want a firecracker who needed to work everyday and Whiskey turned out to be one of the most mellow Vizslas, but then she really likes to work. We’ve been lucky enough to get Whiskey introduced to birds a year ago, but haven’t done anything since. Outside of birds I’ve been working on sniff training, and Whiskey is also very eager to fetch balls and sticks.

    Happy 2nd birthday Whiskey!
    my foray into the world of bird dogs

    So all put together, we had a very clueless human, a dog that was almost new to birds, and out of curiosity, for Whiskey’s 2nd birthday I decided to sign us up for a training day and some tests with the BCABPC (British Columbia All Breed Pointer Club). I was really nervous on our first day since we still didn’t understand what the test was, and what was involved. We arrived for the training day with about 15 other humans/dog pairs, some with more or less experience than us. During the day we worked on different stations that started from just a “stay”(or “whoa”), a “stay” with a bird, finding a bird within 5 meters of high grass, finding a trapped bird in a small field, and finding a free bird in a small field. Everyone there was so nice and helpful but there weren’t enough trainers to go around and we waited quite awhile between stations. There were several people that had travelled from quite afar (one from Calgary?) some in trailers to attend the 3 day event and title their dogs.

    working dogs staked out
    training day
    bringing the birds and bird dogs out to the field
    the first step is to stay in place on an object
    Whiskey’s classmates
    bird on a stick method (I feel bad for the birds!)
    lining up to watch and try
    really nice instructors today
    The best part was was seeing so many beautiful dogs, all very healthy of all ages. Something that was difficult was understanding these weren’t all pets for everyone, but working breeding dogs that weren’t treated as gently as I’m used to.
    meeting friends
    Lovely working dogs

    long haired weimaraner

    a gsp puppy
    a family event
    puppies play while adults work

    So this is what I found happens in field test in layman’s terms:

    • You approach the field with your dog on leash and wait until your turn and a judge comes up to you with a clipboard and will walk you to the “start”. When the judge tells you you’re starting, you unleash your dog (put the leash in your pocket) and tell your pup to start looking for birds. You cannot have anything in your hands and your starter pistol is supposed to be in a holster (oops). Your dog is supposed to run off and look in a good searching pattern until they find and point a bird. The dog is not supposed to rush the bird, pick it up, and is supposed to hold their point until you arrive. You are then to flush the bird in the air (pick it up and release it) and shoot the pistol while the bird is in the air. Ideally your dog is supposed to hold their point while you do all that (not expected in Juniors). Then you go off and find another bird and do the same. After 20-30 minutes your judge will tell you you’re finished and you put your dog back on leash.
    higher levels have two dogs running together in a test
    “planting” birds is a strange concept for me
    hitching a ride to the field tests

    Whiskey took a couple minutes each time to establish her searching pattern (all her sniff training paid off!) and over time she got into her groove. She found 2 birds on each test and pointed 3 times but almost caught one the 4th time. Her points were steady but as soon as I flushed the bird, she went after it. On the other hand, the shots didn’t seem to phase her too much (especially since this was new). At the end we got a score sheet with everything broken down but I won’t receive a copy until later. I did notice she did get perfect marks for responding to her handler (me) so yey!

    first test was in very high grass
    we were the first test of the day
    getting some feedback from my judge
    I’m terrible at flushing and shooting
    Whiskey on point
    galloping around finding birds
    I’ve never seen her run for so long
    demonstrating to the judge
    thankful to have nice judges tell me what to do!

    There are several different levels of testing and as we were brand new we did the easiest one- the JFD (junior field dog). You need 3 passed tests to acquire your title and move onto the next level. In order to properly train a dog for the higher levels, people work with their dogs several times a week and keep birds at home for that purpose. Seeing as we live downtown and have so many interests, we likely won’t take this to the next level, but if we do have an easy opportunity to find birds again I’ll take Whiskey out.

    it’s a bird dog life